16-Sep-2021
.
Admin

Hi guys,
Today i will explained How To Use Codeigniter 4 REST API Example. This example is so easy to use in Codeigniter 4.
This is a comprehensive Codeigniter REST API example. In this tutorial, we are learning how to create REST API in Codeigniter 4 application from starting.
REST is a defines a set of rules that makes the communication between multiple programs. We will deal with the CRUD operation using the REST API, this tutorial mainly gives precedence to HTTP methods such as GET, PUT, POST, DELETE.
So let's start to the example.
Step 1 : Install Codeigniter 4 Application
Codeigniter Project Project install in a two ways.
<?php
https://codeigniter.com/download
or
composer create-project codeigniter4/appstarter project_name
?>
Step 2 : Turn On Error Reporting
This step is completely optional, if you want you can open app/Config/Boot/production.php and set display_errors property to 1 and enable the error debugging in Codeigniter app.
ini_set('display_errors', '1');
Step 3 : Create Database and Table
We will store and manage the data in the database; that’s what REST API set out to do.
Open PHPMyAdmin and create a new database.
CREATE DATABASE demo;
Inside the demo database, create a new table employees where all the values will be stored using RESTful API.
CREATE TABLE employees (
    id int(11) NOT NULL AUTO_INCREMENT COMMENT 'Primary Key',
    name varchar(100) NOT NULL COMMENT 'Name',
    email varchar(255) NOT NULL COMMENT 'Email Address',
    PRIMARY KEY (id)
  ) ENGINE=InnoDB DEFAULT CHARSET=latin1 COMMENT='datatable demo table' AUTO_INCREMENT=1;

INSERT INTO `employees` (`id`, `name`, `email`) VALUES
(1, 'John Doe', 'john@gmail.com'),
(2, 'Vanya Hargreeves', 'vanya@gmail.com'),
(3, 'Luther Hargreeves', 'luther@gmail.com'),
(4, 'Diego Hargreeves', 'diego@gmail.com'),
(5, 'Klaus Hargreeves', 'klaus@gmail.com'),
(6, 'Ben Hargreeves', 'ben@gmail.com'),
(7, 'The Handler', 'handler@gmail.com');
Step 4 : Put Together Database Details
If you don’t know how to connect codeigniter with MySQL database. Then, add database details such as database name, username, password in application/config/database.php file.
public $default = [
        'DSN'      => '',
        'hostname' => 'localhost',
        'username' => 'test',
        'password' => '4Mu99BhzK8dr4vF1',
        'database' => 'demo',
        'DBDriver' => 'MySQLi',
        'DBPrefix' => '',
        'pConnect' => false,
        'DBDebug'  => (ENVIRONMENT !== 'development'),
        'cacheOn'  => false,
        'cacheDir' => '',
        'charset'  => 'utf8',
        'DBCollat' => 'utf8_general_ci',
        'swapPre'  => '',
        'encrypt'  => false,
        'compress' => false,
        'strictOn' => false,
        'failover' => [],
        'port'     => 3306,
    ];
CodeIgniter\Database\Exceptions\DatabaseException #8
Unable to connect database : Codeigniter
If anyhow you get the Codeigniter – cannot connect to MySQL database error, then change the hostname value based on your local server e.g MAMPP or XAMPP.
# MAMPP
public $default = [
    'hostname' => '/Applications/MAMP/tmp/mysql/mysql.sock',
]

# XAMPP
public $default = [
    'hostname' => '/Applications/XAMPP/xamppfiles/var/mysql/mysql.sock',
]
Step 5 : Create Model
Create a model file EmployeeModel.php file inside the app/Models/ directory. Place the following code inside the file to define the Model.
<?php
namespace App\Models;
use CodeIgniter\Model;

class EmployeeModel extends Model
{
    protected $table = 'employees';
    protected $primaryKey = 'id';
    protected $allowedFields = ['name', 'email'];
}
Step 6 : Create Controller
Create a controller Employee.php in app/Controllers/ folder. In this file we will create the functions those will relentlessly handle the Create, Read, Update and Delete operations.
<?php
namespace App\Controllers;
use CodeIgniter\RESTful\ResourceController;
use CodeIgniter\API\ResponseTrait;
use App\Models\EmployeeModel;

class Employee extends ResourceController
{
    use ResponseTrait;

    // all users
    public function index()
    {
        $model = new EmployeeModel();
        $data['employees'] = $model->orderBy('id', 'DESC')->findAll();
        return $this->respond($data);
    }

    // create
    public function create()
    {
        $model = new EmployeeModel();
        $data = [
            'name' => $this->request->getVar('name'),
            'email'  => $this->request->getVar('email'),
        ];
        $model->insert($data);
        $response = [
            'status'   => 201,
            'error'    => null,
            'messages' => [
                'success' => 'Employee created successfully'
            ]
        ];
      return $this->respondCreated($response);
    }

    // single user
    public function show($id = null)
    {
        $model = new EmployeeModel();
        $data = $model->where('id', $id)->first();
        if($data){
            return $this->respond($data);
        }else{
            return $this->failNotFound('No employee found');
        }
    }

    // update
    public function update($id = null)
    {
        $model = new EmployeeModel();
        $id = $this->request->getVar('id');
        $data = [
            'name' => $this->request->getVar('name'),
            'email'  => $this->request->getVar('email'),
        ];
        $model->update($id, $data);
        $response = [
            'status'   => 200,
            'error'    => null,
            'messages' => [
                'success' => 'Employee updated successfully'
            ]
        ];
      return $this->respond($response);
    }

    // delete
    public function delete($id = null)
    {
        $model = new EmployeeModel();
        $data = $model->where('id', $id)->delete($id);
        if($data){
            $model->delete($id);
            $response = [
                'status'   => 200,
                'error'    => null,
                'messages' => [
                    'success' => 'Employee successfully deleted'
                ]
            ];
            return $this->respondDeleted($response);
        }else{
            return $this->failNotFound('No employee found');
        }
    }
}
The methods below deal with a particular task with RESTful API, let me enumerate all the functions performed by each method that we defined in the controller.
-> index() – Get’s all the records from the database.
-> create() – It propels an employee record into the database table.
-> show() – It gets a single employee record from the database.
-> update() – It updates the user record into the database.
-> delete() – It deletes an employee record the database.
Step 7 : Create REST API Route
To sustain the impetus of data between client and server we need API, to access the api we also need to define the route in CI.
Open the app/Config/Routes.php file, and look for the following code.
$Route->get('/', 'home::index');
Next, remove the above line of code and add the given line of code.
$routes->resource('employee');
Step 8 : TEST Codeigniter REST API
Eventually, we have gone through every imperative. Now, Its time to start the application using the following command:
php spark serve
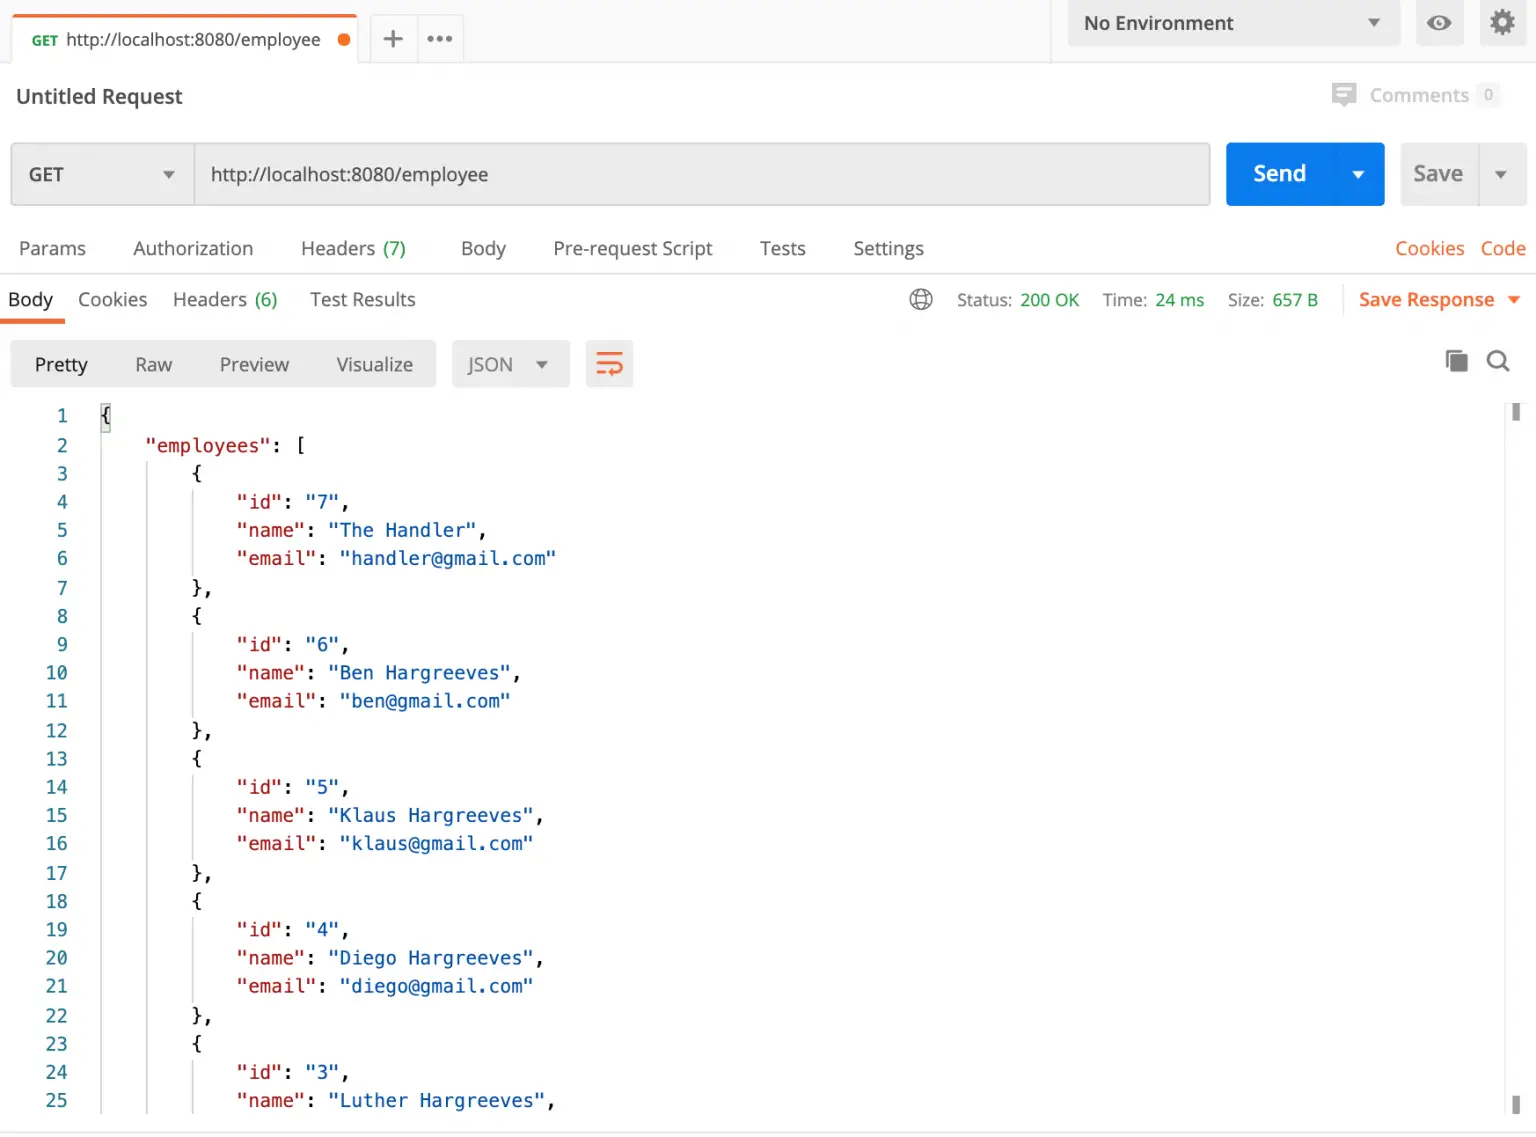
Let us test out the REST API that gets all the user records from the database.
GET All Records
http://localhost:8080/employee
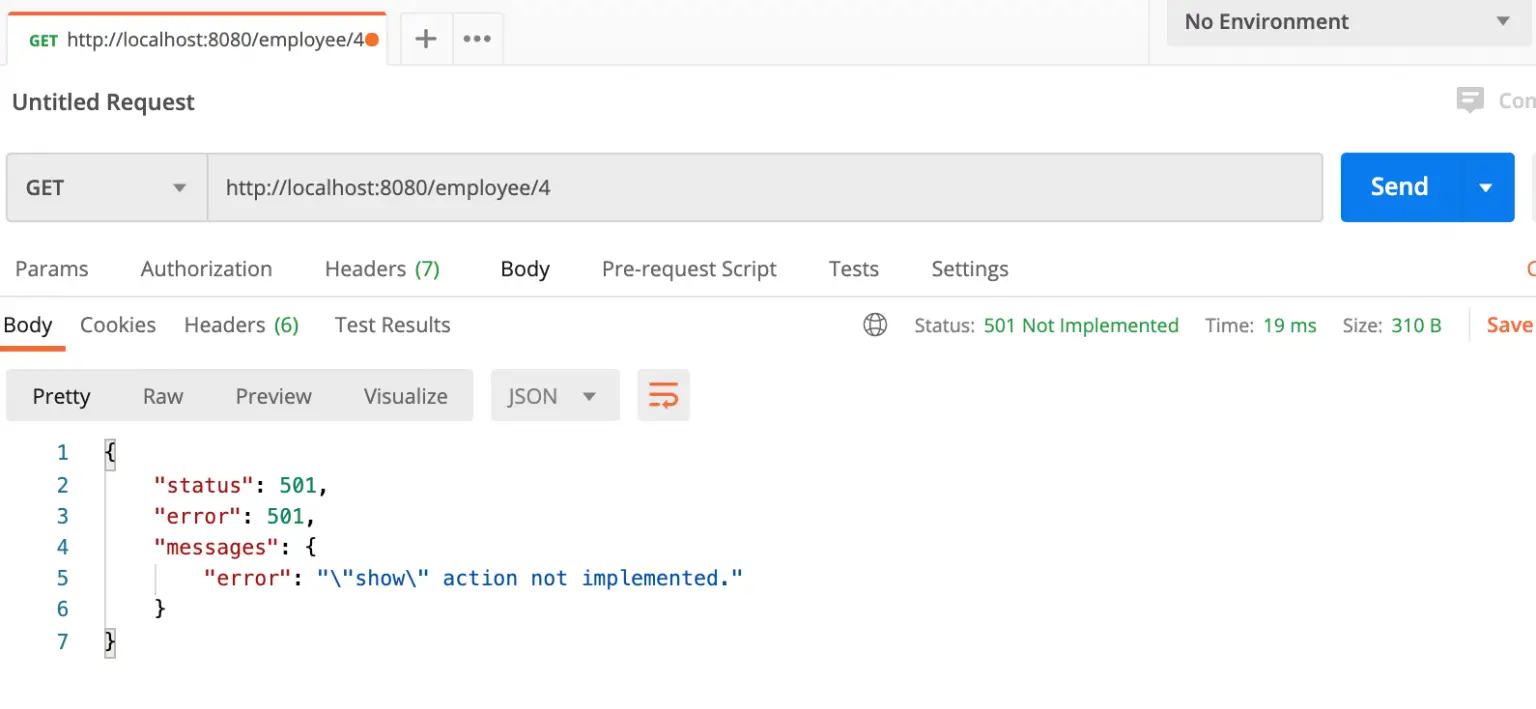
GET Single Record
http://localhost:8080/employee/4
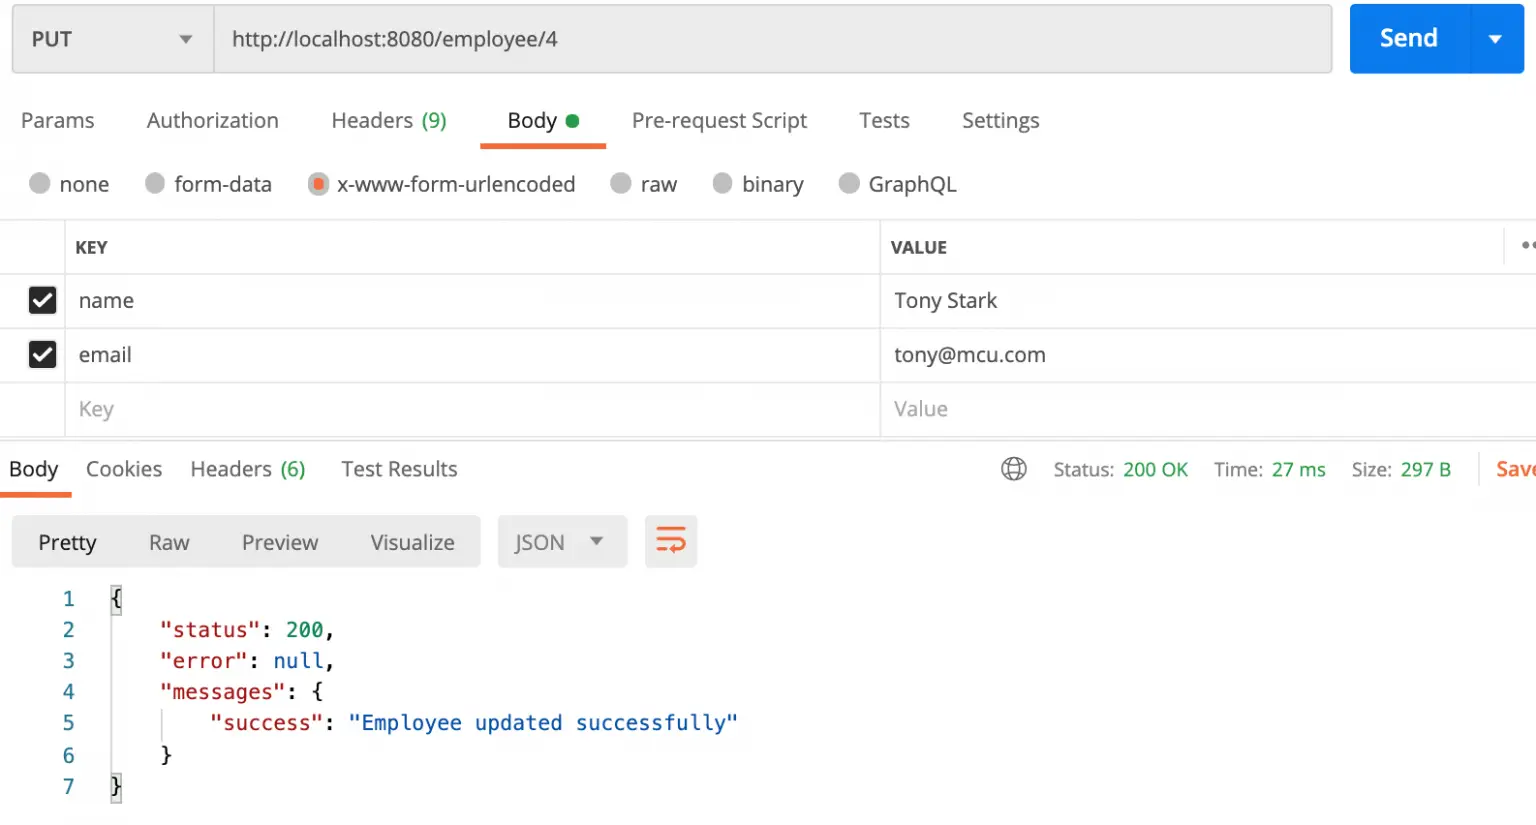
Update Record
http://localhost:8080/employee/4
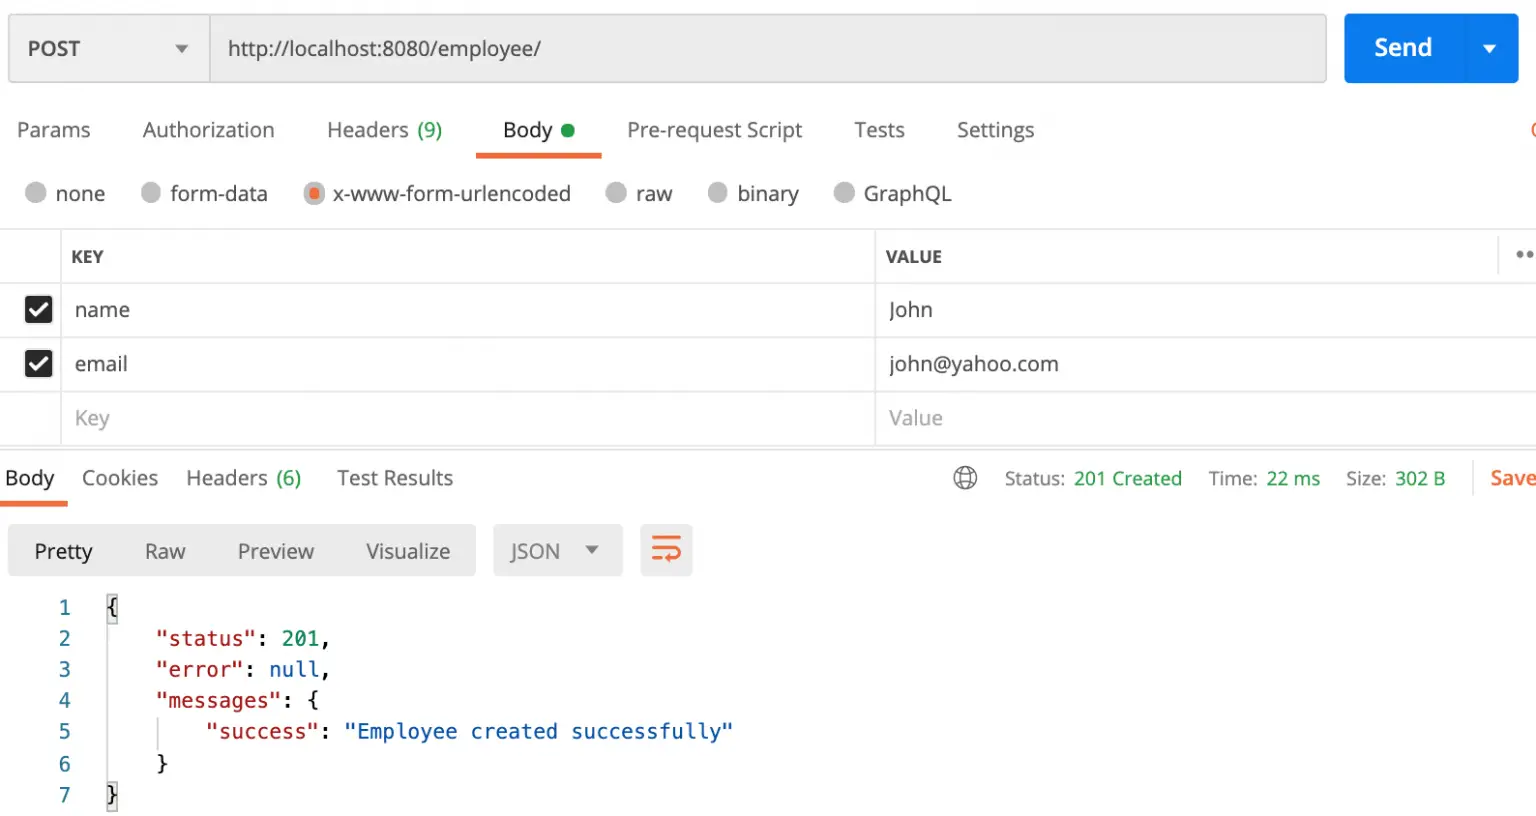
Add Record in Database
http://localhost:8080/employee
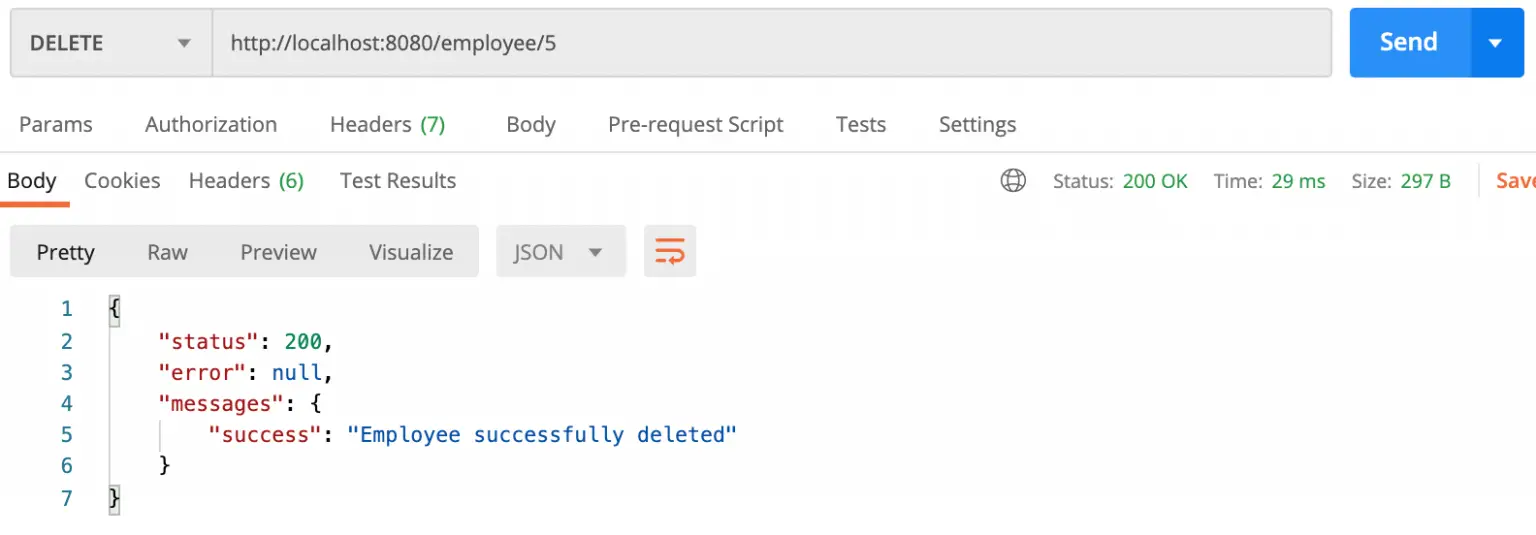
Delete Record
http://localhost:8080/employee/5
Now you can check your own.
I hope it can help you...
#Codeigniter 4
#Codeigniter
