12-Aug-2021
.
Admin
.png)
Hi guys,
Today i will explained Authentication Login And Registration in Codeigniter 4. This example is so easy to use in Codeigniter 4.
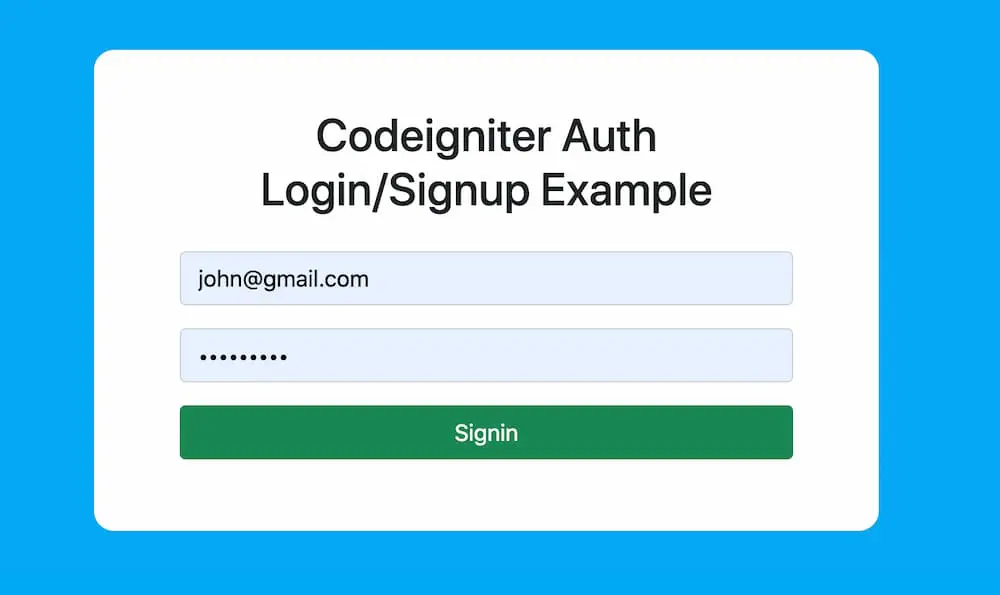
Codeigniter auth tutorial, we will tell you how to create a simple auth system with login and signup functionalities. We will specifically use the Codeigniter session to store the state of authenticated users. Login process is done then user successfully logging into a application.
So let's start to the example.
Step 1: Create Codeigniter Project
Codeigniter Project Project install in a two ways.
<?php
https://codeigniter.com/download
or
composer create-project codeigniter4/appstarter project_name
?>
Step 2: Display Errors
This step is completely optional, if you want you can open app/Config/Boot/production.php and set display_errors property to 1 and enable the error debugging in Codeigniter app.
ini_set('display_errors', '1');
Step 3: Generate Table Into Database
Then third step to generate a database table in your application database.
CREATE TABLE users (
    id INT PRIMARY KEY AUTO_INCREMENT,
    name VARCHAR(150),
    email VARCHAR(150),
    password VARCHAR(150),
    created_at TIMESTAMP DEFAULT CURRENT_TIMESTAMP
) ENGINE=INNODB;
Step 4: Connect CI to Database
Open the app/Config/Database.php, and insert database name, username and password into the file.
public $default = [
        'DSN'      => '',
        'hostname' => 'localhost',
        'username' => 'root',
        'password' => '',
        'database' => 'codeigniter_db',
        'DBDriver' => 'MySQLi',
        'DBPrefix' => '',
        'pConnect' => false,
        'DBDebug'  => (ENVIRONMENT !== 'development'),
        'cacheOn'  => false,
        'cacheDir' => '',
        'charset'  => 'utf8',
        'DBCollat' => 'utf8_general_ci',
        'swapPre'  => '',
        'encrypt'  => false,
        'compress' => false,
        'strictOn' => false,
        'failover' => [],
        'port'     => 3306,
    ];
Step 5: Create and Update User Model
Then next step to create a user model in your CodeIgniter application.
app/Models/UserModel.php
<?php
namespace App\Models;
use CodeIgniter\Model;

class UserModel extends Model{

    protected $table = 'users';

    protected $allowedFields = [
        'name',
        'email',
        'password',
        'created_at'
    ];
}
Step 6: Register Auth Controllers
Create SignupController.php file in the app/Controllers directory, then insert the below code into the file.
app/Controllers/SignupController.php
<?php
namespace App\Controllers;
use CodeIgniter\Controller;
use App\Models\UserModel;

class SignupController extends Controller
{
    public function index()
    {
        helper(['form']);
        $data = [];
        echo view('signup', $data);
    }

    public function store()
    {
        helper(['form']);
        $rules = [
            'name'          => 'required|min_length[2]|max_length[50]',
            'email'         => 'required|min_length[4]|max_length[100]|valid_email|is_unique[users.email]',
            'password'      => 'required|min_length[4]|max_length[50]',
            'confirmpassword'  => 'matches[password]'
        ];

        if($this->validate($rules)){
            $userModel = new UserModel();

            $data = [
                'name'     => $this->request->getVar('name'),
                'email'    => $this->request->getVar('email'),
                'password' => password_hash($this->request->getVar('password'), PASSWORD_DEFAULT)
            ];

            $userModel->save($data);
            return redirect()->to('/signin');
        }else{
            $data['validation'] = $this->validator;
            echo view('signup', $data);
        }
    }
}
app/Controllers/ProfileController.php
<?php
namespace App\Controllers;
use CodeIgniter\Controller;

class ProfileController extends Controller
{
    public function index()
    {
        $session = session();
        echo "Hello : ".$session->get('name');
    }
}
app/Controllers/SigninController.php
<?php
namespace App\Controllers;
use CodeIgniter\Controller;
use App\Models\UserModel;

class SigninController extends Controller
{
    public function index()
    {
        helper(['form']);
        echo view('signin');
    }

    public function loginAuth()
    {
        $session = session();
        $userModel = new UserModel();
        $email = $this->request->getVar('email');
        $password = $this->request->getVar('password');

        $data = $userModel->where('email', $email)->first();

        if($data){
            $pass = $data['password'];
            $authenticatePassword = password_verify($password, $pass);
            if($authenticatePassword){
                $ses_data = [
                    'id' => $data['id'],
                    'name' => $data['name'],
                    'email' => $data['email'],
                    'isLoggedIn' => TRUE
                ];

                $session->set($ses_data);
                return redirect()->to('/profile');

            }else{
                $session->setFlashdata('msg', 'Password is incorrect.');
                return redirect()->to('/signin');
            }

        }else{
            $session->setFlashdata('msg', 'Email does not exist.');
            return redirect()->to('/signin');
        }
    }
}
Step 7: Create Auth View
Next to create a auth view file in your application under directiory;
app/View/signup.php
<!doctype html>
<html lang="en">
<head>
    <meta charset="utf-8">
    <meta name="viewport" content="width=device-width, initial-scale=1">
    <title>Codeigniter 4 Authentication Login And Registration Tutorial Example - Nicesnippets.com</title>
    <link href="https://cdn.jsdelivr.net/npm/bootstrap@5.0.2/dist/css/bootstrap.min.css" rel="stylesheet">
</head>
<body>
    <div class="container mt-5">
        <div class="row justify-content-md-center">
            <div class="col-5">
                <h2>Register User</h2>
                <?php if(isset($validation)):?>
                    <div class="alert alert-warning">
                       <?= $validation->listErrors() ?>
                    </div>
                <?php endif;?>
                <form action="<?php echo base_url(); ?>/SignupController/store" method="post">
                    <div class="form-group mb-3">
                        <input type="text" name="name" placeholder="Name" value="<?= set_value('name') ?>" class="form-control" >
                    </div>
                    <div class="form-group mb-3">
                        <input type="email" name="email" placeholder="Email" value="<?= set_value('email') ?>" class="form-control" >
                    </div>
                    <div class="form-group mb-3">
                        <input type="password" name="password" placeholder="Password" class="form-control" >
                    </div>
                    <div class="form-group mb-3">
                        <input type="password" name="confirmpassword" placeholder="Confirm Password" class="form-control" >
                    </div>
                    <div class="d-grid">
                        <button type="submit" class="btn btn-dark">Signup</button>
                    </div>
                </form>
            </div>
        </div>
    </div>
</body>
</html>
app/View/signin.php
<!doctype html>
<html lang="en">
<head>
    <meta charset="utf-8">
    <meta name="viewport" content="width=device-width, initial-scale=1">
    <title>Codeigniter 4 Authentication Login And Registration Tutorial Example - Nicesnippets.com</title>
    <link href="https://cdn.jsdelivr.net/npm/bootstrap@5.0.2/dist/css/bootstrap.min.css" rel="stylesheet">
</head>
<body>
    <div class="container">
        <div class="row justify-content-md-center">
            <div class="col-5">
                <h2>Login in</h2>
                <?php if(session()->getFlashdata('msg')):?>
                    <div class="alert alert-warning">
                       <?= session()->getFlashdata('msg') ?>
                    </div>
                <?php endif;?>
                <form action="<?php echo base_url(); ?>/SigninController/loginAuth" method="post">
                    <div class="form-group mb-3">
                        <input type="email" name="email" placeholder="Email" value="<?= set_value('email') ?>" class="form-control" >
                    </div>
                    <div class="form-group mb-3">
                        <input type="password" name="password" placeholder="Password" class="form-control" >
                    </div>
                    <div class="d-grid">
                         <button type="submit" class="btn btn-success">Signin</button>
                    </div>
                </form>
            </div>
        </div>
    </div>
</body>
</html>
Step 8: Protect Route With Filter
In the next step, get inside the app/Config/Filters.php, look for $aliases array and replace the whole array with the recommended code.
app/Config/Filters.php
public $aliases = [
    'csrf'     => \CodeIgniter\Filters\CSRF::class,
    'toolbar'  => \CodeIgniter\Filters\DebugToolbar::class,
    'honeypot' => \CodeIgniter\Filters\Honeypot::class,
    'authGuard' => \App\Filters\AuthGuard::class,
];
app/Filters/AuthGuard.php
<?php
namespace App\Filters;
use CodeIgniter\HTTP\RequestInterface;
use CodeIgniter\HTTP\ResponseInterface;
use CodeIgniter\Filters\FilterInterface;

class AuthGuard implements FilterInterface
{
    public function before(RequestInterface $request, $arguments = null)
    {
        if (!session()->get('isLoggedIn')){
            return redirect()->to('/signin');
        }
    }

    public function after(RequestInterface $request, ResponseInterface $response, $arguments = null)
    {

    }
}
app/Config/Routes.php
// custom routes

$routes->get('/', 'SignupController::index');
$routes->get('/signup', 'SignupController::index');
$routes->get('/signin', 'SigninController::index');
$routes->get('/profile', 'ProfileController::index',['filter' => 'authGuard']);
Step 9: Run CI Application
In this last step, you have to open the terminal, type command to run the application.
php spark serve
Then next run the url in your browser.
http://localhost:8080/signup
Output

Now you can check your own.
I hope it can help you...
#Codeigniter 4
#Codeigniter