11-Apr-2023
.
Admin

Hi guys,
Today i will explained jQuery Client Side Form Validation Tutorial Example in Codeigniter 4. This example is so easy to use in Codeigniter 4.
In this Codeigniter 4 Bootstrap 5 contact form validation tutorial, we will teach you how to add client-side validation in simple contact form within the Codeigniter 4 application with the help of the jQuery validate js and Bootstrap CSS plugins.
The validate js is a very powerful and easy to use client-side form validation plugin; it offers tons of customization options. So let's start to the example.
Step 1 : Create Codeigniter App
Codeigniter Project Project install in a two ways.
<?php
https://codeigniter.com/download
or
composer create-project codeigniter4/appstarter project_name
?>
Step 2 : Enable Error Handling
To quickly and easily debug the unwonted errors requires you to update the display_errors property, head over to app/Config/Boot/development.php and app/Config/Boot/production.php files and change the display_errors to 1 from 0.
ini_set('display_errors', '1');
Step 3 : Create Contact Form Table
Then next step to create table.
CREATE TABLE contact_form (
    id int(11) NOT NULL AUTO_INCREMENT COMMENT 'Primary Key',
    name varchar(150) NOT NULL COMMENT 'Name',
    email varchar(255) NOT NULL COMMENT 'Email',
    message varchar(250) NOT NULL COMMENT 'Message',
    created_at varchar(20) NOT NULL COMMENT 'Date Created',
    PRIMARY KEY (id)
) ENGINE=InnoDB DEFAULT CHARSET=latin1 COMMENT='contact form table' AUTO_INCREMENT=1;
Step 4 : Connect To Database
Open the app/Config/Database.php, and insert database name, username and password into the file.
public $default = [
        'DSN'      => '',
        'hostname' => 'localhost',
        'username' => 'root',
        'password' => '',
        'database' => 'codeigniter_db',
        'DBDriver' => 'MySQLi',
        'DBPrefix' => '',
        'pConnect' => false,
        'DBDebug'  => (ENVIRONMENT !== 'development'),
        'cacheOn'  => false,
        'cacheDir' => '',
        'charset'  => 'utf8',
        'DBCollat' => 'utf8_general_ci',
        'swapPre'  => '',
        'encrypt'  => false,
        'compress' => false,
        'strictOn' => false,
        'failover' => [],
        'port'     => 3306,
    ];
Seldom, you might get Unable to connect database: Codeigniter error; it manifests unwontedly and makes you solicitous. If you are one of the user of either MAMP or XAMP, you can add the respective local server value as the hostname.
# ====== MAMP
public $default = [
  'hostname' => '/Applications/MAMP/tmp/mysql/mysql.sock',
]

# ====== XAMP
public $default = [
  'hostname' => '/Applications/XAMPP/xamppfiles/var/mysql/mysql.sock',
]
Step 5 : Set Up New Model
In this segment, you have to create a model file that will hold the logical structure of the contact form table. Head over to the app/Models/ folder within the path, create the new model file and name it contactFormModel.php file.
Update the app/Models/contactFormModel.php file.
<?php
namespace App\Models;
use CodeIgniter\Database\ConnectionInterface;
use CodeIgniter\Model;

class ContactFormModel extends Model
{
    protected $table = 'contact_form';
    protected $allowedFields = [
        'name',
        'email',
        'message'
    ];
}
Step 6 : Create Contact Form Controller
Next, get ready and create a new controller file, primarily head over to the app/Controllers directory, construct a new file, name it ContactFormController.php, then add the following code inside the app/Controllers/ContactFormController.php file.
<?php
namespace App\Controllers;
use CodeIgniter\Controller;
use App\Models\ContactFormModel;

class ContactFormController extends Controller
{
    public function index()
    {
      return view('contact_form');
    }

    public function form()
    {
        helper(['form', 'url']);
        $isValid = $this->validate([
            'name' => 'required',
            'email' => 'required',
            'message'  => 'required',
        ]);

        $contactFormModel = new ContactFormModel();
        if (!$isValid) {
            echo view('contact_form', [
                'validation' => $this->validator
            ]);
        } else {
            $contactFormModel->save([
                'name' => $this->request->getVar('name'),
                'email'  => $this->request->getVar('email'),
                'message'  => $this->request->getVar('message'),
            ]);
            echo view('thank_you');
        }
    }
}
Let me break down how we set up the logical structure in the controller file; the index() method loads the contact form template into the view. Whereas, the form() function is handling the validation and submitting the contact form values to the server.
Step 7 : Add Route
next to make the route for showing charts, you need to go to app/Config/Routes.php and define the given below routes in the file
$routes->setDefaultController('ContactFormController');
$routes->get('/', 'ContactFormController::index');
Step 8 : Create Form View
In this step, you will create the form structure using Bootstrap 5, integrate the form with the database and validate every field of the contact form using the validate js.
Now, get into the app/Views directory, there you need to create a new view file, name it contact_form.php add the following code inside the app/Views/contact_form.php file.
<!DOCTYPE html>
<html>
<head>
    <title>Codeigniter 4 jQuery Client Side Form Validation Tutorial Example - Nicesnippets.com</title>
    <link rel="stylesheet" href="https://cdn.jsdelivr.net/npm/bootstrap@5.0.0/dist/css/bootstrap.min.css">
    <style>
        .error {
            width: 100%;
            margin-top: .25rem;
            font-size: .875em;
            color: #dc3545;
        }
    </style>
</head>
<body>
    <div class="container mt-5" style="max-width: 500px">
        <form id="contact_form" method="post" action="<?php echo base_url('ContactFormController/form') ?>" name="contact_form">
            <div class="form-group mb-3">
                <label class="fw-bold mb-2">Name</label>
                <input type="text" name="name" class="form-control">
            </div>
            <div class="form-group mb-3">
                <label class="fw-bold mb-2">Email</label>
                <input type="text" name="email" class="form-control">
            </div>
            <div class="form-group mb-3">
                <label class="fw-bold mb-2">Message</label>
                <textarea name="message" class="form-control"></textarea>
            </div>
            <div class="d-grid">
                <button type="submit" class="btn btn-primary">Submit</button>
            </div>
        </form>
    </div>
    <script src="https://ajax.googleapis.com/ajax/libs/jquery/3.5.1/jquery.min.js"></script>
    <script src="https://cdn.jsdelivr.net/npm/jquery-validation@1.19.3/dist/jquery.validate.js"></script>
    <script src="https://cdn.jsdelivr.net/npm/jquery-validation@1.19.3/dist/additional-methods.min.js"></script>
    <script>
        if ($("#contact_form").length > 0) {
            $("#contact_form").validate({
                rules: {
                    name: {
                        required: true
                    },
                    email: {
                        required: true,
                        email: true,
                        maxlength: 60
                    },
                    message: {
                        required: true,
                    },
                },
                messages: {
                    name: {
                        required: "Name is required",
                    },
                    email: {
                        email: "It doe not seem valid email",
                        required: "Email is required",
                        maxlength: "Upto 50 characters are allowed",
                    },
                    message: {
                        required: "Please, enter the query",
                    },
                },
            })
        }
    </script>
</body>
</html>
Further, move to the app/Views directory again, create a new file, give it name such as thank_you.php. After that, add the given below code in app/Views/thank_you.php file.
This template is being used for showing the thank you message to the user on successful form submission, its a kind of authentication that reveals that the form has been successfully submitted.
<!DOCTYPE html>
<html>
<head>
    <title>Codeigniter 4 jQuery Client Side Form Validation Tutorial Example - Nicesnippets.com</title>
    <link rel="stylesheet" href="https://cdn.jsdelivr.net/npm/bootstrap@5.0.0/dist/css/bootstrap.min.css">
</head>
<body>
    <div class="container mt-5" style="max-width: 500px">
        <div class="alert alert-success text-center" role="alert">
            <h2>Your message has been received!</h2>
        </div>
    </div>
</body>
</html>
Step 9 : Run Codeigniter Project
In this last step, you have to open the terminal, type command to run the application.
php spark serve
Then next run the url in your browser.
http://localhost:8080
Output
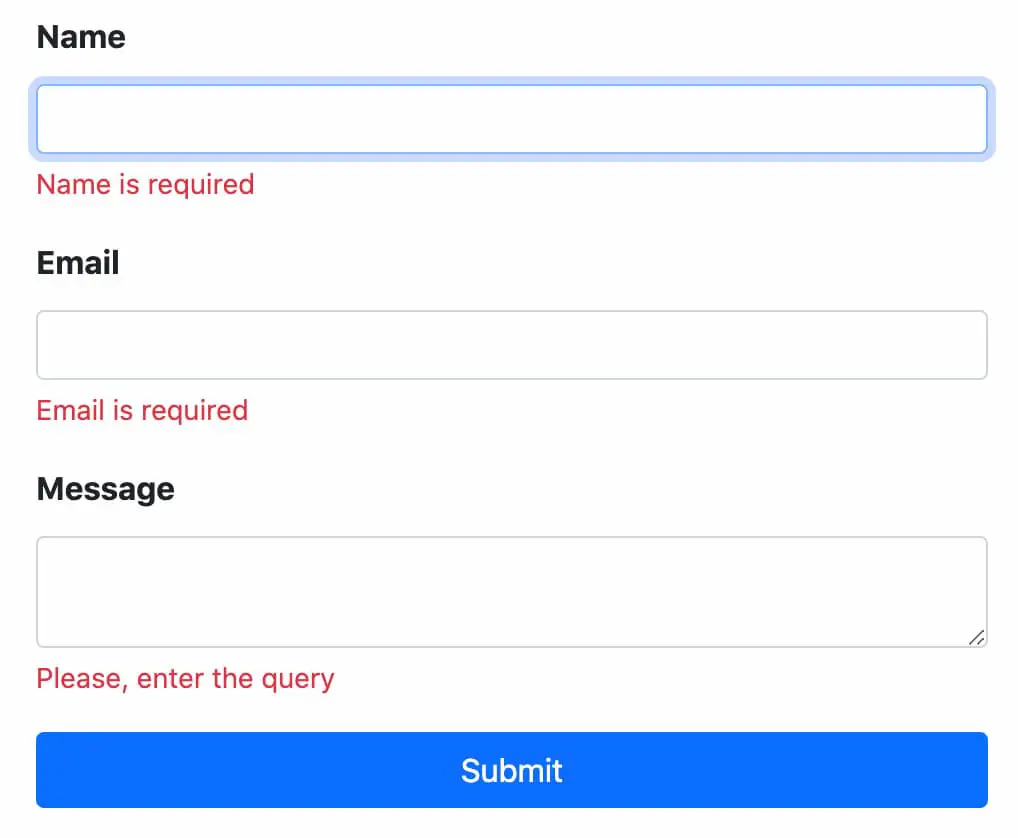
Now you can check your own.
I hope it can help you...
#Codeigniter 4
#Codeigniter
