10-Apr-2023
.
Admin

Hi Guys,
I am going to show you an example of laravel 9 custom pagination example tutorial. we will help you to give example of how to create custom pagination. if you have a question about pagination then I will give a simple example with a solution. This tutorial will give you a simple example of laravel 9 pagination example. Let's get started with custom pagination in laravel 9.
Here, I will give you a full example of how to create a custom pagination view tutorial in laravel 9 as below so follow my all steps.
Step 1: Download Laravel
Let us begin the tutorial by installing a new laravel application. if you have already created the project, then skip following step.
composer create-project laravel/laravel example-app
Step 2: Database Configuration
In second step, we will make database Configuration for example database name, username, password etc. So lets open .env file and fill all deatils like as bellow:
.env
DB_CONNECTION=mysql
DB_HOST=127.0.0.1
DB_PORT=3306
DB_DATABASE=here your database name(blog)
DB_USERNAME=here database username(root)
DB_PASSWORD=here database password(root)
Step 3: Add Custom Pagination Template
In this step,we will create a custom pagination template. Use the below command for generate new folder "pagination" on views files(resources/views/vendor). In pagination folder you will get following files by default:
php artisan vendor:publish --tag=laravel-pagination
So,we are going to use our custom pagination template. We don't use any of the above templates.
Step 4: Add Route
routes/web.php
<?php

use Illuminate\Support\Facades\Route;
use App\Http\Controllers\TestController;

/*
|--------------------------------------------------------------------------
| Web Routes
|--------------------------------------------------------------------------
|
| Here is where you can register web routes for your application. These
| routes are loaded by the RouteServiceProvider within a group which
| contains the "web" middleware group. Now create something great!
|
*/

Route::get('custom-pagination', [TestController::class, 'index']);
Step 5: Add Controller
In this step, we will create a controller. Use the below command to generate a controller
app/Http/Controllers/TestController.php
<?php

namespace App\Http\Controllers;

use Illuminate\Http\Request;
use App\Models\User;

class TestController extends Controller
{
    /**
     * Write Your Code...
     *
     * @return string
    */
    public function index()
    {
        $users = User::paginate(5);
        return view('welcome',compact('users'));
    }
}
Step 6: Add Blade File
In this step, we will create a blade file name custom.blade.php bellow the following path.
resources/views/vendor/pagination/custom.blade.php
@if ($paginator->hasPages())
<nav aria-label="Page navigation example">
    <ul class="pagination justify-content-end">
        @if ($paginator->onFirstPage())
            <li class="page-item disabled">
                <a class="page-link" href="#" tabindex="-1">Previous</a>
            </li>
        @else
            <li class="page-item"><a class="page-link" href="{{ $paginator->previousPageUrl() }}">Previous</a></li>
        @endif

        @foreach ($elements as $element)
            @if (is_string($element))
                <li class="page-item disabled">{{ $element }}</li>
            @endif
            @if (is_array($element))
                @foreach ($element as $page => $url)
                    @if ($page == $paginator->currentPage())
                        <li class="page-item active">
                            <a class="page-link">{{ $page }}</a>
                        </li>
                    @else
                        <li class="page-item">
                            <a class="page-link" href="{{ $url }}">{{ $page }}</a>
                        </li>
                    @endif
                @endforeach
            @endif
        @endforeach

        @if ($paginator->hasMorePages())
            <li class="page-item">
                <a class="page-link" href="{{ $paginator->nextPageUrl() }}" rel="next">Next</a>
            </li>
        @else
            <li class="page-item disabled">
                <a class="page-link" href="#">Next</a>
            </li>
        @endif
    </ul>
@endif
Next following the path create a welcome.blade.php fille
resources/views/welcome.blade.php
@extends('layouts.app')

<link rel="stylesheet" href="https://cdn.jsdelivr.net/npm/bootstrap@4.6.0/dist/css/bootstrap.min.css" integrity="sha384-B0vP5xmATw1+K9KRQjQERJvTumQW0nPEzvF6L/Z6nronJ3oUOFUFpCjEUQouq2+l" crossorigin="anonymous">
<style>
    .page-item.active .page-link{
        z-index: 3;
        color: #fff !important  ;
        background-color: #00ACD6 !important;
        border-color: #00ACD6 !important;
        border-radius: 50%;
        padding: 6px 12px;
    }
    .page-link{
        z-index: 3;
        color: #00ACD6 !important;
        background-color: #fff;
        border-color: #007bff;
        border-radius: 50%;
        padding: 6px 12px !important;
    }
    .page-item:first-child .page-link{
        border-radius: 30% !important;
    }
    .page-item:last-child .page-link{
        border-radius: 30% !important;
    }
    .pagination li{
        padding: 3px;
    }
    .disabled .page-link{
        color: #212529 !important;
        opacity: 0.5 !important;
    }
</style>

@section('content')
    <div class="container">
        <div class="row">
            <div class="col-md-12">
                <div class="card">
                    <div class="card-header">
                        <h4>Laravel 9 Custom Pagination Example Tutorial<span class="text-danger">NiceSnippets.com</span></h4>
                    </div>
                    <div class="card-footer">
                        <table class="table table-bordered">
                            <thead>
                                <tr>
                                    <th>Id</th>
                                    <th>Name</th>
                                    <th>Email</th>
                                </tr>
                            </thead>
                            <tbody>
                                @forelse($users as $key => $user)
                                <tr>
                                    <td>{{ ++$key }}</td>
                                    <td>{{ $user->name }}</td>
                                    <td>{{ $user->email }}</td>
                                </tr>
                                @empty
                                <tr>
                                    <p>There Are no Data</p>
                                </tr>
                                @endforelse
                            </tbody>
                        </table>
                        <div class="col-md-12">
                            {{ $users->links('vendor.pagination.custom')}}
                        </div>
                    </div>
                </div>
            </div>
        </div>
    </div>
@endsection
Run Laravel App:
All steps have been done, now you have to type the given command and hit enter to run the laravel app:
php artisan serve
Now, you have to open web browser, type the given URL and view the app output:
http://localhost:8000/custom-pagination
Output :
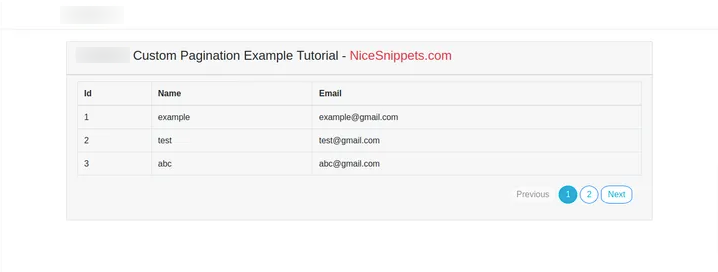
It will help you...
#Laravel 9