21-Jul-2023
.
Admin
Hello Friends,
In this quick example, let's see how to install wordpress on aws apache 2 Ubuntu. Here you will learn how to install wordpress in aws linux. I’m going to show you about installing wordpress on Amazon ec2 Ubuntu. We will look at an example of wordpress installation on AWS ubuntu. Let's see the below example install and configure wordpress on the aws ubuntu.
WordPress installation and configuration on Amazon AWS Ubuntu web server are straightforward tasks because the Ubuntu community provides several commands to install and configure LAMP (Linux, Apache, MySQL, and PHP) on an AWS server, as well as the WordPress community.
Step 1: Launch New AWS ec2 Instance
First of all, you need to launch the aws ec2 instance. If you have already launched a new ec2 instance, so you can move next step. Otherwise, you need to read this tutorial “how to launch ec2 instance in aws step by step“ to launch an aws ec2 instance.
Step 2: Connecting your AWS EC2 Instance from SSH
In this step, you need to connect your aws ec2 instance from the ssh terminal. If you are new to connecting the aws ec2 instance with Windows, ubuntu, and Mac system. So you can read this tutorial “How to Connect to ec2 Instance From Putty and SSH Terminal” to connect your ec2 instance from ssh.
Step 3: Install Apache 2 on ubuntu 18.04
In this step, use the following Ubuntu commands to install ubuntu on your virtual server:
3.1: Update Ubuntu System Repositories
sudo apt update
3.2: Update Ubuntu System Repositories
sudo apt install apache2
3.3: List the UFW application profiles
sudo ufw app list
3.4: sudo ufw allow ‘Apache Full’
sudo ufw allow 'Apache Full'
3.5: Verify that the Apache service is running
sudo systemctl status apache2
3.6: Open Browser and type EC2 intance IP
Finally, open your browser and type your AWS ec2 instance IP address. And, it will be looks like the Apache 2 page in the following picture:

install apache 2 web server on amazon ec2
Step 4: Install MySQL
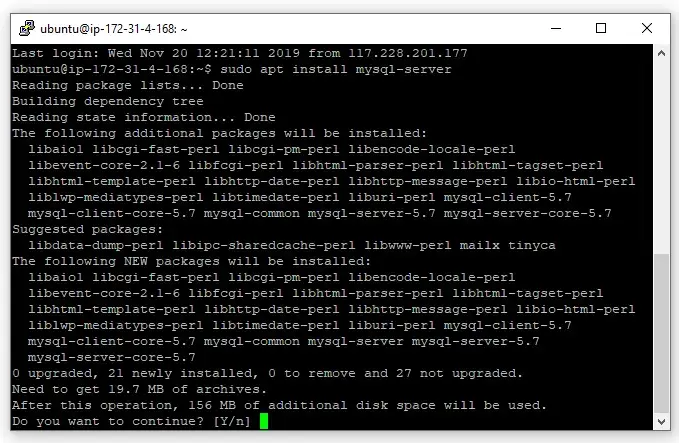
4.1: Installing MySQL server
Now, open your ssh terminal and type the following command to install MySql Server:
sudo apt-get install mysql-server
install apache 2 web server on amazon ec2
4.2: Securing MySQL server in Apache aws ec2
Then, secure the MySql server by using the following command. So, you will need to set the root password of the database and secure it using the following command:
sudo mysql_secure_installation
When you run this command. Then the questions given below in the prompt will appear:
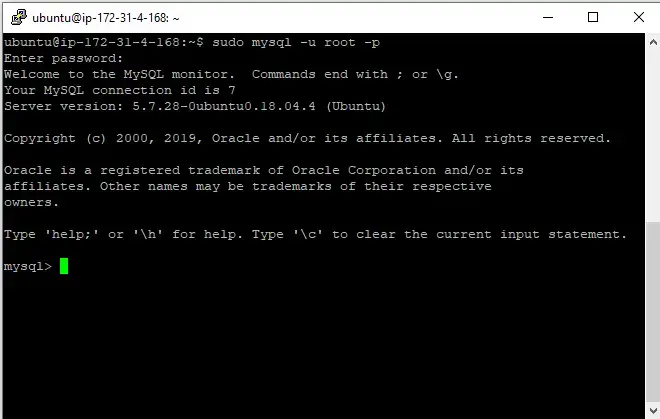
sudo mysql -u root -p
The above command will ask for the password. Password is the same that was set in the previous step.
install apache 2 web server on amazon ec2
4.3: Create MySQL User
Now, Create a user named ‘test’. you can choose the user name anything you want.
mysql> CREATE USER 'test'@'localhost' IDENTIFIED BY 'Password';
4.4: Grant Permission To User
Now, type the following command on the ssh terminal to grant permission of user.
mysql> GRANT ALL PRIVILEGES ON *.* TO 'test'@'localhost';
4.5: Reload all privileges
mysql> FLUSH PRIVILEGES;
4.6: Create Database For WordPress Website
Now create a new database for the wordpress website. So, type the following command on your ssh terminal to create a database named wp_aws:
mysql> CREATE DATABASE wp_aws;
Now, use the exit command to exit from MySql:
exit
Step 5: Install PHP 7.3
5.1: Install PHP and Common Extensions
Now, install PHP with it’s common extensions. So open your ssh terminal and type the following command:
sudo apt-get install php libapache2-mod-php php-mysql php-curl php-gd php-json php-zip php-mbstring
5.2: Edit dir.conf File
After successfully installing PHP on the ubuntu amazon ec2 instance. Now, you need to configure the dir. conf file by using the following sudo nano command:
sudo nano /etc/apache2/mods-enabled/dir.conf
It will look like this:
<IfModule mod_dir.c>
    DirectoryIndex index.html index.cgi index.pl index.php index.xhtml index.htm
</IfModule>
Move the PHP index file to the first position after the DirectoryIndex specification, like this:
<IfModule mod_dir.c>
    DirectoryIndex index.php index.html index.cgi index.pl index.xhtml index.htm
</IfModule>
5.3: Restart Apache Web Server
After successfully installing PHP MySQL and configuring these on the ubuntu amazon ec2 instance.
Finally, You need to restart Apache 2 server by using the following command:
sudo service apache2 restart
Step 6: Install WordPress And Configure
6.1: Installing WordPress
Use the below command to download the latest version of WordPress on the EC2 instance:
wget https://wordpress.org/latest.tar.gz
6.2: Extract wordpress setup tar file
Type the below command on your ssh terminal to extract wordpress setup tar file:
tar -xvzf latest.tar.gz
6.3: Move the extracted file contents to /var/www/html Directory
Use the below command to move all extracted file contents of wordpress to /var/www/html directory:
sudo mv -f wordpress/* /var/www/html
6.4: Enable Permission to Apache 2 User
Type the following command on the ssh terminal to enable permissions on the WordPress folder to the apache2 user:
sudo chown -R www-data:www-data /var/www/html
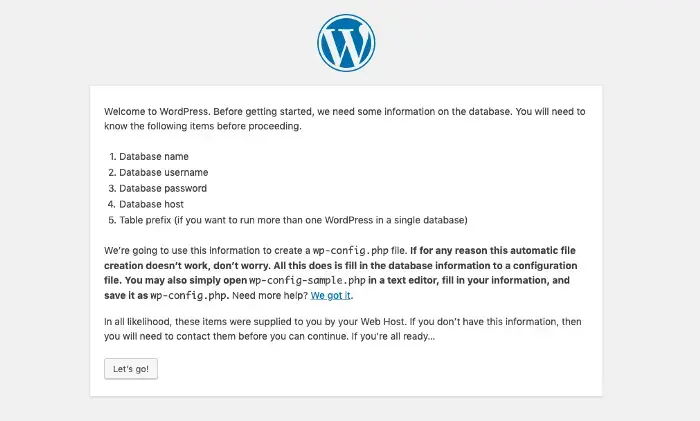
6.5: Type Your instance Ip Address On Browser
Now, you need to type aws instance ip address on the browser and looks like the following screen:
install apache 2 web server on amazon ec2
Then click on the let’s go button. After that, you need to add your database name, username, password, Sitename, and email on the next screen.
Congratulation, you have successfully installed Lamp (linux, apache 2, PHP, and mysql) and wordpress on Amazon (AWS) ec2 Ubuntu.
I hope it can help you...
#Ubuntu