22-Jul-2023
.
Admin
Hello Friends,
In this tutorial, I will show you how to install php mysql on linux ubuntu. let’s discuss how to install mysql php in linux. This article will give you a simple example of how to install and configure php mysql. Here you will learn how to set up php mysql ubuntu. Follow the below tutorial step on how to install Apache php mysql on Ubuntu.
Install PHP MySQL on Ubuntu EC2 Instance. Here, we will show you step-by-step how to install PHP and MySQL on Ubuntu 18.04 AWS EC2.
Step 1: Connect Your AWS EC2 Instance from SSH
First, you need to connect your aws ec2 instance from ssh. If you are new to connecting the aws ec2 instance with Windows, Ubuntu, and Mac systems. So you can read this tutorial “How to Connect to ec2 Instance From Putty and SSH Terminal” to connect your ec2 instance from ssh.
Step 2: Install MySQL on AWS EC2 Ubuntu
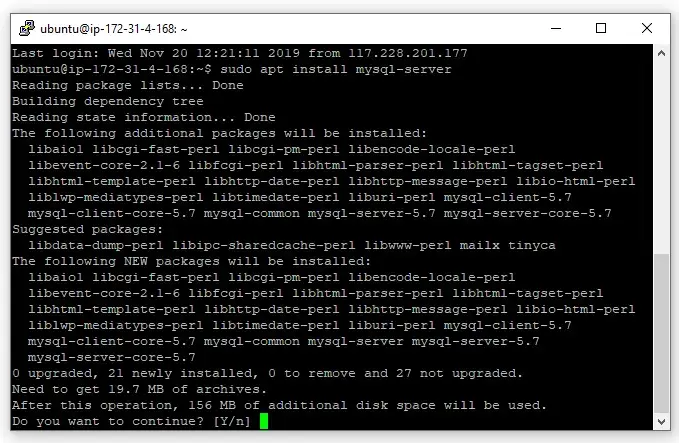
In this step, open your ssh terminal and type the following command to install MySql Server:
sudo apt-get install mysql-server
Then, secure the MySql server by using the following command. So, you will need to set the root password of the database and ensure it using the following command:
sudo mysql_secure_installation
When you run this command. Then the questions given below in the prompt will appear:
sudo mysql -u root -p
The above command will ask for the password. Enter the password that you enter while securing the MySQL and hitting enter will log in to MySQL:

Now, Type exit on the ssh terminal to get out of MySql:
exit
Step 3: Install PHP Amazon EC2 Ubuntu
In this step, install PHP with its common extensions. So open your ssh terminal and type the following command:
sudo apt-get install php libapache2-mod-php php-mysql php-curl php-gd php-json php-zip php-mbstring
After successfully installing PHP on the ubuntu amazon ec2 instance. Now, you need to configure the dir. conf file by using the following sudo nano command:
sudo nano /etc/apache2/mods-enabled/dir.conf
It will look like this:
<IfModule mod_dir.c>
    DirectoryIndex index.html index.cgi index.pl index.php index.xhtml index.htm
</IfModule>
Move the PHP index file to the first position after the DirectoryIndex specification, like this:
<IfModule mod_dir.c>
    DirectoryIndex index.php index.html index.cgi index.pl index.xhtml index.htm
</IfModule>
Step 4: Restart Apache Web Server
After successfully installing PHP MySQL and configuring these on the ubuntu amazon ec2 instance.
Finally, You need to restart Apache 2 server by using the following command:
sudo service apache2 restart
I hope it can help you...
#Ubuntu