10-Apr-2023
.
Admin
Hello Friends,
In this blog, I would like share with you how to integration razorpay payment gateway in laravel 8.We will show razorpay payment gateway integration in laravel 8 with example. In this laravel razorpay payment gateway example, we will use the javascript lib of the razorpay payment gateway for payment deduction.
In this tutorial, I will show you payments using razorpay payment gateway in laravel. Today We will implement razorpay payment gateway in larvel 8 application. In this example I will give easy and simple way to integration razorpay payment gateway in laravel application.
Here, I am going show you full example for laravel 8 razorpay payment gateway integration. So let's see bellow example step by step.
Step 1 : Install Laravel App
In First step, We need to get fresh laravel version application using bellow command. So Let's open terminal and run bellow command.
composer create-project --prefer-dist laravel/laravel blog
Step 2 : Setup Database Configuration
After successfully install laravel app thenafter configure databse setup. We will open ".env" file and change the database name, username and password in the env file.
DB_CONNECTION=mysql
DB_HOST=127.0.0.1
DB_PORT=3306
DB_DATABASE=Enter_Your_Database_Name
DB_USERNAME=Enter_Your_Database_Username
DB_PASSWORD=Enter_Your_Database_Password
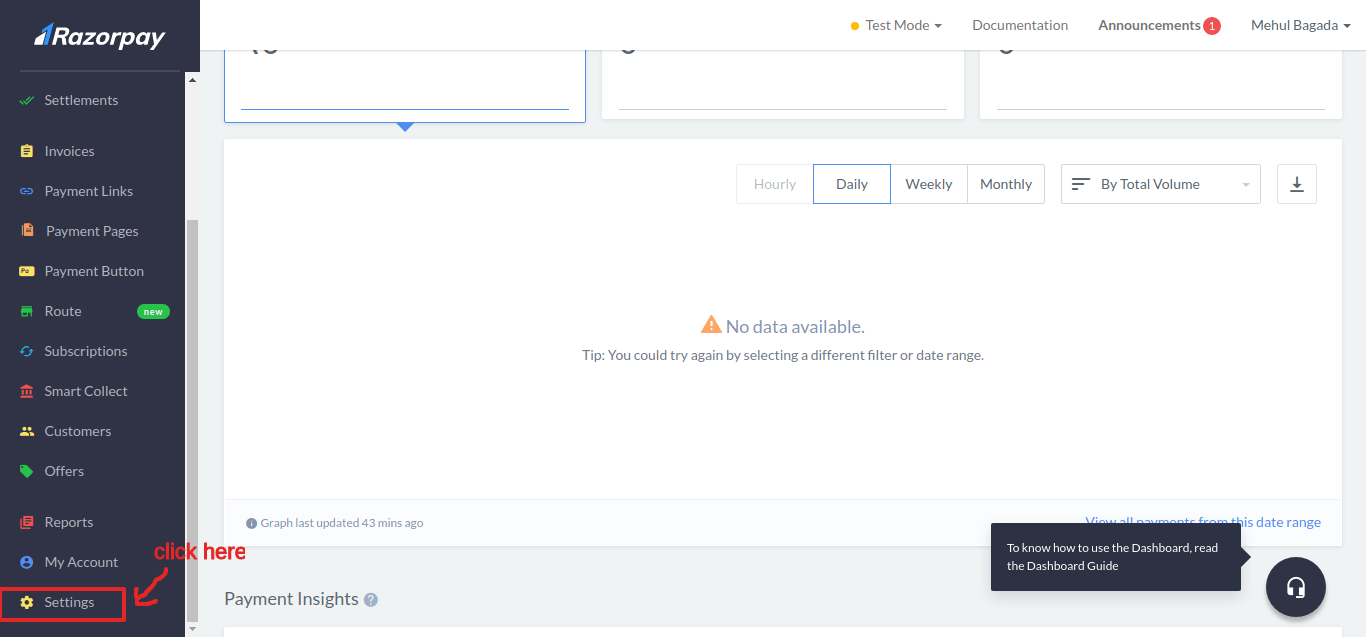
Step 3 : Create Account in Razorpay
Here We need a razorpay account first you can create account in razorpay So let's create Razorpay Account.
You have alreay account the sign in otherwise create account click sign up.

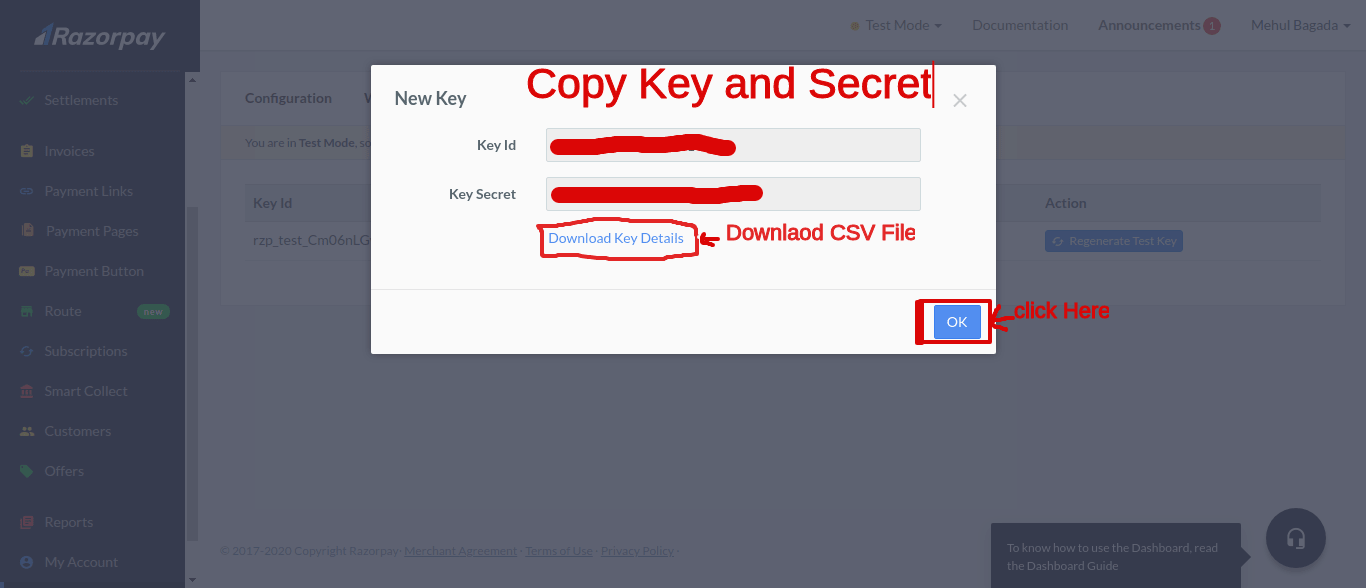
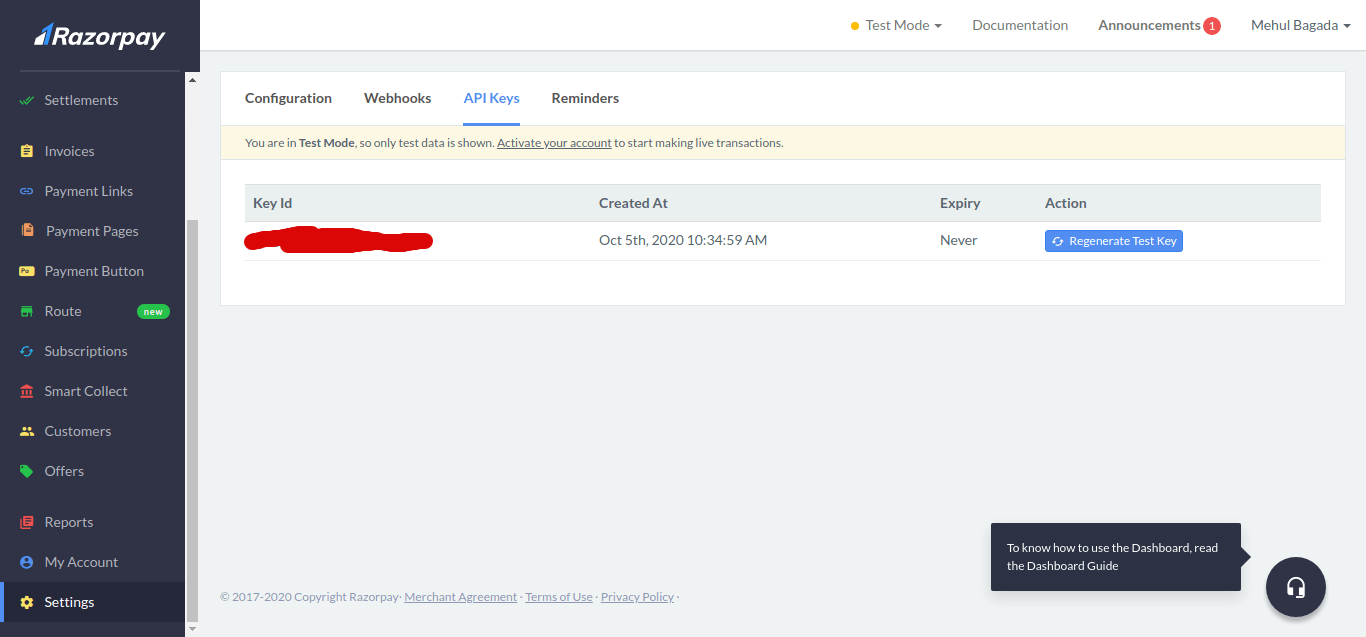
Now sign in or sign up after click on setting menu in your left sidebar.
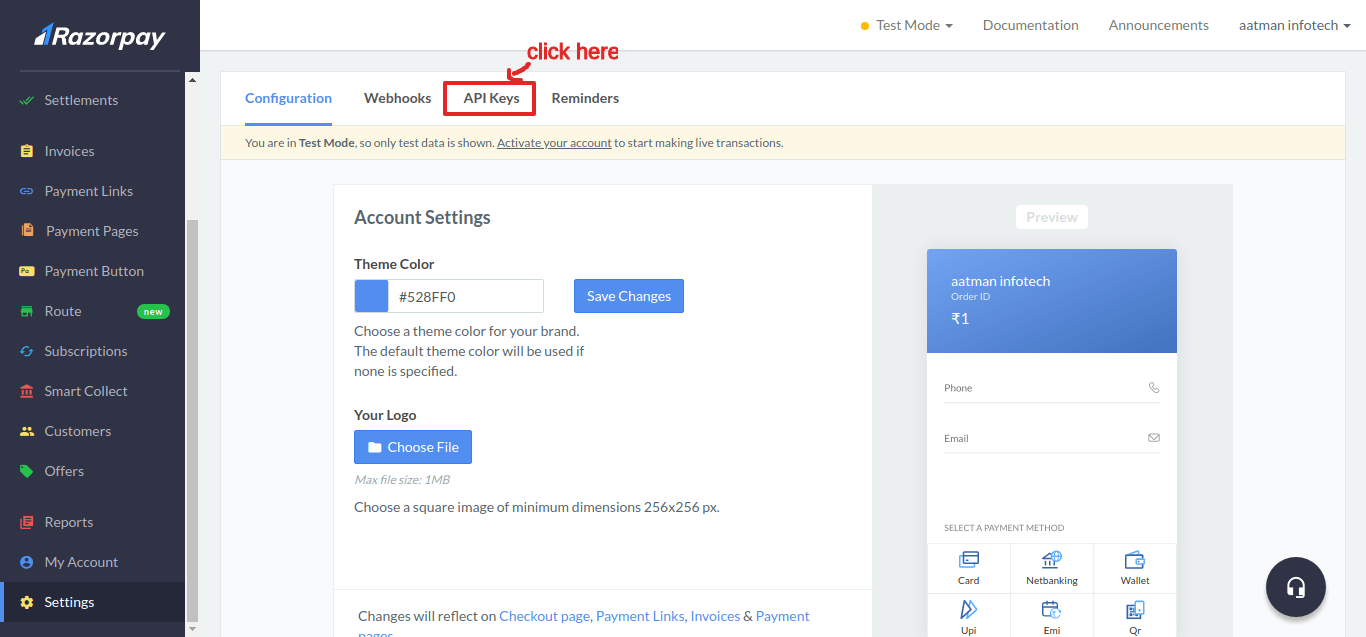
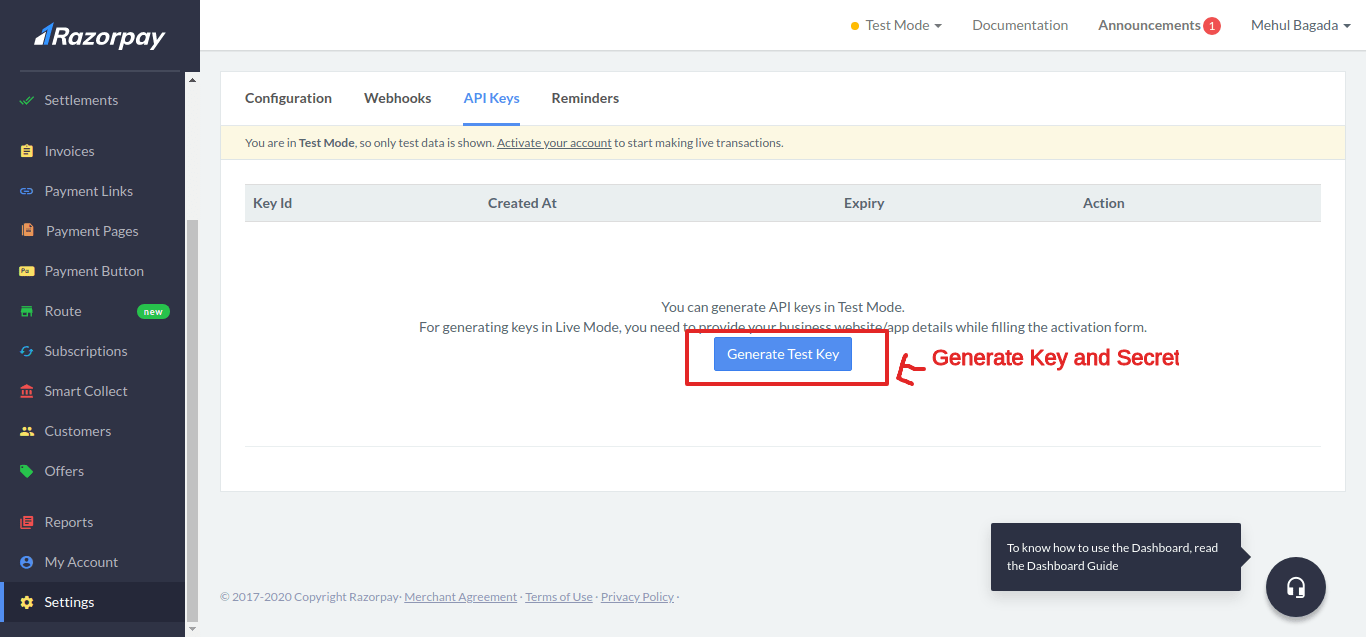
Now you will generate key and secret on razorpay. copy your key and secret.
Step 4 : Install Razorpay
In this step, we need to install razorpay laravel package in our application. so let's open terminal and run bellow command:
composer require razorpay/razorpay
Successfully install razorpay package then after you can add razorkey and razorsecret in .env file.
.env
RAZOR_KEY=your_razorpay_key
RAZOR_SECRET=your_razorpay_secret
Step 5 : Create Migration
Here we need migration for store payment data So let's create payment table and model using bellow artisan command:
php artisan make:model Payment -m
Now you can create migration after add bellow fields:
database/migrations/2020_10_02_050717_create_payments_table.php
<?php

use Illuminate\Database\Migrations\Migration;
use Illuminate\Database\Schema\Blueprint;
use Illuminate\Support\Facades\Schema;

class CreatePaymentsTable extends Migration
{
    /**
     * Run the migrations.
     *
     * @return void
     */
    public function up()
    {
        Schema::create('payments', function (Blueprint $table) {
            $table->id();
            $table->string('payment_id'); // razorpay payment id
            $table->integer('user_id');
            $table->string('amount');
            $table->timestamps();
        });
    }

    /**
     * Reverse the migrations.
     *
     * @return void
     */
    public function down()
    {
        Schema::dropIfExists('payments');
    }
}
Now add fields in fillable on model.
app\Models\Payment.php
<?php

namespace App\Models;

use Illuminate\Database\Eloquent\Factories\HasFactory;
use Illuminate\Database\Eloquent\Model;

class Payment extends Model
{
    use HasFactory;
    protected $fillable = [
        'payment_id', 'user_id','amount'
    ];
}
Step 6: Add New Route
In this step, we will add two routes, one for display razorpay payment gateway and another for store payment. So you have to simply add two new routes in your laravel application.
/routes/web.php
use App\Http\Controllers\RazorpayController;

Route::get('paywithrazorpay', [RazorpayController::class,'payWithRazorpay'])->name('paywithrazorpay');
Route::post('payment', [RazorpayController::class,'payment'])->name('payment');
Step 7: Create Controller
In third step, we will create new RazorpayController file to handle request of created two new route. In this Controller we define two method, create() and payment(). Both method will handle route request. So let's create new controller and put code:
php artisan make:controller RazorpayController
After successfully run above command . So, let's copy bellow code and put on RazorpayController.php file.
app/http/controller/RazorpayController.php
<?php

namespace App\Http\Controllers;

use Illuminate\Http\Request;
use Razorpay\Api\Api;
use App\Models\Payment;
use Session;
use Redirect;

class RazorpayController extends Controller
{
    public function payWithRazorpay()
    {
        return view('payWithRazorpay');
    }

    public function payment(Request $request)
    {
        $input = $request->all();

        $api = new Api(env('RAZOR_KEY'), env('RAZOR_SECRET'));

        $payment = $api->payment->fetch($request->razorpay_payment_id);

        if(count($input)  && !empty($input['razorpay_payment_id'])) {
            try {

                $payment->capture(array('amount'=>$payment['amount']));

            } catch (\Exception $e) {
                return  $e->getMessage();
                \Session::put('error',$e->getMessage());
                return redirect()->back();
            }
        }

        $payInfo = [
                   'payment_id' => $request->razorpay_payment_id,
                   'user_id' => '1',
                   'amount' => $request->amount,
                ];

        Payment::insertGetId($payInfo);

        \Session::put('success', 'Payment successful');

        return response()->json(['success' => 'Payment successful']);
    }
}
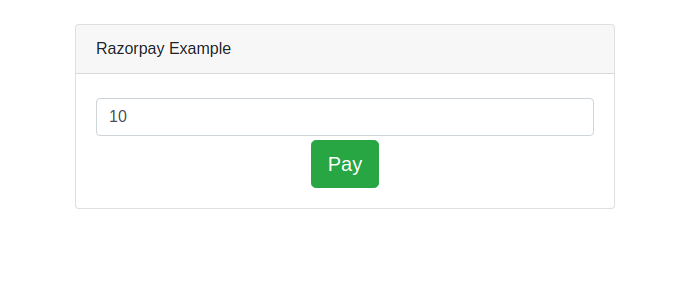
Step 8: Create blade file
In last step we will create payWithRazorpay.blade.php file and write code of display razorpay payment form.
resources/views/payWithRazorpay.blade.php
<!DOCTYPE html>
<html lang="{{ str_replace('_', '-', app()->getLocale()) }}">
<head>
<meta charset="utf-8">
<meta name="viewport" content="width=device-width, initial-scale=1">
<!-- CSRF Token -->
<meta name="csrf-token" content="{{ csrf_token() }}">
<title>RozerPay Example</title>
<!-- Scripts -->
<script src="https://cdnjs.cloudflare.com/ajax/libs/jquery/3.5.1/jquery.min.js" integrity="sha512-bLT0Qm9VnAYZDflyKcBaQ2gg0hSYNQrJ8RilYldYQ1FxQYoCLtUjuuRuZo+fjqhx/qtq/1itJ0C2ejDxltZVFg==" crossorigin="anonymous"></script>
<script src="https://cdnjs.cloudflare.com/ajax/libs/twitter-bootstrap/4.5.2/js/bootstrap.min.js" integrity="sha512-M5KW3ztuIICmVIhjSqXe01oV2bpe248gOxqmlcYrEzAvws7Pw3z6BK0iGbrwvdrUQUhi3eXgtxp5I8PDo9YfjQ==" crossorigin="anonymous"></script>
<!-- Fonts -->
<link rel="dns-prefetch" href="//fonts.gstatic.com">
<link href="https://fonts.googleapis.com/css?family=Nunito" rel="stylesheet">
<!-- Styles -->
<link rel="stylesheet" href="https://cdnjs.cloudflare.com/ajax/libs/twitter-bootstrap/4.5.2/css/bootstrap.min.css" integrity="sha512-MoRNloxbStBcD8z3M/2BmnT+rg4IsMxPkXaGh2zD6LGNNFE80W3onsAhRcMAMrSoyWL9xD7Ert0men7vR8LUZg==" crossorigin="anonymous" />
</head>
<body>
<div id="app">
<main class="py-4">
<div class="container">
<div class="row">
<div class="col-md-6 offset-3 col-md-offset-6">
@if($message = Session::get('error'))
<div class="alert alert-danger alert-dismissible fade in" role="alert">
<button type="button" class="close" data-dismiss="alert" aria-label="Close">
<span aria-hidden="true">×</span>
</button>
<strong>Error!</strong> {{ $message }}
</div>
@endif
<div class="alert alert-success success-alert alert-dismissible fade show" role="alert" style="display: none;">
<button type="button" class="close" data-dismiss="alert" aria-label="Close">
<span aria-hidden="true">×</span>
</button>
<strong>Success!</strong> <span class="success-message"></span>
</div>
{{ Session::forget('success') }}
<div class="card card-default">
<div class="card-header">
Razorpay Example
</div>
<div class="card-body text-center">
<div class="form-group mt-1 mb-1">
<input type="text" name="amount" class="form-control amount" placeholder="Enter Amount">
</div>
<button id="rzp-button1" class="btn btn-success btn-lg">Pay</button>
</div>
</div>
</div>
</div>
</div>
</main>
</div>
<script src="https://checkout.razorpay.com/v1/checkout.js"></script>
<script>
$('body').on('click','#rzp-button1',function(e){
e.preventDefault();
var amount = $('.amount').val();
var total_amount = amount * 100;
var options = {
"key": "{{ env('RAZOR_KEY') }}", // Enter the Key ID generated from the Dashboard
"amount": total_amount, // Amount is in currency subunits. Default currency is INR. Hence, 10 refers to 1000 paise
"currency": "INR",
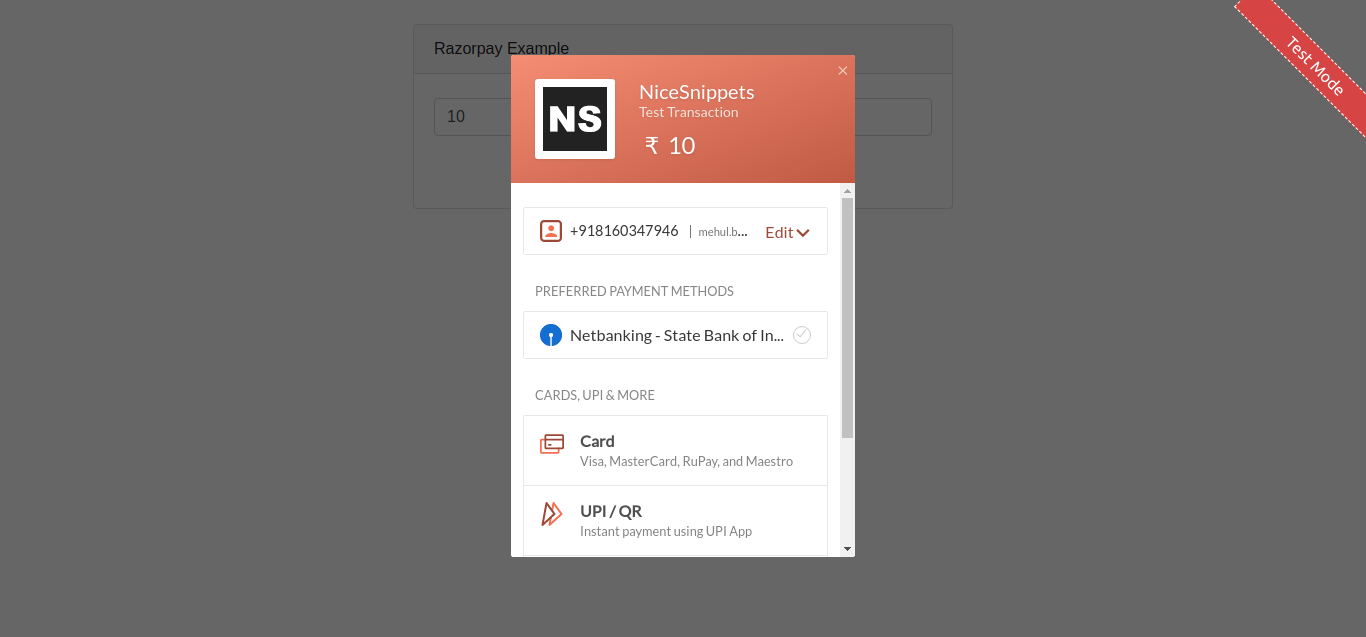
"name": "NiceSnippets",
"description": "Test Transaction",
"image": "https://www.nicesnippets.com/image/imgpsh_fullsize.png",
"order_id": "", //This is a sample Order ID. Pass the `id` obtained in the response of Step 1
"handler": function (response){
$.ajaxSetup({
headers: {
'X-CSRF-TOKEN': $('meta[name="csrf-token"]').attr('content')
}
});
$.ajax({
type:'POST',
url:"{{ route('payment') }}",
data:{razorpay_payment_id:response.razorpay_payment_id,amount:amount},
success:function(data){
$('.success-message').text(data.success);
$('.success-alert').fadeIn('slow', function(){
$('.success-alert').delay(5000).fadeOut();
});
$('.amount').val('');
}
});
},
"prefill": {
"name": "Mehul Bagda",
"email": "mehul.bagda@example.com",
"contact": "818********6"
},
"notes": {
"address": "test test"
},
"theme": {
"color": "#F37254"
}
};
var rzp1 = new Razorpay(options);
rzp1.open();
});
</script>
</body>
</html>
Now we are ready to run our example so run bellow command for quick run:
php artisan serve
Now you can open bellow URL on your browser:
http://localhost:8000/payment-razorpay
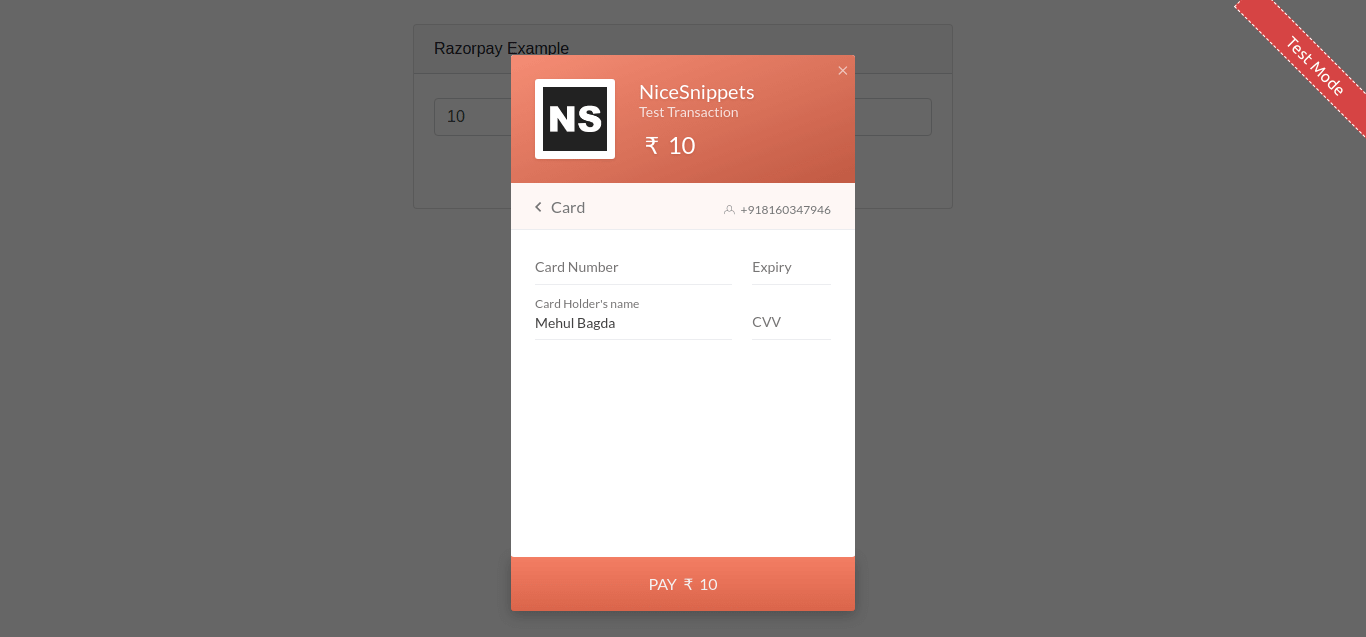
Use following test card details to test the payment:
Card No. : 4111 1111 1111 1111
Month : Any Future Month
Year : Any Future Year
CVV : Any 3 Digit Number
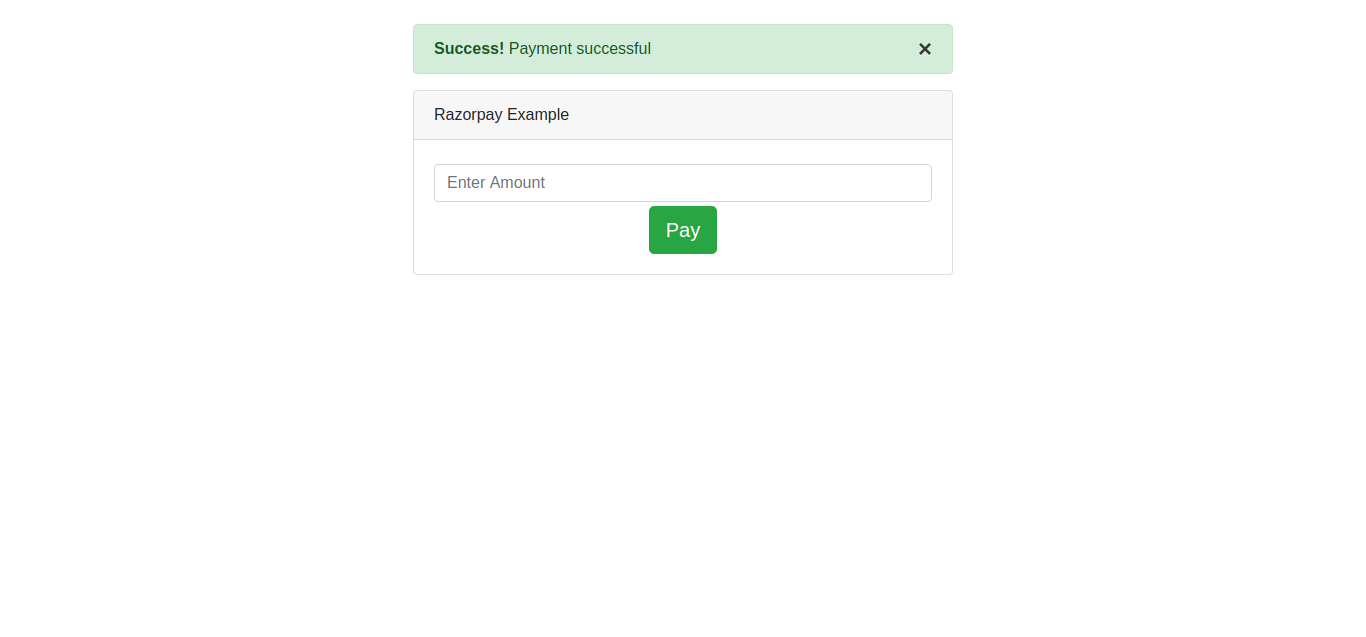
You will see layout as like bellow:
It will help you...
#Laravel 8
#Laravel
