04-Apr-2023
.
Admin
Hi Guys,
Today, I will learn you how to use virtualizedlist in react native. You can easily use virtualizedlist click event in react native. First i will create import namespace virtualizedlist from react-native, after I will make virtualizedlist using for virtualizedlist tag add in react native example.
Here, I will give you full example for simply display virtualizedlist using react native as bellow.
Step 1 - Create project
In the first step Run the following command for create project.
expo init VirtualizedlistApp
Step 2 - App.js
In this step, You will open App.js file and put the code.
import React from 'react';
import { SafeAreaView, View, VirtualizedList, StyleSheet, Text, StatusBar } from 'react-native';

const DATA = [];

const getItem = (data, index) => ({
  id: Math.random().toString(12).substring(0),
  title: `Item box ${index+1}`
});

const getItemCount = (data) => 50;

const Item = ({ title }) => (
  <View style={styles.item}>
    <Text style={styles.title}>{title}</Text>
  </View>
);

const App = () => {
  return (
    <SafeAreaView style={styles.container}>
      <VirtualizedList
        data={DATA}
        initialNumToRender={4}
        renderItem={({ item }) => <Item title={item.title} />}
        keyExtractor={item => item.key}
        getItemCount={getItemCount}
        getItem={getItem}
      />
    </SafeAreaView>
  );
}

const styles = StyleSheet.create({
  container: {
    flex: 1,
    marginTop: StatusBar.currentHeight,
  },
  item: {
    backgroundColor: '#ffb606',
    height: 150,
    justifyContent: 'center',
    marginVertical: 8,
    marginHorizontal: 16,
    padding: 20,
    borderRadius: 20,
  },
  title: {
    fontSize: 32,
  },
});

export default App;
Step 3 - Run project
In the last step run your project using bellow command.
expo start
Output
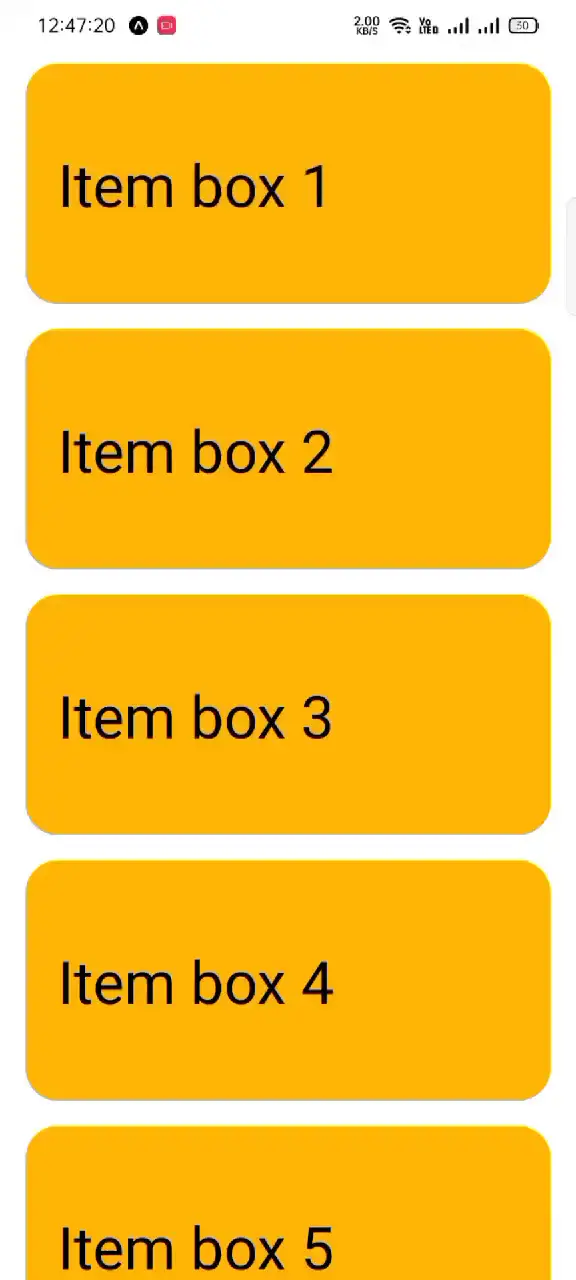
It will help you...
#React Native
