20-Jul-2023
.
Admin

Hello Friends,
In this article we will cover how to implement how to install Jenkins on Ubuntu. you will learn how to install and configure Jenkins on Ubuntu. you can understand the concept of installing Jenkins on Ubuntu. I’m going to show you to install and configure the Jenkins build server.
Install and configure Jenkins on Ubuntu 22.04; Through this tutorial, we will learn how to install and configure Jenkins on Ubuntu 22.04. It appears that the text is generally well-written, but there are a couple of minor changes to consider.
Step 1: Add Jenkins GPG key
Open your command prompt and execute the following command on the command prompt to add Jenkins GPG key:
wget -q -O - https://pkg.jenkins.io/debian-stable/jenkins.io.key | sudo apt-key add -
Step 2: Add Jenkins Stable Debian Package
Execute the following command on the command prompt to add Jenkins stable Debian package repository:
echo "deb https://pkg.jenkins.io/debian-stable binary/" | sudo tee /etc/apt/sources.list.d/jenkins.list
Step 3: Update Dependencies
After both commands have been executed, run apt update so that apt will use the new repository:
sudo apt update
Step 4: Install Jenkins on Ubuntu
Execute the following command on the command prompt to install Jenkins and its dependencies:
sudo apt install jenkins
Then execute the following command on the command prompt to confirm its status:
systemctl status jenkins
If it's not running, start Jenkins using the executing the following command on the command prompt:
sudo systemctl start jenkins
Step 5: Opening the Firewall
By default, Jenkins runs on port 8080. Open that port using ufw:
sudo ufw allow 8080
Note: If the firewall is inactive, the following commands will allow OpenSSH and enable the firewall:
sudo ufw allow OpenSSH
sudo ufw enable
Check ufw’s status to confirm the new rules:
sudo ufw status
You’ll notice that traffic is allowed to port 8080 from anywhere:
OutputStatus: active

To                         Action      From
--                         ------      ----
OpenSSH                    ALLOW       Anywhere
8080                       ALLOW       Anywhere
OpenSSH (v6)               ALLOW       Anywhere (v6)
8080 (v6)                  ALLOW       Anywhere (v6)
With Jenkins installed and a firewall configured, you have completed the installation stage and can continue with configuring Jenkins.
Step 6: Setting Up Jenkins
Use default port, 8080 with your server domain name or IP to set up your installation; address:
http://your_server_ip_or_domain:8080
Now, we should receive the Unlock Jenkins screen, which displays the location of the initial password:
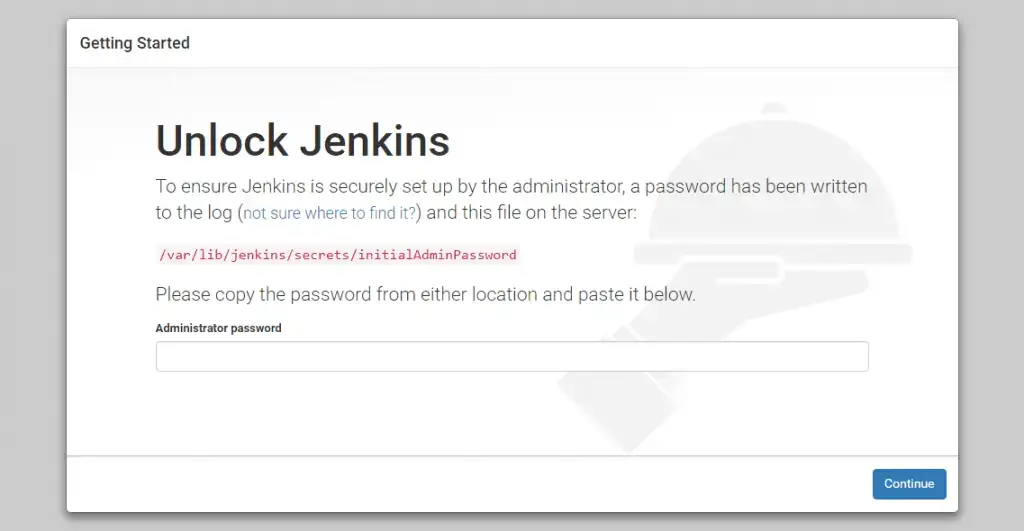
unlock jenkins
In the terminal window, use the cat command to display the password:
sudo cat /var/lib/jenkins/secrets/initialAdminPassword
Copy the 32-character alphanumeric password from the terminal and paste it into the Administrator password field, then click Continue.
The next screen presents the option of installing suggested plugins or selecting specific plugins:
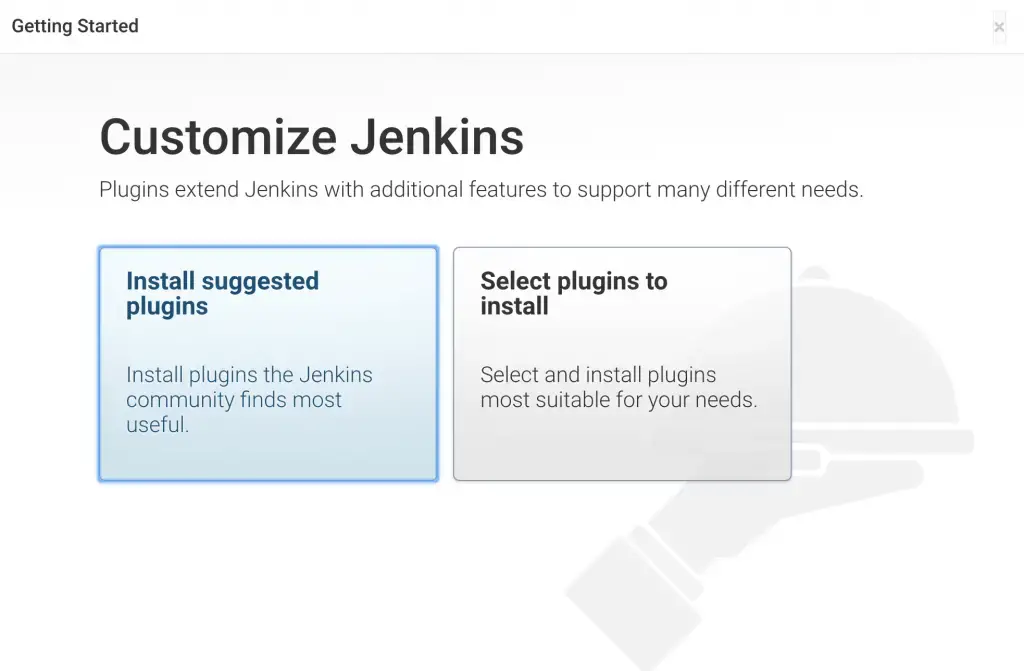
customize jenkins screen two
We’ll click the Install suggested plugins option, which will immediately begin the installation process.
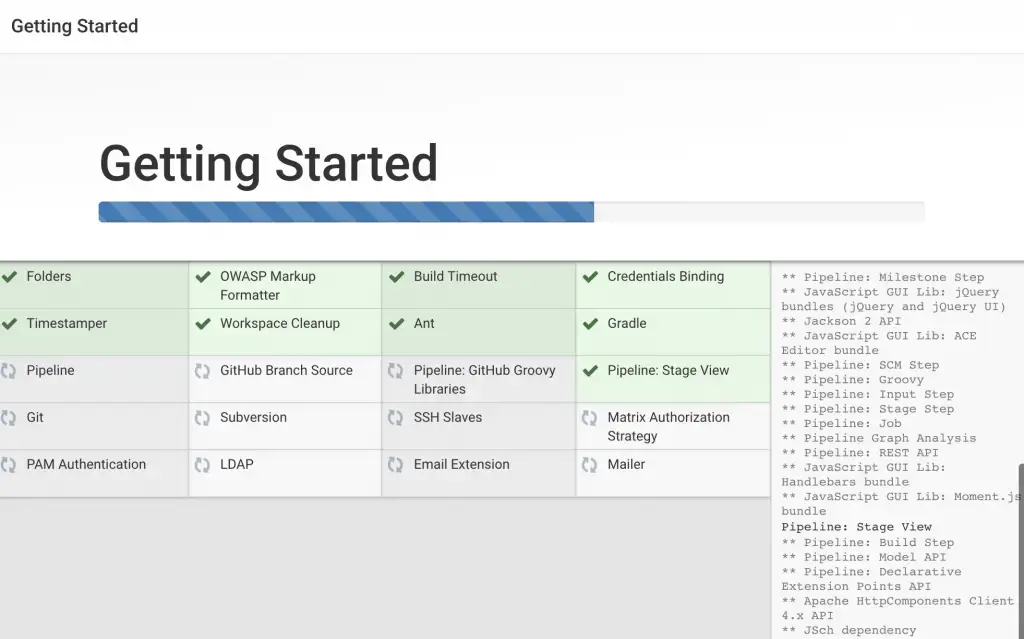
jenkins plugin install two
When the installation is complete, you’ll be prompted to set up the first administrative user. It’s possible to skip this step and continue as admin using the initial password from above, but we’ll take a moment to create the user.
Note: The default Jenkins server is NOT encrypted, so the data submitted with this form is not protected. Refer to How to Configure Jenkins with SSL Using an Nginx Reverse Proxy on Ubuntu 22.04 to protect user credentials and information about builds that are transmitted via the web interface.
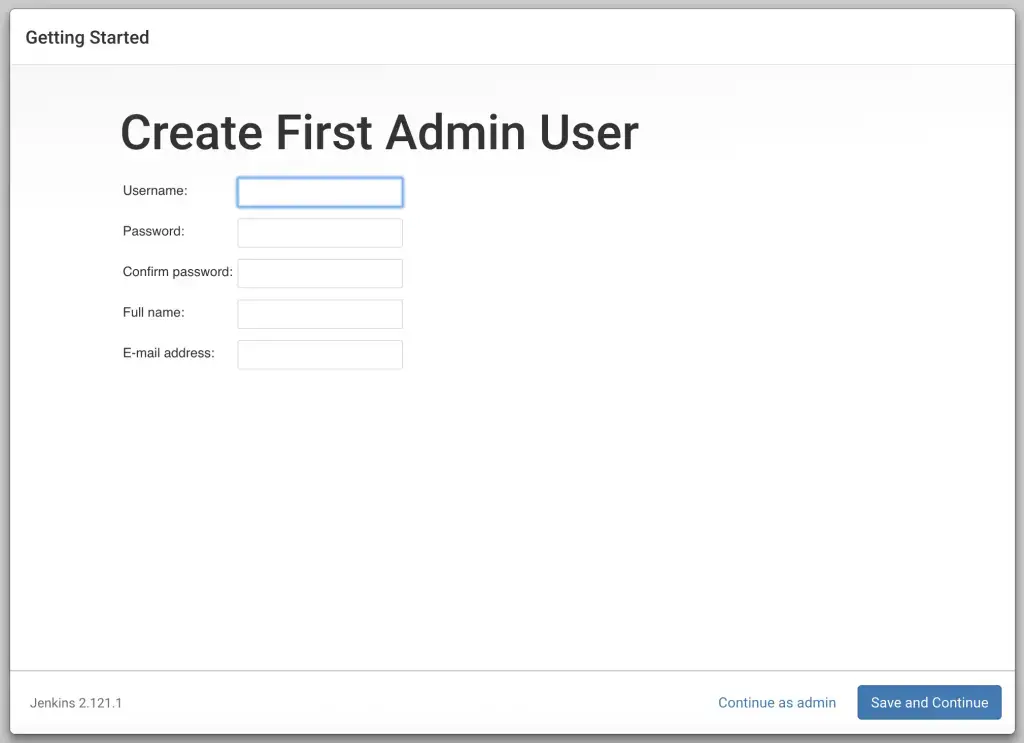
jenkins create user
Enter the name and password for your user:
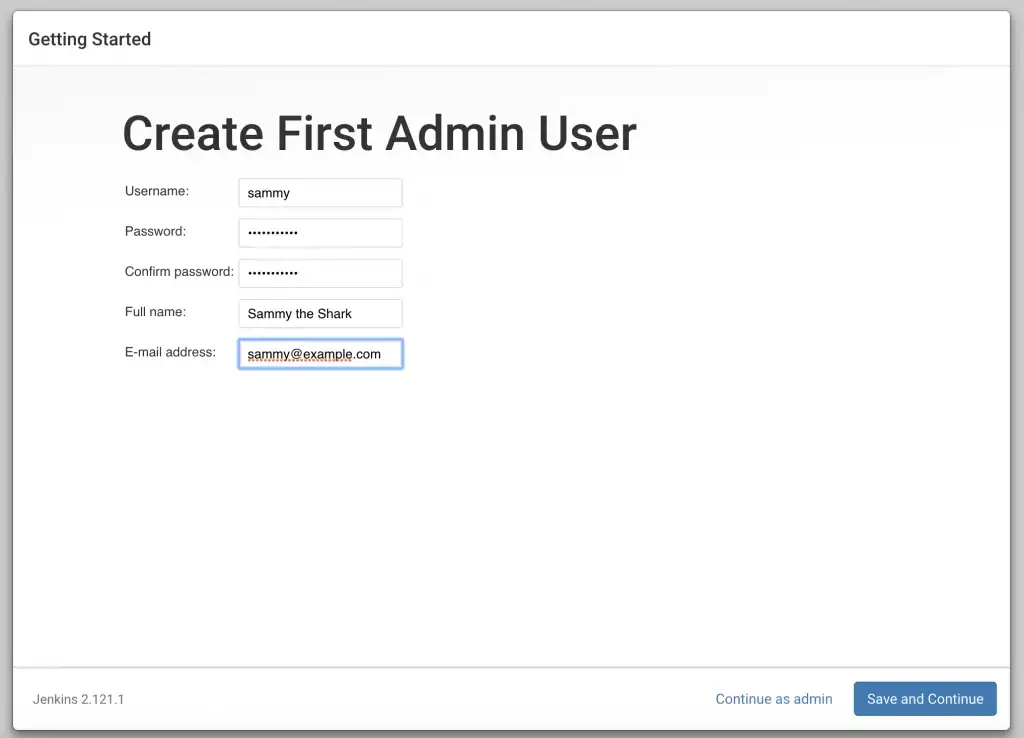
jenkins user info
You’ll receive an Instance Configuration page that will ask you to confirm the preferred URL for your Jenkins instance. Confirm either the domain name for your server or your server’s IP address:
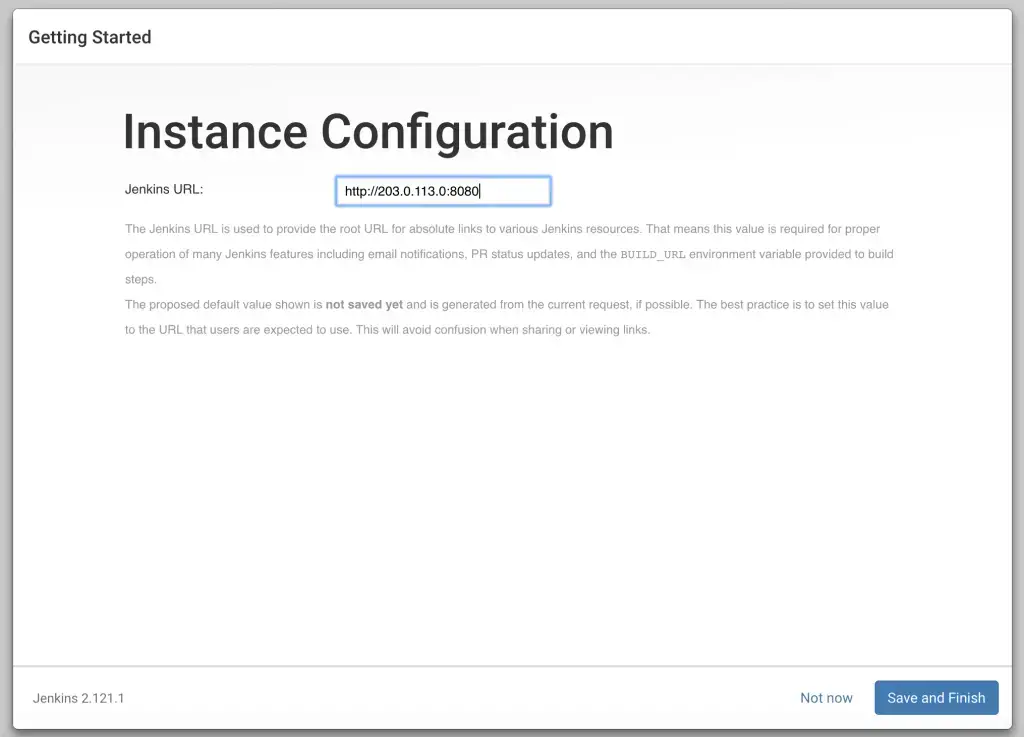
instance confirmation
After confirming the appropriate information, click Save and Finish. You’ll receive a confirmation page confirming that “Jenkins is Ready!”:
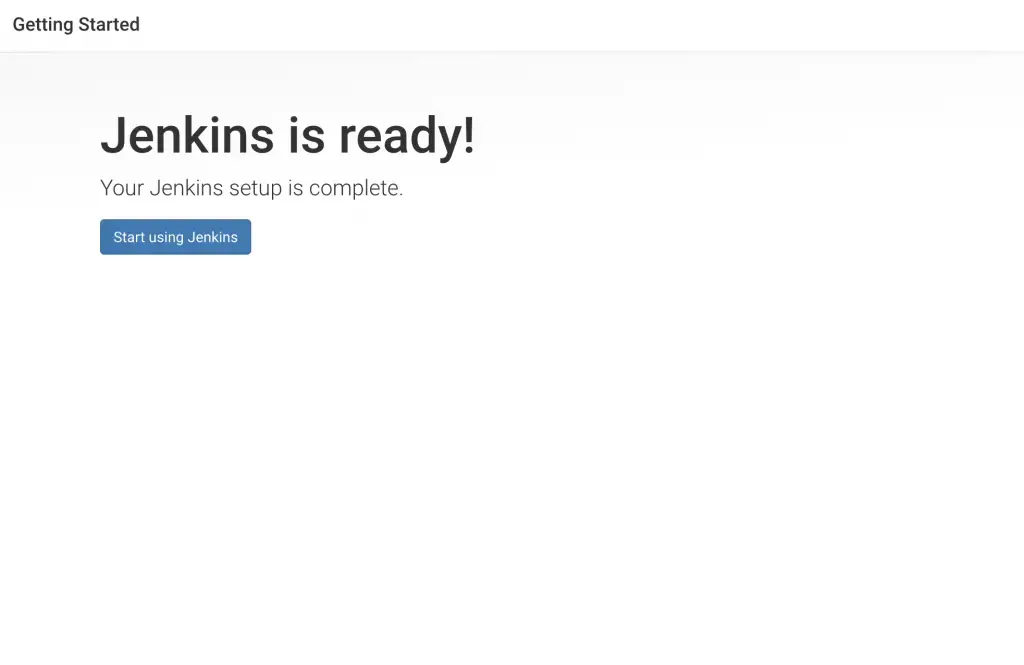
jenkins ready page two
Click Start using Jenkins to visit the main Jenkins dashboard:

jenkins home page
At this point, you have completed a successful installation of Jenkins.
I hope it can help you...
#Ubuntu