03-Mar-2021
.
Admin
Hi Guys,
Today,I will learn you how to create firebase authentication in vue.js. we will show example of vue.js firebase authentication. i will explain step by step vue.js firebase authentication example.We will also learn to register a user, login a user and send password reset mail and logout from firebase app using Vue.js application.
I will use Firebase database to add authentication in Vue project from scratch. Firebase is a robust real-time database which offers Backend-as-a-service. Firebase offers tons of user authentication features such as Signin/Signup with Email and Password, Facebook, Google, Twitter, GitHub, Phone Number etc.
In this example, we’ll be creating a basic Vue app from scratch, adding Firebase to vue app. We’ll create the user registration, user login with email/password, forgot password, logout using various vue.js components and Firebase user authentication API.
Step 1: Install and Setup Vue Project
In this step,Install latest version of Vue CLI to getting started with Vue.
# npm
npm install -g @vue/cli

# yarn
yarn global add @vue/cli
Create a new Vue project and get inside of it using below command.
vue create vue-firebase-auth && cd vue-firebase-auth
Start VUE app by using following command:
npm run serve
Step 2: Add Bootstrap & Global CSS in Vue
In this step,Install Bootstrap 4 module in Vue project.
npm install bootstrap
# or
yarn add bootstrap
Open main.js file and import the Bootstrap path inside of it.
import Vue from 'vue'
import App from './App.vue'
import router from './router'

import 'bootstrap/dist/css/bootstrap.min.css'

Vue.config.productionTip = false

new Vue({
  router,
  render: h => h(App)
}).$mount('#app')
Next, include global styling in a Vue app.
Create src/assets/css folder then create the main.css file.
Add the global CSS path inside the main.js file right after the Bootstrap path.
import Vue from 'vue'
import App from './App.vue'
import router from './router'

import 'bootstrap/dist/css/bootstrap.min.css'
import '@/assets/css/main.css'

Vue.config.productionTip = false

new Vue({
  router,
  render: h => h(App)
}).$mount('#app')
Add the following styling code in assets/css/main.css file.
* {
  box-sizing: border-box;
}

body {
  background: #2554FF !important;
  min-height: 100vh;
  display: flex;
  font-weight: 400;
}

body,
html,
.App,
.vue-tempalte,
.vertical-center {
  width: 100%;
  height: 100%;
}

.navbar-light {
  background-color: #ffffff;
  box-shadow: 0px 14px 80px rgba(34, 35, 58, 0.2);
}

.vertical-center {
  display: flex;
  text-align: left;
  justify-content: center;
  flex-direction: column;
}

.inner-block {
  width: 450px;
  margin: auto;
  background: #ffffff;
  box-shadow: 0px 14px 80px rgba(34, 35, 58, 0.2);
  padding: 40px 55px 45px 55px;
  border-radius: 15px;
  transition: all .3s;
}

.vertical-center .form-control:focus {
  border-color: #2554FF;
  box-shadow: none;
}

.vertical-center h3 {
  text-align: center;
  margin: 0;
  line-height: 1;
  padding-bottom: 20px;
}

label {
  font-weight: 500;
}

.forgot-password,
.forgot-password a {
  text-align: right;
  font-size: 13px;
  padding-top: 10px;
  color: #7a7a7a;
  margin: 0;
}

.forgot-password a {
  color: #2554FF;
}

.social-icons {
  text-align: center;
  font-family: "Open Sans";
  font-weight: 300;
  font-size: 1.5em;
  color: #222222;
}

.social-icons ul {
  list-style: none;
  margin: 0;
  padding: 0;
}
.social-icons ul li {
  display: inline-block;
  zoom: 1;
  width: 65px;
  vertical-align: middle;
  border: 1px solid #e3e8f9;
  font-size: 15px;
  height: 40px;
  line-height: 40px;
  margin-right: 5px;
  background: #f4f6ff;
}

.social-icons ul li a {
  display: block;
  font-size: 1.4em;
  margin: 0 5px;
  text-decoration: none;
}
.social-icons ul li a i {
  -webkit-transition: all 0.2s ease-in;
  -moz-transition: all 0.2s ease-in;
  -o-transition: all 0.2s ease-in;
  -ms-transition: all 0.2s ease-in;
  transition: all 0.2s ease-in;
}

.social-icons ul li a:focus i,
.social-icons ul li a:active i {
  transition: none;
  color: #222222;
}
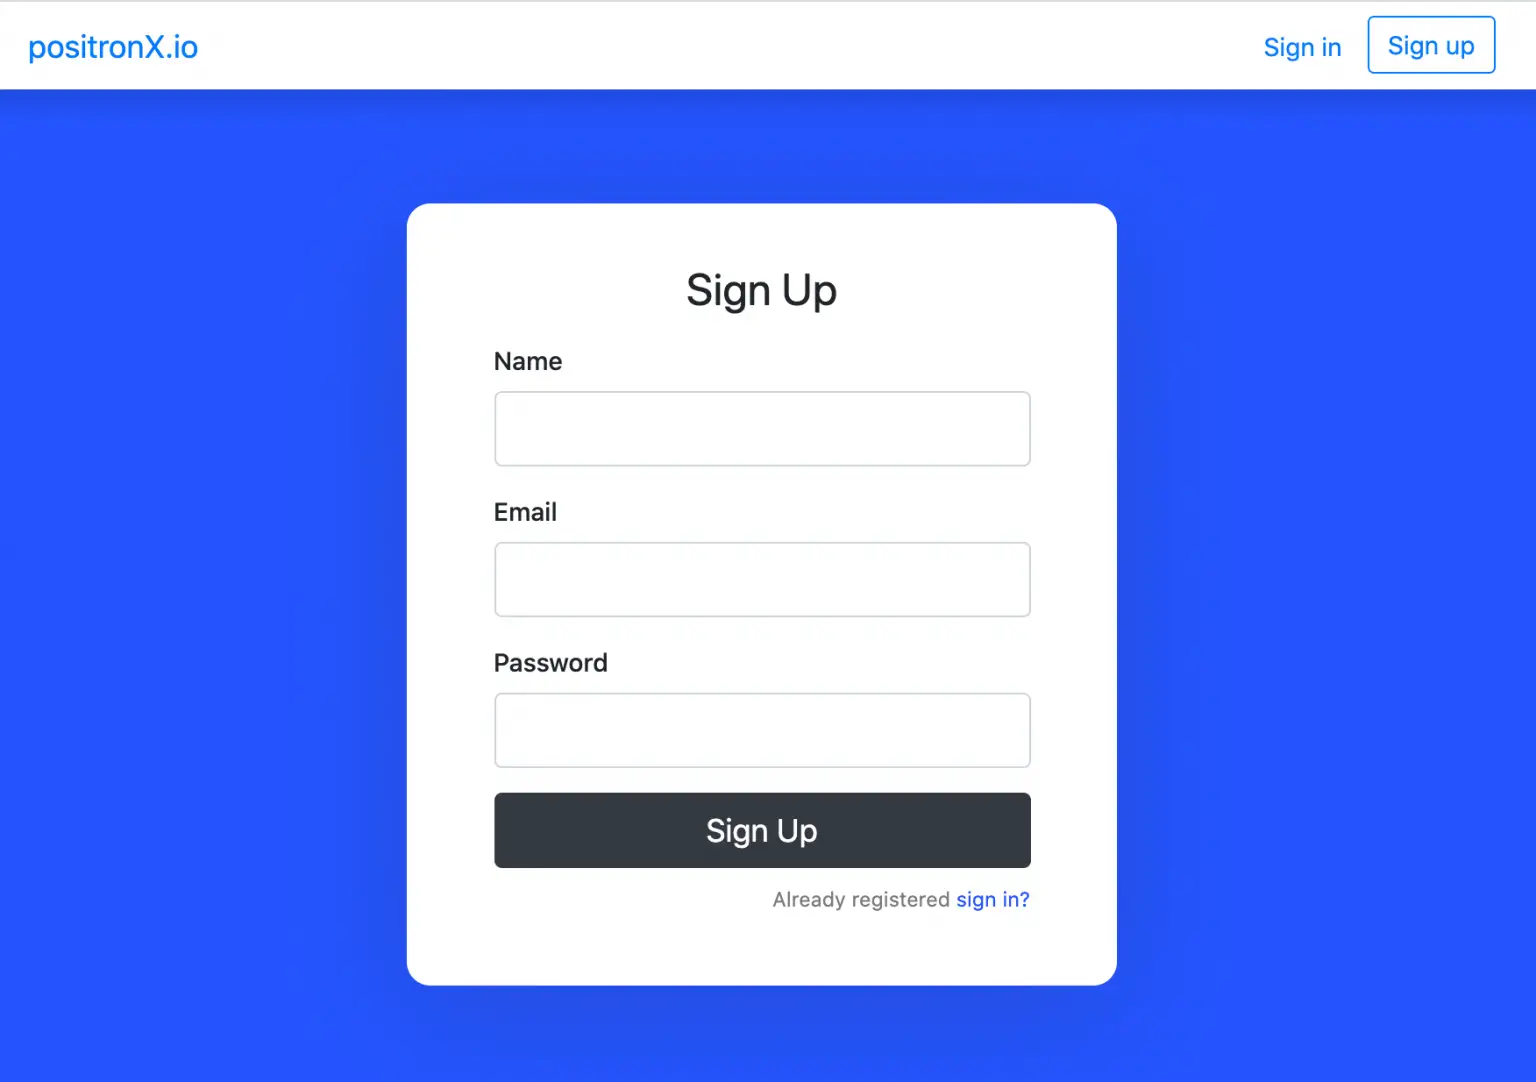
Step:3 Create Components for Firebase Authentication
Now this step,To manage the Firebase authentication in Vue app, we need to create the following components. Go to src/components folder and create the following files.
->Login.vue
->Signup.vue
->Home.vue
->ForgotPassword.vue
An example of Vue component.
<template>
    <div>
       <!-- Content goes here -->
    </div>
</template>

<script>
    export default {
      data() {
         return {...}
      }
    }
</script>
Step 4:Create Routers and Enable Navigation
In this step,Go to src/router/index.js file and replace with the existing code.
import Vue from 'vue'
import VueRouter from 'vue-router'

Vue.use(VueRouter)

  const routes = [
  {
    path: '/',
    name: 'signup',
    component: () => import('../components/Signup.vue')
  },
  {
    path: '/login',
    name: 'login',
    component: () => import('../components/Login.vue')
  },
  {
    path: '/forgot-password',
    name: 'forgot-password',
    component: () => import('../components/ForgotPassword.vue')
  },
  {
    path: '/home',
    name: 'home',
    component: () => import('../components/Home.vue')
  }
]

const router = new VueRouter({
  mode: 'history',
  base: process.env.BASE_URL,
  routes
})

export default router
We are all set with the /signup, /login, /forgort-password and /home routes next we will create a navigation header using Bootstrap nav-bar component.
Open src/App.vue file and the following code.
<template>
  <div class="vue-tempalte">
    <!-- Navigation -->
    <nav class="navbar shadow bg-white rounded justify-content-between flex-nowrap flex-row fixed-top">
      <div class="container">
        <a class="navbar-brand float-left" href="https://www.positronx.io" target="_blank">
           positronX.io
        </a>
        <ul class="nav navbar-nav flex-row float-right">
          <li class="nav-item">
            <router-link class="nav-link pr-3" to="/login">Sign in</router-link>
          </li>
          <li class="nav-item">
            <router-link class="btn btn-outline-primary" to="/">Sign up</router-link>
          </li>
        </ul>
      </div>
    </nav>

    <!-- Main -->
    <div class="App">
      <div class="vertical-center">
        <div class="inner-block">
          <router-view />
        </div>
      </div>
    </div>
  </div>
</template>
Step 5: Set up Firebase Project
We need to create a Firebase project to get started with Vue and Firebase Authentication. Go to console.firebase.google.com to create a Firebase project.
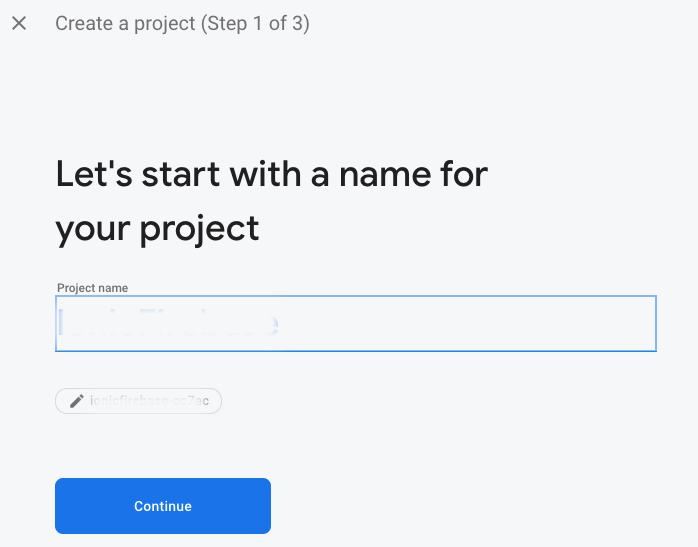
Click “Create a project”.
Click on “Continue” to generate the project.
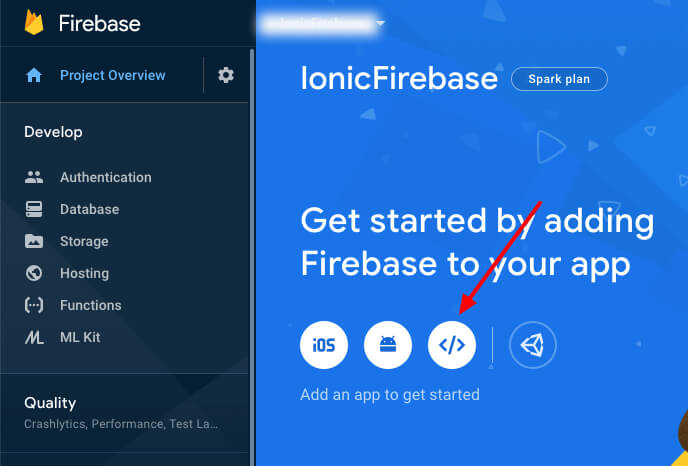
Click on the web icon.
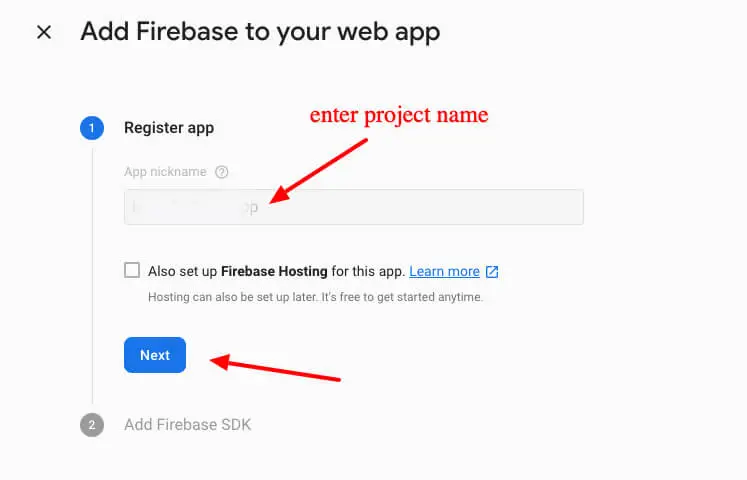
Enter the project name and click on “Next”.
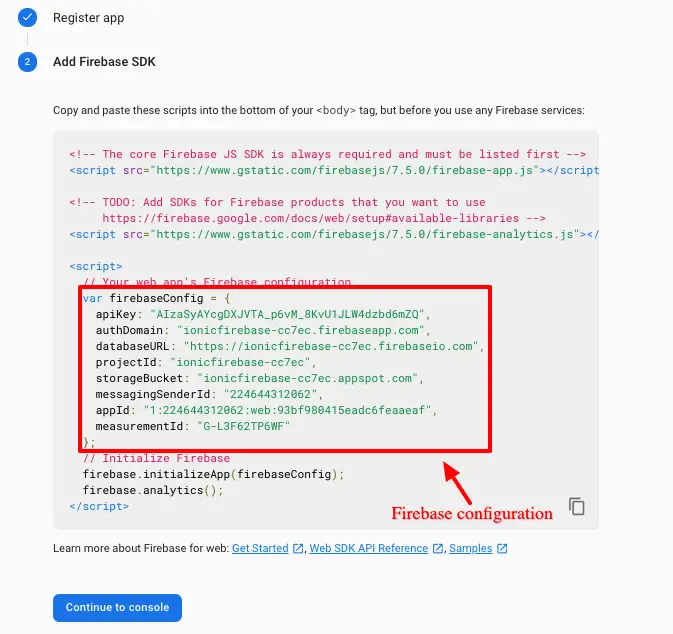
Take Firebase configuration details we will need it later to connect Vue with Firebase.
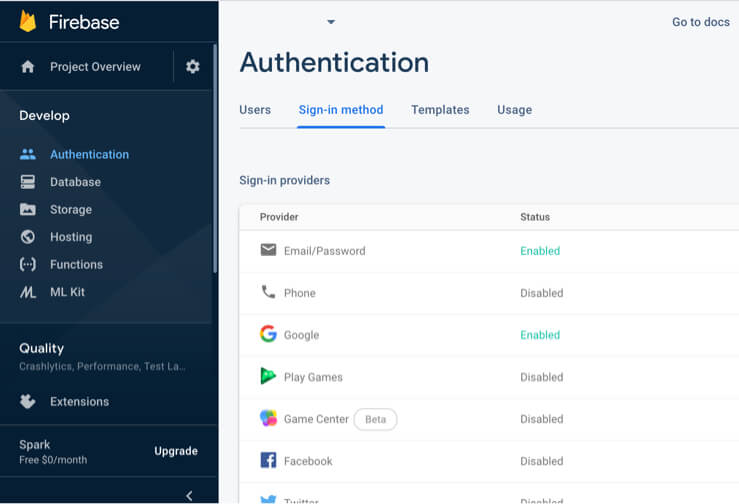
Click on “Authentication”.
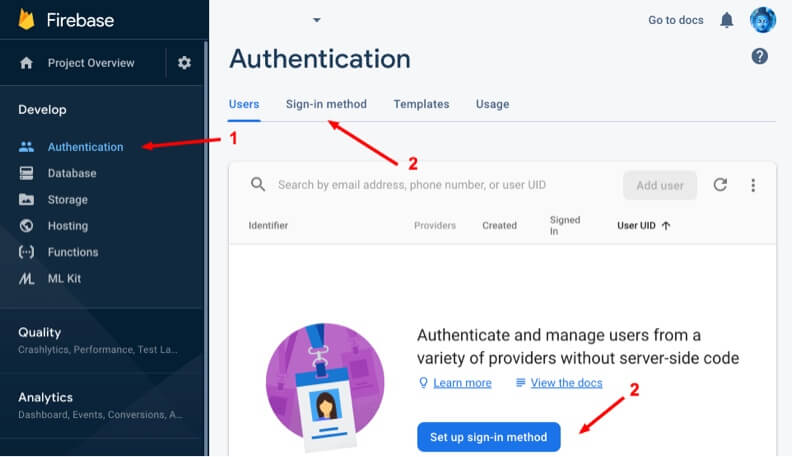
As we can see, Firebase is offering lots of authentication providers that can easily allow you to authenticate using social channels, email/password and phone number. We only need to enable the Email/Password auth provider.
Step 6: Add Firebase in Vue
In this step,To add the Firebase in the Vue app, we need to install the Firebase plugin using the following command.
npm install firebase
Next, go to main.js file here we have to import the Firebase module and add the Firebase configuration details
import Vue from 'vue'
import App from './App.vue'
import router from './router'
import * as firebase from 'firebase';

import 'bootstrap/dist/css/bootstrap.min.css'
import '@/assets/css/main.css'

Vue.config.productionTip = false

const firebaseConfig = {
    apiKey: "api-key",
    authDomain: "project-id.firebaseapp.com",
    databaseURL: "https://project-id.firebaseio.com",
    projectId: "project-id",
    storageBucket: "project-id.appspot.com",
    messagingSenderId: "sender-id",
    appId: "app-id",
    measurementId: "G-measurement-id"
}

firebase.initializeApp(firebaseConfig);

new Vue({
  router,
  render: h => h(App)
}).$mount('#app')
Step 7:User Registration with Email/Password
We are going to register a user with the name, email and password. Open the src/components/Signup.vue file and place the following code.
<template>
    <div class="vue-tempalte">
        <form @submit.prevent="userRegistration">
            <h3>Sign Up</h3>

            <div class="form-group">
                <label>Name</label>
                <input type="text" class="form-control form-control-lg" v-model="user.name" />
            </div>

            <div class="form-group">
                <label>Email</label>
                <input type="email" class="form-control form-control-lg" v-model="user.email" />
            </div>

            <div class="form-group">
                <label>Password</label>
                <input type="password" class="form-control form-control-lg" v-model="user.password" />
            </div>

            <button type="submit" class="btn btn-dark btn-lg btn-block">
               Sign Up
            </button>

            <p class="forgot-password text-right">
                Already registered
                <router-link :to="{name: 'login'}">sign in?</router-link>
            </p>
        </form>
    </div>
</template>
<script>
import firebase from "firebase";

export default {
  data() {
    return {
      user: {
        name: '',
        email: '',
        password: ''
      }
    };
  },
  methods: {
    userRegistration() {
      firebase
      .auth()
      .createUserWithEmailAndPassword(this.user.email, this.user.password)
      .then((res) => {
        res.user
          .updateProfile({
            displayName: this.user.name
          })
          .then(() => {
            this.$router.push('/login')
          });
      })
      .catch((error) => {
         alert(error.message);
      });
    }
  }
};
</script>
To create a new user account via Vue frontend with a name, email and password fields, we took the following approach.
We created a new sign-up form in Vue with Bootstrap. To register a new user, we called createUserWithEmailAndPassword() method and passed user email and password.
Step 8:Vue Firebase Login Example
Let’s implement user login in Vue app with Firebase API, we need correct email and password to access in the app. So, Open the src/components/Login.vue file and include the following code.
<template>
    <div class="vue-tempalte">
        <form @submit.prevent="userLogin">
            <h3>Sign In</h3>

            <div class="form-group">
                <label>Email address</label>
                <input type="email" class="form-control form-control-lg" v-model="user.email" />
            </div>

            <div class="form-group">
                <label>Password</label>
                <input type="password" class="form-control form-control-lg" v-model="user.password" />
            </div>

            <button type="submit" class="btn btn-dark btn-lg btn-block">Sign In</button>

            <p class="forgot-password text-right mt-2 mb-4">
                <router-link to="/forgot-password">Forgot password ?</router-link>
            </p>
        </form>
    </div>
</template>
<script>
import firebase from "firebase";

export default {
  data() {
    return {
      user: {
        email: '',
        password: ''
      }
    };
  },
  methods: {
    userLogin() {
        firebase
        .auth()
        .signInWithEmailAndPassword(this.user.email, this.user.password)
        .then(() => {
            this.$router.push('/home')
        })
        .catch((error) => {
          alert(error.message);
        });
    }
  }
};
</script>
We are using signInWithEmailAndPassword(email, password) method and passing the registered email address and correct password to make the user login to our vue app.
Step 9:Send Password Reset Email
Open the components/ForgotPassword.vue component and add the following code inside of it.
<template>
    <div class="vue-tempalte">
        <form @submit.prevent="forgetPassword">
            <h3>Forgot Password</h3>

            <div class="form-group">
                <label>Email</label>
                <input type="email" class="form-control form-control-lg" v-model="user.email" />
            </div>

            <button type="submit" class="btn btn-dark btn-lg btn-block">Reset password</button>
        </form>
    </div>
</template>

<script>
import firebase from "firebase";

export default {
  data() {
    return {
      user: {
        email: ''
      }
    };
  },
  methods: {
    forgetPassword() {
        firebase
        .auth()
        .sendPasswordResetEmail(this.user.email)
        .then(() => {
            alert('Check your registered email to reset the password!')
            this.user = {
              email: ''
            }
        }).catch((error) => {
          alert(error)
        })
    }
  }
};
</script>
The sendPasswordResetEmail(email) method takes email id, and when it is appropriately called, it sends the password reset instruction on the registered email id.
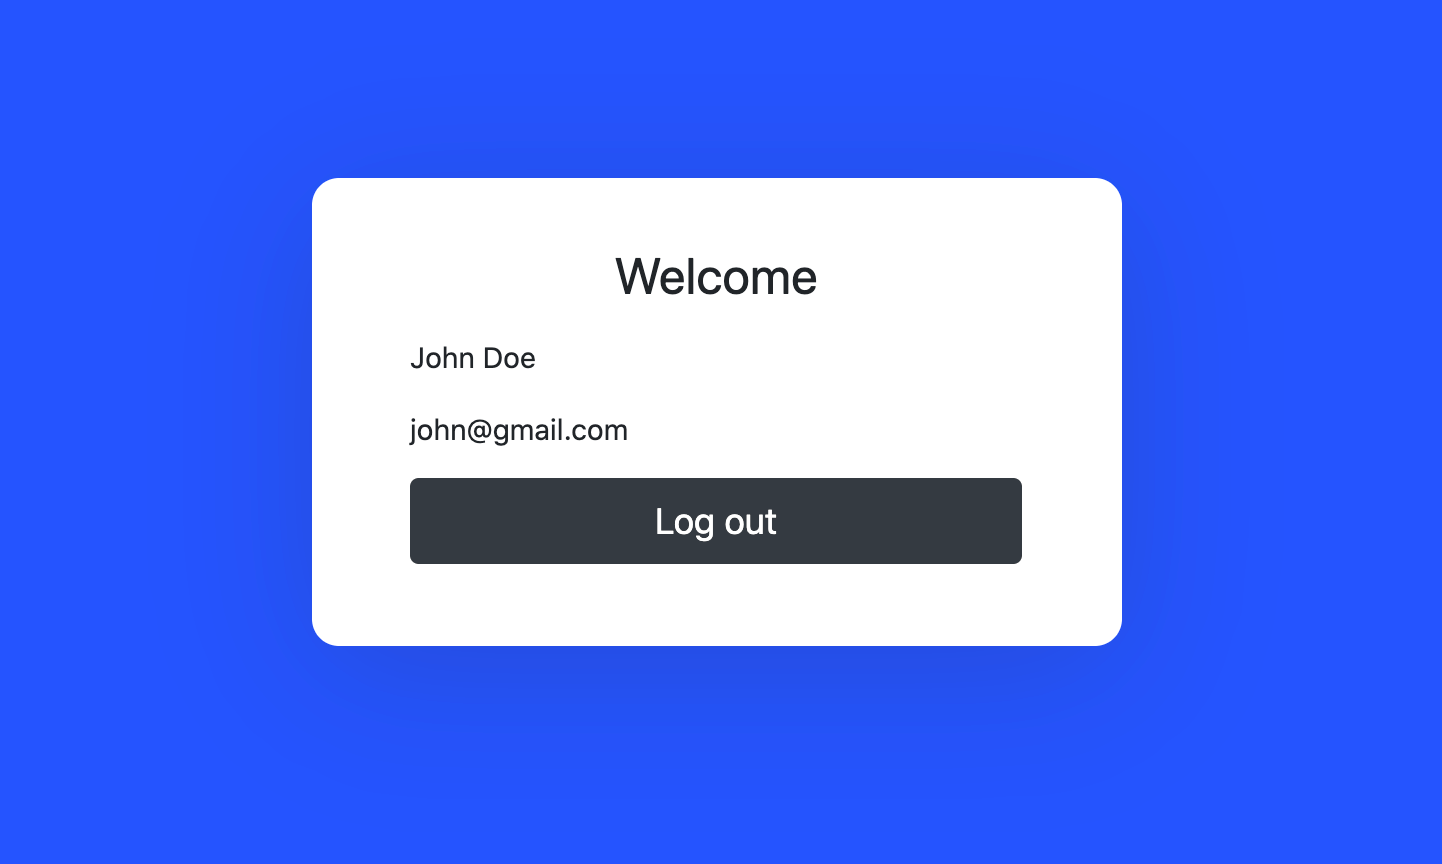
Step 10:User Logout and Display Logged in User Data
We are going to cover up how to logout from the Firebase and Vue app and display the logged in user’s data.
Open the src/components/Home.vue file and place the following code.
<template>
    <div class="vue-tempalte">
        <h3>Welcome</h3>
           <p>{{user.displayName}}</p>
           <p>{{user.email}}</p>
        <button
        type="submit"
        class="btn btn-dark btn-lg btn-block"
        @click="logOut()">
            Log out
        </button>
    </div>
</template>

<script>
import firebase from "firebase";

export default {
  data() {
    return {
      user: null
    };
  },
  created() {
    firebase.auth().onAuthStateChanged((user) => {
      if (user) {
        this.user = user;
      } else {
        this.user = null;
      }
    });
  },
  methods: {
    logOut() {
      firebase.auth().signOut().then(() => {
        firebase.auth().onAuthStateChanged(() => {
          this.$router.push('/login')
        })
      })
    }
  }
};
</script>
In the given above source code, we are getting the logged-in user’s data when the auth state is changing. The auth.signOut() method logs out the user from the firebase app.
It will help you...
#Vue.Js
