10-Mar-2023
.
Admin

Hi Guys,
In this example,I will learn you how to restore back deleted record in laravel.you can easy and simply restore back deleted record in laravel.
In this case, you will need to be contacted by a developer or database administrator to Restored back your deleted Data.
Laravel Eloquent ORM provides us soft delete trait, we use this trait with trashed to restore or recover data, I will give you a quick tip to undo or restore data in Laravel Project.
Step 1: Install Laravel Project
First, you need to download the laravel fresh setup. Use this command then download laravel project setup :
composer create-project --prefer-dist laravel/laravel blog
Step 2: Setup Database
After successfully install laravel 8 Application, Go to your project .env file and set up database credential and move next step
DB_CONNECTION=mysql
DB_HOST=127.0.0.1
DB_PORT=3306
DB_DATABASE=here your database name
DB_USERNAME=here database username
DB_PASSWORD=here database password
Step 3: Create Migration
we are going to create file upload application for restores. so we have to create migration for "restores" table and create model using Laravel 8 php artisan command, so first fire bellow command:
php artisan make:migration create_restores_table --table=restores
After this command you will find one file in following path "database/migrations" and you have to put bellow code in your migration file for create restores table
<?php

use Illuminate\Database\Migrations\Migration;
use Illuminate\Database\Schema\Blueprint;
use Illuminate\Support\Facades\Schema;

class CreateRestoresTable extends Migration
{
    /**
     * Run the migrations.
     *
     * @return void
     */
    public function up()
    {
        Schema::create('restores', function (Blueprint $table) {
            $table->id();
            $table->string('name',25);
            $table->string('address',70);
            $table->timestamps();
            $table->softDeletes();
        });
    }

    /**
     * Reverse the migrations.
     *
     * @return void
     */
    public function down()
    {
        Schema::dropIfExists('restores');
    }
}
Now you have to run this migration by following command:
php artisan migrate
Now you can add table field in Restore model :
App\Models\Restore.php
<?php

namespace App\Models;

use Illuminate\Database\Eloquent\Factories\HasFactory;
use Illuminate\Database\Eloquent\Model;
use Illuminate\Database\Eloquent\SoftDeletes;

class Restore extends Model
{
    use SoftDeletes,HasFactory;
    protected $table = 'restores';
}
Step 4: Add Route
Here, we need to add route for ajax form submit. so open your "routes/web.php" file and add following route.
routes/web.php
use App\Http\Controllers\DataRestoreController;

Route::get('/data', [DataRestoreController::class, 'index'])->name('data.list');
Route::get('/data-delete/{id}', [DataRestoreController::class, 'deleteData'])->name('data.delete');
Route::get('/data-restore/{id}', [DataRestoreController::class, 'restore'])->name('data.restore');
Step 5: Add Controller
In this step, now we should create new controller as DataRestoreController. So run bellow command and create new controller. bellow controller for create DataRestoreController
php artisan make:controller DataRestoreController
app/Http/Controllers/DataRestoreController.php
<?php

namespace App\Http\Controllers;

use Illuminate\Http\Request;
use App\Models\Restore;
use Session;

class DataRestoreController extends Controller
{
    public function index(){
        $Getdata = Restore::get();
        return view('index',compact('Getdata'));
    }

    public function deleteData($id){
        $deleteData = Restore::find($id);
        $deleteData->delete();
        return redirect()->route('data.list')->with('message','Data successfully deleted. Whoops, Undo');
    }

    public function restore($id)
    {
        $restoreDataId = Restore::withTrashed()->find($id);
        if($restoreDataId && $restoreDataId->trashed()){
           $restoreDataId->restore();
        }
        return redirect()->route('data.list')->with('message','Data restored successfully');
    }
}
Step 6: Add Blade
In last step. In this step we have to create two blade file index file. So mainly we have to create contactForm file and contactMail file. So finally you have to create two following bellow blade file:
resources/views/index.blade.php
<!DOCTYPE html>
<html lang="en">
   <head>
      <title>List Data</title>
      <meta charset="utf-8">
      <meta name="viewport" content="width=device-width, initial-scale=1">
      <link rel="stylesheet" href="https://maxcdn.bootstrapcdn.com/bootstrap/4.5.2/css/bootstrap.min.css">
      <script src="https://ajax.googleapis.com/ajax/libs/jquery/3.5.1/jquery.min.js"></script>
      <script src="https://cdnjs.cloudflare.com/ajax/libs/popper.js/1.16.0/umd/popper.min.js"></script>
      <script src="https://maxcdn.bootstrapcdn.com/bootstrap/4.5.2/js/bootstrap.min.js"></script>
   </head>
   <body>
      <div class="container">
          <br>
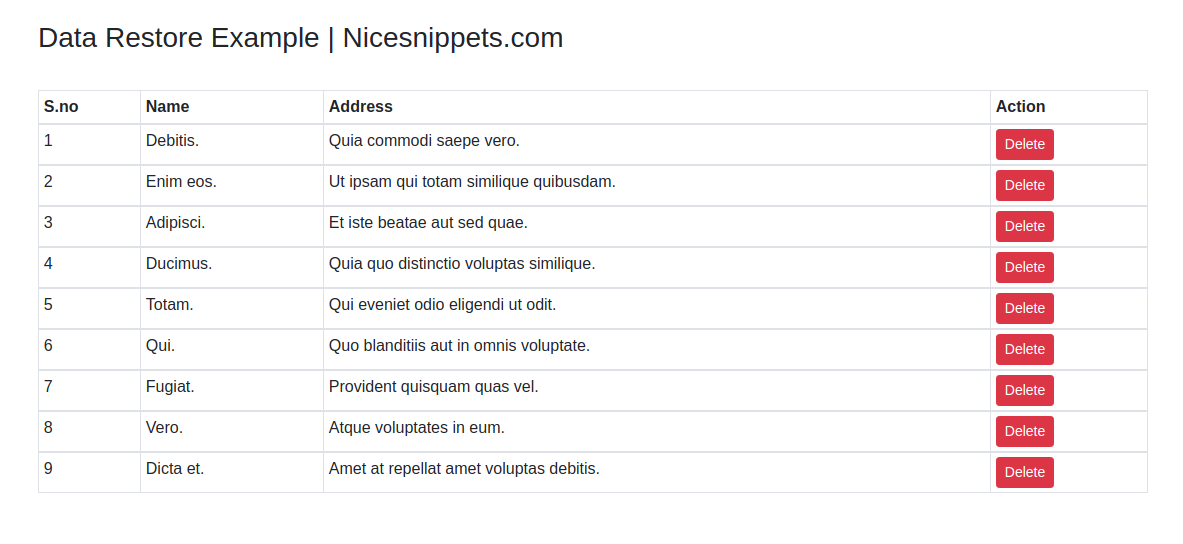
         <h3>Data Restore Example | Nicesnippets.com</h3>
         <br>
         <div class="row justify-content-end mb-1">
            <div class="col-sm-8">
               @if(Session::has('message'))
               <div class="alert alert-success alert-dismissible p-2">
                  <a href="#" class="close" data-dismiss="alert" aria-label="close">×</a>
                  <strong>Success!</strong> {!! session('message')!!}.
               </div>
               @endif
            </div>
         </div>
         <table class="table table-bordered table-sm">
            <thead>
               <tr>
                  <th>S.no</th>
                  <th>Name</th>
                  <th>Address</th>
                 <th>Action</th>
               </tr>
            </thead>
            <tbody>
                @if ($Getdata->count() > 0 )
               @foreach($Getdata as $key => $data)
               <tr>
                  <td>{{ $key+1 }}</td>
                  <td>{{$data->name}}</td>
                  <td>{{$data->address}}</td>
                  <td>
                <a href="{{route('data.delete',$data->id)}}" class="btn btn-danger btn-sm" role="button">Delete</a>
                 </td>
               </tr>
            </tbody>
            @endforeach
            @else
            <h2>No Data Found !</h2>
            @endif
         </table>
      </div>
   </body>
</html>
Now we are ready to run contact form submit request with laravel 8 so run bellow command for quick run:
php artisan serve
Now you can open bellow URL on your browser:
localhost:8000/data
It will help you...
#Laravel 8
#Laravel 7
#Laravel
#Laravel 6