10-Apr-2023
.
Admin

Hello Friends,
In this example, you will learn laravel validation custom error messages tutorial. We will look at an example of custom error message laravel validator. if you have a question about laravel custom validation message in a controller then I will give a simple example with solution. you will learn laravel form validation custom error messages. you will do the following things for laravel change validation error message.
The function in it is getting 3 values: attribute, value, and fail. The attribute is the field for which the validation is happening. The value corresponds to the actual value of the said object and failure is the callback method that would be executed once the validation fails.
You can use this example with laravel 6, laravel 7, laravel 8, and laravel 9 versions.
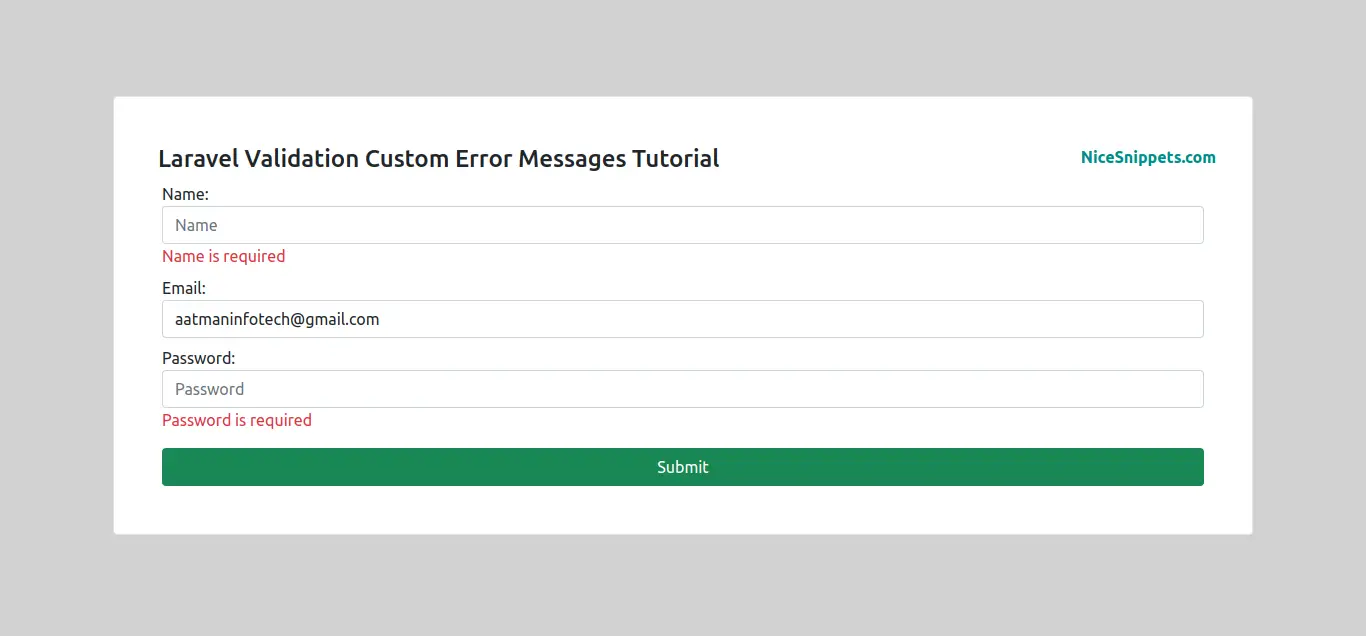
You have just to follow the below step and you will get the layout as below:
Step 1: Install Laravel
This is optional; however, if you have not created the laravel app, then you may go ahead and execute the below command:
composer create-project laravel/laravel example-app
Step 2: Database Configuration
In this step we have to make database configuration for the example database name, email, password, etc. So let's open the .env file and fill in all details like as below:
.env
DB_CONNECTION=mysql
DB_HOST=127.0.0.1
DB_PORT=3306
DB_DATABASE=here your database name(blog)
DB_USERNAME=here database username(root)
DB_PASSWORD=here database password(root)
Step 3: Create CustomError Controller
Run below command to create CustomError controller
php artisan make:controller CustomErrorController
app/Http/Controllers/CustomErrorController.php
<?php

namespace App\Http\Controllers;
use Illuminate\Http\Request;
use App\Models\User;

class CustomErrorController extends Controller
{

    public function index()
    {
        return view('form');
    }

    public function store(Request $request)
    {
        $request->validate(
            [
                'name' => 'required',
                'password' => 'required',
                'email' => 'required'
            ],
            [
                'name.required' => 'Name is required',
                'password.required' => 'Password is required'
            ]
          );

        $input = $request->all();
        $input['password'] = bcrypt($input['password']);
        $user = User::create($input);

        return back()->with('success', 'User created successfully.');
    }

}
Step 4: Create CustomError Route
web.php
<?php

use Illuminate\Support\Facades\Route;
use App\Http\Controllers\CustomErrorController;

/*
|--------------------------------------------------------------------------
| Web Routes
|--------------------------------------------------------------------------
|
| Here is where you can register web routes for your application. These
| routes are loaded by the RouteServiceProvider within a group which
| contains the "web" middleware group. Now create something great!
|
*/

Route::get('form', [CustomErrorController::class, 'index'])->name('form');
Route::post('store', [CustomErrorController::class, 'store'])->name('store');
Run the migration command to migrate User Table:
php artisan migrate
Step 5: Create Carousel Slider View
let's create form.blade.php(resources/views/form.blade.php) for form and we will write design code here and put the following code:
views/form.blade.php
<!DOCTYPE html>
<html>
<head>
    <title>Laravel Validation Custom Error Messages Tutorial - NiceSnippets.com</title>
    <meta charset="utf-8">
    <meta http-equiv="X-UA-Compatible" content="IE=edge">
    <meta name="viewport" content="width=device-width, initial-scale=1">
    <link href="https://cdn.jsdelivr.net/npm/bootstrap@5.0.2/dist/css/bootstrap.min.css" rel="stylesheet" integrity="sha384-EVSTQN3/azprG1Anm3QDgpJLIm9Nao0Yz1ztcQTwFspd3yD65VohhpuuCOmLASjC" crossorigin="anonymous">
    <style>
        body{
            background-color: #d2d2d2;
        }
        form{
            background-color: #fff;
        }
    </style>
</head>
<body>
    <div class="container">
        <div class="row">
            <div class="col-md-12 mt-5">
                <div class="row">
                    <form method="POST" action="{{ route('store') }}" class="border rounded p-5 mt-5" autocomplete='off'>
                        @csrf
                        <div class="col-md-12">
                            <div class="row">
                                <h4 class="col-md-7 ps-2 m-0">Laravel Validation Custom Error Messages Tutorial</h4>
                                <strong class="col-md-5 p-0 m-0 text-end"  style="color: #008B8B">NiceSnippets.com</strong>
                                @if(Session::has('success'))
                                <div class="alert alert-success">
                                    {{ Session::get('success') }}
                                    @php
                                        Session::forget('success');
                                    @endphp
                                </div>
                                @endif
                            </div>
                        </div>
                        <div class="col-md-12 mt-2">
                            <label for="name" class="form-label mb-0">Name:</label>
                            <input type="text" name="name" class="form-control" placeholder="Name">
                            @if ($errors->has('name'))
                                <span class="text-danger">{{ $errors->first('name') }}</span>
                            @endif
                        </div>
                        <div class="col-md-12 mt-2">
                            <label for="email" class="form-label mb-0">Email:</label>
                            <input type="text" name="email" class="form-control" placeholder="Email">
                            @if ($errors->has('email'))
                                <span class="text-danger">{{ $errors->first('email') }}</span>
                            @endif
                        </div>
                        <div class="col-md-12 mt-2">
                            <label for="password" class="form-label mb-0">Password:</label>
                            <input type="password" name="password" class="form-control" placeholder="Password">
                            @if ($errors->has('password'))
                                <span class="text-danger">{{ $errors->first('password') }}</span>
                            @endif
                        </div>
                        <div class="col-md-12">
                            <button class="col-md-12 btn btn-success btn-submit mt-3">Submit</button>
                        </div>
                    </form>
                </div>
            </div>
        </div>
    </div>
</body>
</html>
Step 6: Start Development Server
Start the development server. Use the PHP artisan serve command and start your server:
php artisan serve
Now you are ready to run our example so run the below command to quick run.
http://localhost:8000/form
Output:
I hope it can help you...
#Laravel
