10-Apr-2023
.
Admin
Hello Friends,
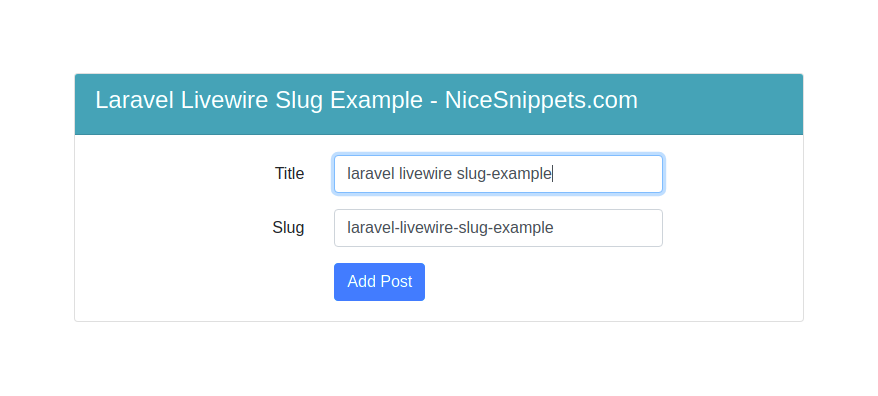
In this blog, I would like to share with you how to generate slug in laravel livewire .I will show you a complete example for generate slug example with laravel livewire. We will talk about how to create unique slug in laravel.
Livewire is a full-stack framework for Laravel that makes building dynamic interfaces simple, without leaving the comfort of Laravel.Livewire relies solely on AJAX requests to do all its server communicaton.
Here I will give full example for laravel livewire generate slug example,So Lets follow the bellow step.
Step 1 : Install Laravel App
In First step, We need to get fresh laravel version application using bellow command. So Let's open terminal and run bellow command.
composer create-project --prefer-dist laravel/laravel blog
Step 2 : Setup Database Configuration
After successfully install laravel app thenafter configure databse setup. We will open ".env" file and change the database name, username and password in the env file.
DB_CONNECTION=mysql
DB_HOST=127.0.0.1
DB_PORT=3306
DB_DATABASE=Enter_Your_Database_Name
DB_USERNAME=Enter_Your_Database_Username
DB_PASSWORD=Enter_Your_Database_Password
Step 3 : Install Livewire
In this step, You will simply install livewire to our laravel application using bellow command:
composer require livewire/livewire
Step 4 : Install "cviebrock/eloquent-sluggable" Package
In this step, You will simply install "cviebrock/eloquent-sluggable" for generate slug to our laravel application using bellow command:
composer require cviebrock/eloquent-sluggable
The package will automatically register its service provider.publish the configuration file if you want to change any defaults using bellow command:
php artisan vendor:publish --provider="Cviebrock\EloquentSluggable\ServiceProvider"
Your models should use the Sluggable trait, which has an abstract method sluggable() that you need to define. This is where any model-specific configuration is set (see Configuration below for details):
use Cviebrock\EloquentSluggable\Sluggable;

class Post extends Model
{
    use Sluggable;

    /**
     * Return the sluggable configuration array for this model.
     *
     * @return array
     */
    public function sluggable(): array
    {
        return [
            'slug' => [
                'source' => 'title'
            ]
        ];
    }
}
Step 5 : Create Post Table
In this step, We have to create migration for blogs table using bellow artisan command. So let's open terminal and run bello command :
php artisan make:model Post -m
database/migrations/2021_06_05_044246_create_posts_table.php
<?php

use Illuminate\Database\Migrations\Migration;
use Illuminate\Database\Schema\Blueprint;
use Illuminate\Support\Facades\Schema;

class CreatePostsTable extends Migration
{
    /**
     * Run the migrations.
     *
     * @return void
     */
    public function up()
    {
        Schema::create('posts', function (Blueprint $table) {
            $table->id();
            $table->string('title');
            $table->string('slug');
            $table->timestamps();
        });
    }

    /**
     * Reverse the migrations.
     *
     * @return void
     */
    public function down()
    {
        Schema::dropIfExists('posts');
    }
}
App/Models/Post.php
<?php

namespace App\Models;

use Illuminate\Database\Eloquent\Factories\HasFactory;
use Illuminate\Database\Eloquent\Model;
use Cviebrock\EloquentSluggable\Sluggable;

class Post extends Model
{
    use HasFactory,Sluggable;

    protected $fillable = [
        'title','slug'
    ];

    /**
     * Return the sluggable configuration array for this model.
     *
     * @return array
     */
    public function sluggable(): array
    {
        return [
            'slug' => [
                'source' => 'title'
            ]
        ];
    }
}
Step 6 : Create Component
Now, You can create livewire component using bellow command, So Let's run bellow command to create Posts form component:
php artisan make:livewire Posts
Now they created fies on both path:
app/Http/Livewire/Posts.php
resources/views/livewire/posts.blade.php
Now first file we will update as bellow for Posts.php file.
app/Http/Livewire/Posts.php
<?php

namespace App\Http\Livewire;

use Livewire\Component;
use \Cviebrock\EloquentSluggable\Services\SlugService;
use App\Models\Post;

class Posts extends Component
{
    public $title;
    public $slug;

    public function render()
    {
        $posts = Post::latest()->take(5)->get();
        return view('livewire.posts', compact('posts'));
    }

    public function updatedTitle()
    {
        $this->slug = SlugService::createSlug(Post::class, 'slug', $this->title);
    }

    public function store()
    {
        Post::create([
            'title' => $this->title,
            'slug'  => $this->slug
        ]);
        $this->title = '';
        $this->slug = '';
    }
}
Step 7 : Add Route
now, we need to add route for Show posts and create post in laravel application. so open your "routes/web.php" file and add following route.
routes/web.php
Route::view('posts','livewire.home');
Step 8 : Create View
Here, we will create blade file for call modal route. in this file we will use @livewireStyles, @livewireScripts and @livewire('posts'). so let's add it.
resources/views/livewire/home.blade.php
<!DOCTYPE html>
<html>
<head>
    <title></title>
    <script src="{{ asset('js/app.js') }}" defer></script>
    <link href="{{ asset('css/app.css') }}" rel="stylesheet">
    <link rel="stylesheet" href="https://cdnjs.cloudflare.com/ajax/libs/font-awesome/5.15.3/css/all.min.css" integrity="sha512-iBBXm8fW90+nuLcSKlbmrPcLa0OT92xO1BIsZ+ywDWZCvqsWgccV3gFoRBv0z+8dLJgyAHIhR35VZc2oM/gI1w==" crossorigin="anonymous" referrerpolicy="no-referrer" />
    <script src="https://cdnjs.cloudflare.com/ajax/libs/twitter-bootstrap/4.6.0/js/bootstrap.min.js" integrity="sha512-XKa9Hemdy1Ui3KSGgJdgMyYlUg1gM+QhL6cnlyTe2qzMCYm4nAZ1PsVerQzTTXzonUR+dmswHqgJPuwCq1MaAg==" crossorigin="anonymous" referrerpolicy="no-referrer"></script>
    <link rel="stylesheet" href="https://cdnjs.cloudflare.com/ajax/libs/twitter-bootstrap/4.6.0/css/bootstrap.min.css" integrity="sha512-P5MgMn1jBN01asBgU0z60Qk4QxiXo86+wlFahKrsQf37c9cro517WzVSPPV1tDKzhku2iJ2FVgL67wG03SGnNA==" crossorigin="anonymous" referrerpolicy="no-referrer" />
    @livewireStyles
</head>
<body>
    <div class="container mt-5">
        <div class="row justify-content-center mt-5">
            <div class="col-md-8 mt-5">
                <div class="card">
                    <div class="card-header bg-info text-white">
                        <h4>Laravel Livewire Slug Example - NiceSnippets.com</h4>
                    </div>
                    <div class="card-body">
                        @if (session()->has('message'))
                            <div class="alert alert-success">
                                {{ session('message') }}
                            </div>
                        @endif
                        @livewire('posts')
                    </div>
                </div>
            </div>
        </div>
    </div>
    @livewireScripts
</body>
</html>
resources/views/livewire/posts.blade.php
<div>
    <form wire:submit.prevent="store">
        <div class="form-group row">
            <label for="title" class="col-md-2 col-form-label text-md-right">Title</label>
            <div class="col-md-6">
                <input wire:model="title"
                       type="text"
                       class="form-control @error('title') is-invalid @enderror"
                       autofocus>

                @error('title')
                <span class="invalid-feedback" role="alert">
                    <strong>{{ $message }}</strong>
                </span>
                @enderror
            </div>
        </div>

        <div class="form-group row">
            <label for="slug" class="col-md-2 col-form-label text-md-right">Slug</label>
            <div class="col-md-6">
                <input wire:model="slug"
                       type="text"
                       class="form-control @error('slug') is-invalid @enderror">

                @error('slug')
                <span class="invalid-feedback" role="alert">
                    <strong>{{ $message }}</strong>
                </span>
                @enderror
            </div>
        </div>

        <div class="form-group row mb-0">
            <div class="col-md-8 offset-md-4">
                <button type="submit" class="btn btn-primary">
                    Add Post
                </button>
            </div>
        </div>
    </form>
    <table class="table table-bordered mt-2">
        <thead>
            <tr>
                <th>Name</th>
                <th>Slug</th>
            </tr>
        </thead>
        <tbody>
            @if($posts->count())
                @foreach ($posts as $post)
                    <tr>
                        <td>{{ $post->title }}</td>
                        <td>{{ $post->slug }}</td>
                    </tr>
                @endforeach
            @endif
        </tbody>
    </table>
</div>
Now we are ready to run our example so run bellow command for quick run:
php artisan serve
Now you can open bellow URL on your browser:
http://localhost:8000/posts
It will help you..
#Laravel 8
#Laravel 7
#Laravel
#Laravel 6
