10-Apr-2023
.
Admin
Hi Guys,
Today,in this article I will share you new realese spatie medialibrary package how to utilize spatie medialibrary in laravel 8 application,we will show example of laravel spatie medialibrary.you can easliy use spatie media library laravel 8.this package use to upload a photo or an avatar. In this tutorial we will show you an easy way to add it, using Spatie’s Media Library package.
So, Let’s move over the well-known laravel medialibrary package deal evolved by way of Spatie. This package deal can companion all varieties of documents together with your Eloquent models.
Here, I will give you full example for spatie media library laravel 8 as bellow so follow my all steps.
Step 1 : Install Laravel 8
In the first step, we need to get fresh laravel 8 version application So let's open terminal and run bellow command to install fresh laravel project.
composer create-project --prefer-dist laravel/laravel spatie
Step 2 : Database Configuration
>In second step, we will make database Configuration for example database name, username, password etc. So lets open .env file and fill all deatils like as bellow:
.env
DB_CONNECTION=mysql
DB_HOST=127.0.0.1
DB_PORT=3306
DB_DATABASE=here your database name(blog)
DB_USERNAME=here database username(root)
DB_PASSWORD=here database password(root)
Step 3 : Install Spatie Medialibrary
0In this third step, we require laravel/Spatie Medialibrary package. you can install Spatie Medialibrary package using bellow command so let's run bellow command
composer require "spatie/laravel-medialibrary:^9.6.0"
After the successfully package is installed, run the following command to copy the migration file from to package directory to your project directory and also to run the fresh migration command.
php artisan vendor:publish --provider="Spatie\MediaLibrary\MediaLibraryServiceProvider" --tag="migrations"
php artisan migrate
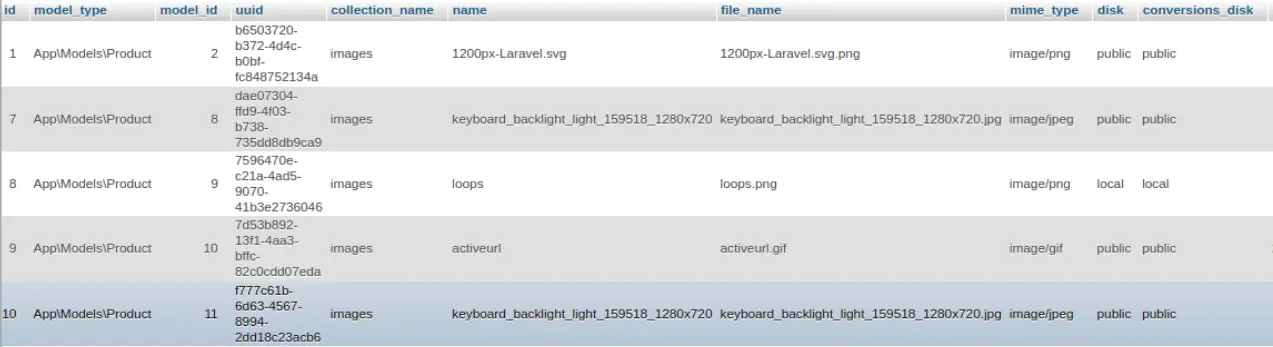
Database :
Step 4: Create Model and Migration
Here in this step, we will engender one model and migration name Product. Use the below following command and create it
php artisan make:model Product -m
Next,Open Product migration file and put the below code.
here following path of migration file
Path: /database/migrations/2021_07_09_044900_create_products_table.php
<?php

use Illuminate\Database\Migrations\Migration;
use Illuminate\Database\Schema\Blueprint;
use Illuminate\Support\Facades\Schema;

class CreateProductsTable extends Migration
{
    /**
     * Run the migrations.
     *
     * @return void
     */
    public function up()
    {
        Schema::create('products', function (Blueprint $table) {
            $table->id();
            $table->string('name');
            $table->text('detail');
            $table->timestamps();
        });
    }

    /**
     * Reverse the migrations.
     *
     * @return void
     */
    public function down()
    {
        Schema::dropIfExists('products');
    }
}
Next, go to app/Models/Product.php and open Product model file and put the below code.
here following path of model fille
Path:/app/Models/Product.php
<?php

namespace App\Models;

use Illuminate\Database\Eloquent\Factories\HasFactory;
use Illuminate\Database\Eloquent\Model;
use Spatie\MediaLibrary\HasMedia;
use Spatie\MediaLibrary\InteractsWithMedia;

class Product extends Model implements HasMedia
{
    use HasFactory,InteractsWithMedia;

    /**
     * Write Your Code..
     *
     * @return string
    */
    protected $fillable = [
        'name',
        'detail',
    ];
}
Step 5: Create Route
Create two routes one for show form and the second route send data to the server:
here following path of route fille
Path:/routes/web.php
<?php

use Illuminate\Support\Facades\Route;
use App\Http\Controllers\ProductController;

/*
|--------------------------------------------------------------------------
| Web Routes
|--------------------------------------------------------------------------
|
| Here is where you can register web routes for your application. These
| routes are loaded by the RouteServiceProvider within a group which
| contains the "web" middleware group. Now create something great!
|
*/

Route::get('product',[ProductController::class,'index'])->name('product');
Route::get('product/create',[ProductController::class,'create'])->name('product.create');
Route::post('product/store',[ProductController::class,'store'])->name('product.store');
Step 6:Create Controller
In this step,we will create a controller. Use the below command for generate controller
php artisan make:controller ProductController
Here this step,we will create two methods inside the controller first index method is used to display product form and second store method is used to store data in the mysql database and image upload Medialibrary to storge folder
here following path of Controller fille.
Path:/app/Http/Controllers/ProductController.php
<?php

namespace App\Http\Controllers;

use Illuminate\Http\Request;
use App\Models\Product;

class ProductController extends Controller
{
    /**
     * Write Your Code..
     *
     * @return string
    */
    public function index()
    {
        $products = Product::latest()->get();
        return view('index',compact('products'));
    }

    /**
     * Write Your Code..
     *
     * @return string
    */
    public function create()
    {
        return view('create');
    }

    /**
     * Write Your Code..
     *
     * @return string
    */
    public function store(Request $request)
    {
        $input = $request->all();
        $valiator = $request->validate([
            'name' => 'required',
            'detail' => 'required',
            'image' => 'required',
        ]);

        $products = Product::create($valiator);

        if($request->hasFile('image') && $request->file('image')->isValid()){
            $products->addMediaFromRequest('image')->toMediaCollection('images');
        }

        return redirect()->route('product');

    }
}
Step 7:Create a blade view
In this step, we will create two blade file name index.blade.php and create.blade.php.
here following path of index.blade fille
Path:/resources/views/index.blade.php
<html>
<head>
    <title>Laravel Spatie Medialibrary Example - NiceSnippets.com</title>
    <link rel="stylesheet" href="https://cdnjs.cloudflare.com/ajax/libs/twitter-bootstrap/5.0.1/css/bootstrap.min.css" />
    <link rel="stylesheet" href="https://cdnjs.cloudflare.com/ajax/libs/font-awesome/4.7.0/css/font-awesome.min.css" integrity="sha512-SfTiTlX6kk+qitfevl/7LibUOeJWlt9rbyDn92a1DqWOw9vWG2MFoays0sgObmWazO5BQPiFucnnEAjpAB+/Sw==" crossorigin="anonymous" referrerpolicy="no-referrer" />
    <style type="text/css" media="screen">
        body{
            background-color: #f7fcff;
        }
    </style>
</head>
<body>
<div class="container">
    <div class="row">
        <div class="col-md-8 offset-2">
            <div class="card mt-5">
                <div class="card-header">
                    <div class="row">
                        <div class="col-md-11">
                            <h4>Laravel Spatie Medialibrary Example - NiceSnippets.com</h4>
                        </div>
                        <div class="col-md-1 text-center">
                            <a href="{{ route('product.create') }}" class="btn btn-success"><i class="fa fa-plus py-1" aria-hidden="true"></i></a>
                        </div>
                    </div>
                </div>
                <div class="card-body">
                    <table class="table table-bordered">
                        <thead>
                            <tr>
                                <th>No</th>
                                <th>Product Name</th>
                                <th width="25%">Image</th>
                            </tr>
                        </thead>
                        <tbody>
                            @foreach($products as $key => $product)
                                <tr>
                                    <td>{{ ++$key }}</td>
                                    <td>{{ $product->name }}</td>
                                    <td><img src="{{$product->getFirstMediaUrl('images', 'thumb')}}" / width="100%"></td>
                                </tr>
                            @endforeach
                        </tbody>
                    </table>
                </div>
            </div>
        </div>
    </div>
</div>
</body>
</html>
Next following path create a create.blade fille
Path:/resources/views/create.blade.php
<!DOCTYPE html>
<html>
<head>
    <title>Laravel Spatie Medialibrary Example - NiceSnippets.com</title>
    <link rel="stylesheet" href="https://cdnjs.cloudflare.com/ajax/libs/twitter-bootstrap/5.0.1/css/bootstrap.min.css" />
    <link rel="stylesheet" href="https://cdnjs.cloudflare.com/ajax/libs/font-awesome/4.7.0/css/font-awesome.min.css" integrity="sha512-SfTiTlX6kk+qitfevl/7LibUOeJWlt9rbyDn92a1DqWOw9vWG2MFoays0sgObmWazO5BQPiFucnnEAjpAB+/Sw==" crossorigin="anonymous" referrerpolicy="no-referrer" />
    <style type="text/css" media="screen">
        body{
            background-color: #f7fcff;
        }
    </style>
</head>
<body>
<div class="container">
    <div class="row">
        <div class="col-md-8 offset-2">
            <div class="card mt-5">
                <div class="card-header">
                    <div class="row">
                        <div class="col-md-11">
                            <h4>Laravel Spatie Medialibrary Example - NiceSnippets.com</h4>
                        </div>
                        <div class="col-md-1 text-center">
                            <a href="{{ route('product') }}" class="btn btn-secondary text-white"><i class="fa fa-arrow-left" aria-hidden="true"></i></a>
                        </div>
                    </div>
                </div>
                <div class="card-body">
                    @if(Session::has('success'))
                        <div class="alert alert-success">
                            {{ Session::get('success') }}
                            @php
                                Session::forget('success');
                            @endphp
                        </div>
                        @endif
                    <form action="{{ route('product.store') }}" method="post" enctype="multipart/form-data">
                        @csrf
                        <div class="row">
                            <div class="col-md-12 mb-3">
                                <div class="form-group">
                                    <label for="">Name:</label>
                                    <input type="" name="name" class="form-control" placeholder="Enter Product Name">
                                    @if ($errors->has('name'))
                                        <span class="text-danger">{{ $errors->first('name') }}</span>
                                    @endif
                                </div>
                            </div>
                        </div>
                        <div class="row">
                            <div class="col-md-12 mb-3">
                                <label for="">Detail:</label>
                                <textarea name="detail" id="" class="form-control" rows="3" placeholder="Enter.."></textarea>
                                @if ($errors->has('detail'))
                                    <span class="text-danger">{{ $errors->first('detail') }}</span>
                                @endif
                            </div>
                        </div>
                        <div class="row">
                            <div class="col-md-12 mb-3">
                                <label for="">Image:</label>
                                <input type="file" name="image" class="form-control">
                                @if ($errors->has('image'))
                                    <span class="text-danger">{{ $errors->first('image') }}</span>
                                @endif
                            </div>
                        </div>
                        <div class="row">
                            <div class="col-md-12 mb-3 text-center">
                                <button class="btn btn-success btn-block">Submit</button>
                            </div>
                        </div>
                    </form>
                </div>
            </div>
        </div>
    </div>
</div>
</body>
</html>
After Note that to view the files in the browser you need to make the files public that is stored in the storage directory, you need to run the following command on your project root in terminal/command-line.
php artisan storage:link
next change .env file in APP_URL path
......
APP_URL=http://localhost:8000
......
Now, we will use the php artisan serve command.
php artisan serve
Now we are ready to run our example so run bellow command to quick run.
http://localhost:8000/product
OutPut
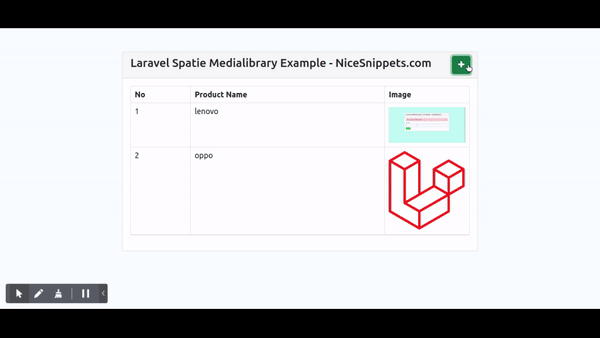
It will help you...
#Laravel 8
#Laravel 7
#Laravel
#Laravel 6
