10-Apr-2023
.
Admin

Hi friends,
Today, I explain laravel 9 google recaptcha v3 tutorial with an example. I will show you how to use Google Recaptcha V3 in laravel 9. This example is Laravel 9 google ReCAPTCHA v3 form with validation. we will learn how to add google v3 ReCAPTCHA with laravel 9 forms. I’ll guide you through step by step for the integration of google recaptcha v3 in a laravel 9 app.
We will be using ‘josiasmontag/laravel-recaptchav3’ package for laravel 9 google recaptcha v3 integration in laravel 9 application. Laravel implement google v3 Recaptcha tutorial, you will learn how to add google v3 Recaptcha with the contact us form in laravel 9.
The Google ReCaptcha is an open service that assures a computer user is a human. Google ReCaptcha is one of the most popular captcha systems that defends your site from bots spam and abuse. In order to integrate the reCaptcha, you must sign up for the Google API key & secret for your laravel application.
Step 1: Download Laravel
Let us begin the tutorial by installing a new laravel application. if you have already created the project, then skip following step.
composer create-project laravel/laravel example-app
Step 2: Install josiasmontag/laravel-recaptchav3 Package
In this step we need to install josiasmontag/laravel-recaptchav3 via the Composer package manager, so one your terminal and fire bellow command:
composer require josiasmontag/laravel-recaptchav3
After successfully install package, we require to publish config file with bellow command:
php artisan vendor:publish --provider="Lunaweb\RecaptchaV3\Providers\RecaptchaV3ServiceProvider"
Step 3: Update Google API Key
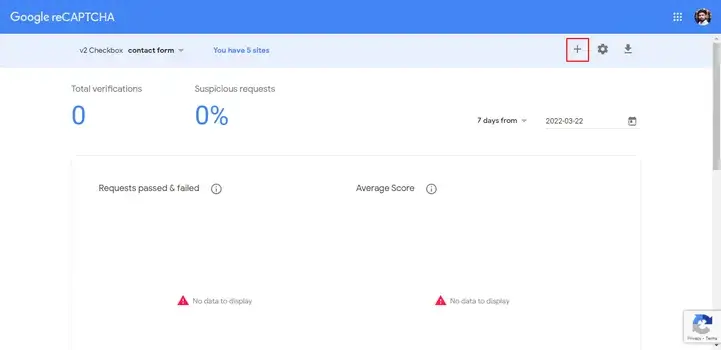
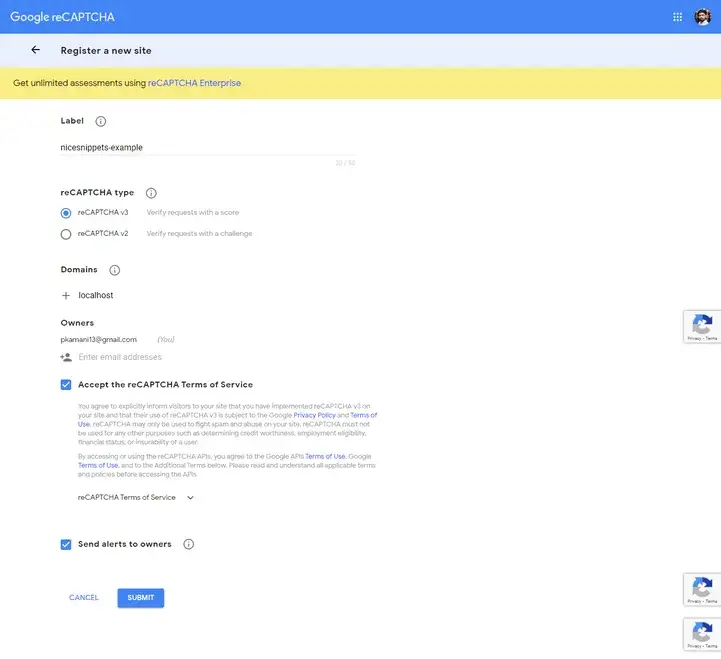
In this step we need to set google site key and secret key. If you don't have site key and secret key then you can create from here. First click on this link : Recaptcha Admin
Now you have to create new key for google recaptchav3 as bellow screen shot:
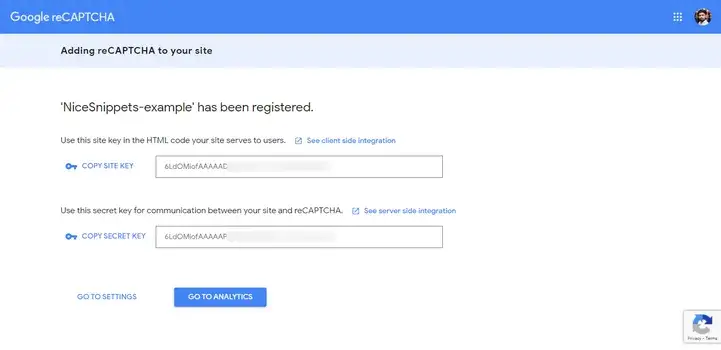
.env
RECAPTCHAV3_SITEKEY=[site-key]
RECAPTCHAV3_SECRET=[secret-key]
Step 4: Add Controller
In this step, we have to create new controller as RegisterController and we have also need to add two methods index() and store() on that controller like as you can see bellow:
php artisan make:controller RegisterController
app/Http/Controllers/RegisterController.php
<?php

namespace App\Http\Controllers;

use Illuminate\Http\Request;

class RegisterController extends Controller
{
     /**
     * Create a new controller instance.
     *
     * @return void
     */
    public function index()
    {
        return view('register');
    }

    /**
     * Create a new controller instance.
     *
     * @return void
     */
    public function store(Request $request)
    {
        $this->validate($request, [
            'name' => 'required',
            'email' => 'required|email',
            'password' => 'required|same:password_confirmation',
            'password_confirmation' => 'required',
            'g-recaptcha-response' => 'required|recaptchav3:register,0.5'
        ]);

        dd('done');
    }
}
Step 5: Add Route
We need to create register routes as bellow:
routes/web.php
<?php

use Illuminate\Support\Facades\Route;
use App\Http\Controllers\RegisterController;

/*
|--------------------------------------------------------------------------
| Web Routes
|--------------------------------------------------------------------------
|
| Here is where you can register web routes for your application. These
| routes are loaded by the RouteServiceProvider within a group which
| contains the "web" middleware group. Now create something great!
|
*/

Route::controller(RegisterController::class)->group(function(){
    Route::get('register', 'index');
    Route::post('register', 'store');
});
Step 6: Add Blade File
In Last step, let's create register.blade.php(resources/views/register.blade.php) for layout and lists all items code here and put following code:
resources/views/register.blade.php
<!DOCTYPE html>
<html>
<head>
    <title>Laravel 9 Google Recaptcha V3 Tutorial with Example - Nicesnippets.com</title>
    <link href="https://cdn.jsdelivr.net/npm/bootstrap@5.0.2/dist/css/bootstrap.min.css" rel="stylesheet">
    <script src="https://cdnjs.cloudflare.com/ajax/libs/jquery/3.3.1/jquery.min.js"></script>
    {!! RecaptchaV3::initJs() !!}
</head>
<body>
    <div class="container">
        <div class="row justify-content-center">
            <div class="col-md-8 col-md-offset-2 my-5 py-5">
                <div class="card card-primary">
                    <div class="card-header">
                        <h4>Laravel 9 Google Recaptcha V3 Tutorial with Example - Nicesnippets.com</h4>
                    </div>
                    <div class="card-body">
                        <form class="form-horizontal" role="form" method="POST" action="{{ url('/register') }}">
                            {!! csrf_field() !!}

                            <div class="form-group{{ $errors->has('name') ? ' has-error' : '' }}">
                                <label class="col-md-4 control-label">Name</label>
                                <div class="col-md-6">
                                    <input type="text" class="form-control" name="name" value="{{ old('name') }}">
                                    @if ($errors->has('name'))
                                        <span class="help-block">
                                            <strong>{{ $errors->first('name') }}</strong>
                                        </span>
                                    @endif
                                </div>
                            </div>

                            <div class="form-group{{ $errors->has('email') ? ' has-error' : '' }}">
                                <label class="col-md-4 control-label">E-Mail Address</label>
                                <div class="col-md-6">
                                    <input type="email" class="form-control" name="email" value="{{ old('email') }}">
                                    @if ($errors->has('email'))
                                        <span class="help-block">
                                            <strong>{{ $errors->first('email') }}</strong>
                                        </span>
                                    @endif
                                </div>
                            </div>

                            <div class="form-group{{ $errors->has('password') ? ' has-error' : '' }}">
                                <label class="col-md-4 control-label">Password</label>
                                <div class="col-md-6">
                                    <input type="password" class="form-control" name="password">
                                    @if ($errors->has('password'))
                                        <span class="help-block">
                                            <strong>{{ $errors->first('password') }}</strong>
                                        </span>
                                    @endif
                                </div>
                            </div>

                            <div class="form-group{{ $errors->has('password_confirmation') ? ' has-error' : '' }}">
                                <label class="col-md-4 control-label">Confirm Password</label>
                                <div class="col-md-6">
                                    <input type="password" class="form-control" name="password_confirmation">
                                    @if ($errors->has('password_confirmation'))
                                        <span class="help-block">
                                            <strong>{{ $errors->first('password_confirmation') }}</strong>
                                        </span>
                                    @endif
                                </div>
                            </div>

                            <div class="form-group{{ $errors->has('g-recaptcha-response') ? ' has-error' : '' }}">
                                <div class="col-md-6">
                                    {!! RecaptchaV3::field('register') !!}
                                    @if ($errors->has('g-recaptcha-response'))
                                        <span class="help-block">
                                            <strong>{{ $errors->first('g-recaptcha-response') }}</strong>
                                        </span>
                                    @endif
                                </div>
                            </div>

                            <div class="form-group">
                                <div class="col-md-6 col-md-offset-4">
                                    <br/>
                                    <button type="submit" class="btn btn-primary">
                                        <i class="fa fa-btn fa-user"></i>Register
                                    </button>
                                </div>
                            </div>
                        </form>
                    </div>
                </div>
            </div>
        </div>
    </div>
</body>
</html>
Run Laravel App:
All steps have been done, now you have to type the given command and hit enter to run the laravel app:
php artisan serve
Now, you have to open web browser, type the given URL and view the app output:
http://localhost:8000/register
Output:
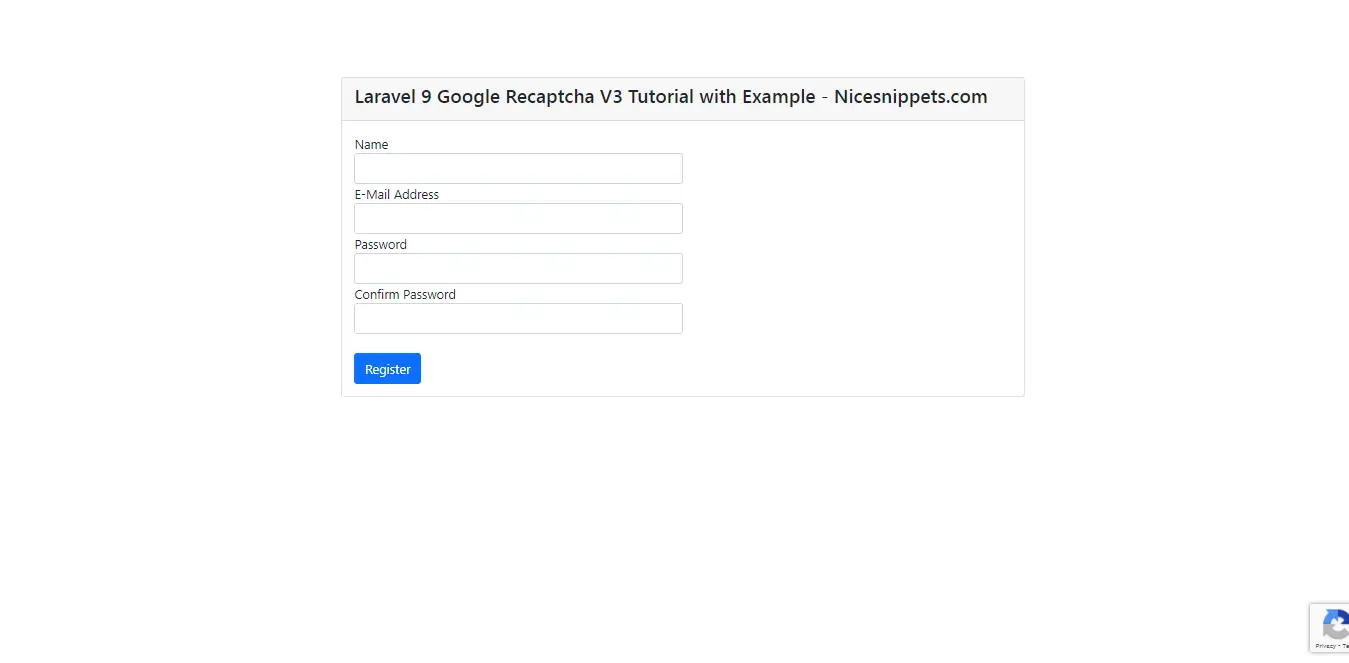
I hope it can help you...
#Laravel 9
