10-Apr-2023
.
Admin

Hi Guys,
In this example,I will learn you how to use dynamic autocomplete search with select2 in laravel 9.you can easy and simply use dynamic autocomplete search with select2 in laravel 9.
we have more or thousands of records on our tables like users, products, tags etc, so that can not possible to handle in manage from select box. But you must require to make select dropdown for your products tables then you can do it using select2.js plugin.
In this tutorial, i going to give you full example from scratch so you can easily understand and implement it on your project. You have to just follow few step to done this example.
Step 1: Download Laravel
Let us begin the tutorial by installing a new laravel application. if you have already created the project, then skip following step.
composer create-project laravel/laravel example-app
Step 2: Database Configuration
In this step, configure database with your downloded/installed laravel 9 app. So, you need to find .env file and setup database details as following:
.env
DB_CONNECTION=mysql
DB_HOST=127.0.0.1
DB_PORT=3306
DB_DATABASE=db name
DB_USERNAME=db user name
DB_PASSWORD=db password
Step 3: Add Migration and Model
Create a Movie Model that is generated by the following model command.
php artisan make:model Movie -m
In this step, we need to add new row "name" in movies table and model. than we need to run migration. so let's change that on both file.
database/migrations/timestamp_create_movies_table
<?php

use Illuminate\Database\Migrations\Migration;
use Illuminate\Database\Schema\Blueprint;
use Illuminate\Support\Facades\Schema;

class CreateMoviesTable extends Migration
{
    /**
     * Run the migrations.
     *
     * @return void
     */
    public function up()
    {
        Schema::create('movies', function (Blueprint $table) {
            $table->id();
            $table->string('name');
            $table->timestamps();
        });
    }

    /**
     * Reverse the migrations.
     *
     * @return void
     */
    public function down()
    {
        Schema::dropIfExists('movies');
    }
}
app/Models/Movie.php
<?php

namespace App;

use Illuminate\Database\Eloquent\Model;

class Movie extends Model
{
    /**
     * The attributes that are mass assignable.
     *
     * @var array
     */
    protected $fillable = [
        'name'
    ];
}
Run the following command to run the migration.
php artisan migrate
Step 4: Add Route
Now, we need to add one more route for User home page so let's add that route in web.php file.
routes/web.php
<?php

use App\Http\Controllers\Select2SearchController;

/*
|--------------------------------------------------------------------------
| Web Routes
|--------------------------------------------------------------------------
|
| Here is where you can register web routes for your application. These
| routes are loaded by the RouteServiceProvider within a group which
| contains the "web" middleware group. Now create something great!
|
*/

Route::get('search', [Select2SearchController::class,'index']);
Route::get('ajax-autocomplete-search', [Select2SearchController::class,'selectSearch']);
Step 5: Add Controller
Create a controller by using the following command.
php artisan make:controller Select2SearchController
In controller file we will create two functions.
The index() method brings the autocomplete search in the view, and the selectSearch() function contains the logic to fetch the data from the database on matched text.
app\Http\Controllers\Select2SearchController.php
<?php

namespace App\Http\Controllers;
use App\Models\Movie;
use Illuminate\Http\Request;

class Select2SearchController extends Controller
{
    /**
     * Write code on Method
     *
     * @return response()
     */
    public function index()
    {
        return view('home');
    }

    /**
     * Write code on Method
     *
     * @return response()
     */
    public function selectSearch(Request $request)
    {
        $movies = [];

        if($request->has('q')){
            $search = $request->q;
            $movies =Movie::select("id", "name")
                    ->where('name', 'LIKE', "%$search%")
                    ->get();
        }
        return response()->json($movies);
    }
}
Step 6: Add Blade File
In this last Step,you will create to layout your file.
resources/views/home.blade.php
<!DOCTYPE html>
<html lang="{{ str_replace('_', '-', app()->getLocale()) }}">
<head>
    <meta charset="utf-8">
    <meta name="viewport" content="width=device-width, initial-scale=1">
    <title>Laravel 9 Ajax Autocomplete Dynamic Search with select2</title>
    <link rel="stylesheet" type="text/css" href="https://cdnjs.cloudflare.com/ajax/libs/twitter-bootstrap/5.0.0-alpha1/css/bootstrap.min.css">
    <script src="https://ajax.googleapis.com/ajax/libs/jquery/3.5.1/jquery.min.js"></script>
    <link href="https://cdn.jsdelivr.net/npm/select2@4.1.0-beta.1/dist/css/select2.min.css" rel="stylesheet" />
    <script src="https://cdn.jsdelivr.net/npm/select2@4.1.0-beta.1/dist/js/select2.min.js"></script>
    <style>
        h2 {
            color: white;
        }
    </style>
</head>
<body class="bg-primary">
    <div class="container mt-5">
        <div class="row">
            <div class="col-md-12 text-center mt-5">
                <h2>Laravel 9 AJAX Autocomplete Search with Select2</h2>
            </div>
            <div class="col-md-8 mt-5 offset-2">
                <select class="livesearch form-control p-3" name="livesearch"></select>
            </div>
        </div>
    </div>
</body>
<script type="text/javascript">
    $('.livesearch').select2({
        placeholder: 'Select movie',
        ajax: {
            url: '/ajax-autocomplete-search',
            dataType: 'json',
            delay: 250,
            processResults: function (data) {
                return {
                    results: $.map(data, function (item) {
                        return {
                            text: item.name,
                            id: item.id
                        }
                    })
                };
            },
            cache: true
        }
    });
</script>
</html>
Run Laravel App:
All steps have been done, now you have to type the given command and hit enter to run the laravel app:
php artisan serve
Now, you have to open web browser, type the given URL and view the app output:
http://localhost:8000/search
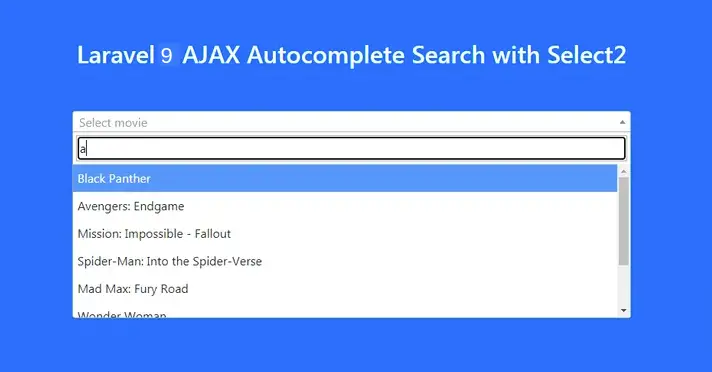
Output :

It will help you...
#Laravel 9