10-Apr-2023
.
Admin
Hello Friends,
In this tutorial, i am going to share with you how to integrate Stripe subscription using Laravel Cashier in laravel application. In this example, i will show you the example of stripe subscription using laravel cashier in laravel 7.
Laravel Cashier Paddle provides an expressive, fluent interface to Paddle's subscription billing services. It handles almost all of the boilerplate subscription billing code you are dreading. In addition to basic subscription management, Cashier can handle: coupons, swapping subscription, subscription "quantities", cancellation grace periods, and more.
In this article, i will show you laravel 7 cashier with stripe subscription. So Let's follow bellow step by step.
Step 1 : Install Laravel Fresh App
In first step, You have to need laravel project. You can install laravel fresh project using bellow composer command:
composer create-project --prefer-dist laravel/laravel blog
Step 2 : Setup Database Configuration
After successfully install laravel app thenafter configure databse setup. We will open ".env" file and change the database name, username and password in the env file.
DB_CONNECTION=mysql
DB_HOST=127.0.0.1
DB_PORT=3306
DB_DATABASE=Enter_Your_Database_Name
DB_USERNAME=Enter_Your_Database_Username
DB_PASSWORD=Enter_Your_Database_Password
Step 3 : Install Auth
Laravel's laravel/ui package provides a quick way to scaffold all of the routes and views you need for authentication using a few simple commands:
composer require laravel/ui
Run successfully above command then after run bellow command:
php artisan ui vue --auth
Step 4 : Install Cashier Package
In this step, You have to need laravel official cashier package. you can install cashier package using bellow command So Let's open terminal and run bellow command:
composer require laravel/cashier
Successfully install then after migrate the database So lets run bellow artisan command:
php artisan migrate
If you need to overwrite the migrations that ship with the Cashier package, you can publish them using the vendor:publish Artisan command:
php artisan vendor:publish --tag="cashier-migrations"
Step 5 : Configuration Cashier
Before using Cashier, add the Billable trait to your model definition. This trait provides various methods to allow you to perform common billing tasks, such as creating subscriptions, applying coupons, and updating payment method information:
This trait use in user modal So lets open user modal and add billable trait:
app\User.php
use Laravel\Cashier\Billable;

class User extends Authenticatable
{
    use Billable;
}
Cashier assumes your Billable model will be the App\User class that ships with Laravel. If you wish to change this you can specify a different model in your .env file:
.env
CASHIER_MODEL=App\User
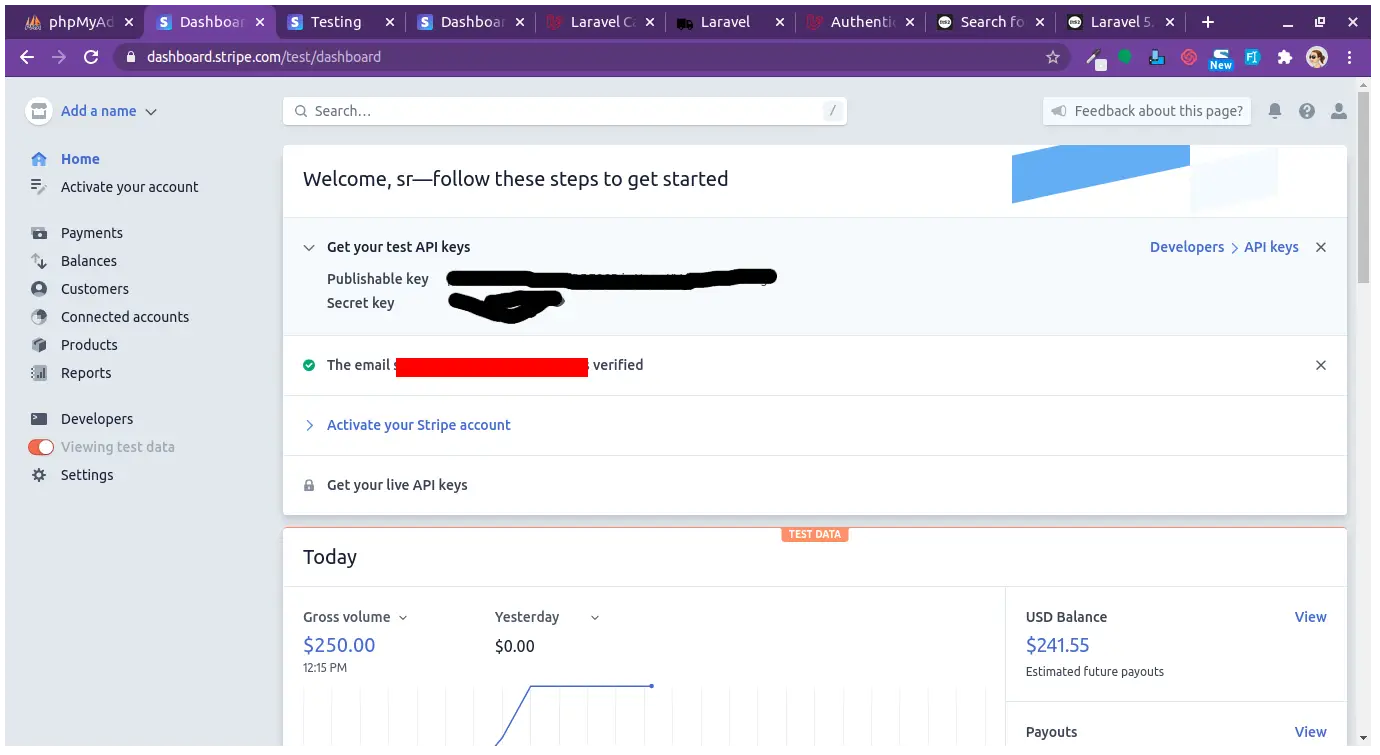
Step 6 : Create Stripe Account Set Stripe API Key and SECRET
In this step, You have to need stripe account first you can create stripe account So lets open Stripe official website
Now, we need to set stripe key and secret. so first you can go on (----add link --- {Stripe}) website and create development stripe account key and secret and add bellow:
Get Stripe API Key and SECRET
.env
STRIPE_KEY=pk_test*****
STRIPE_SECRET=sk_test******
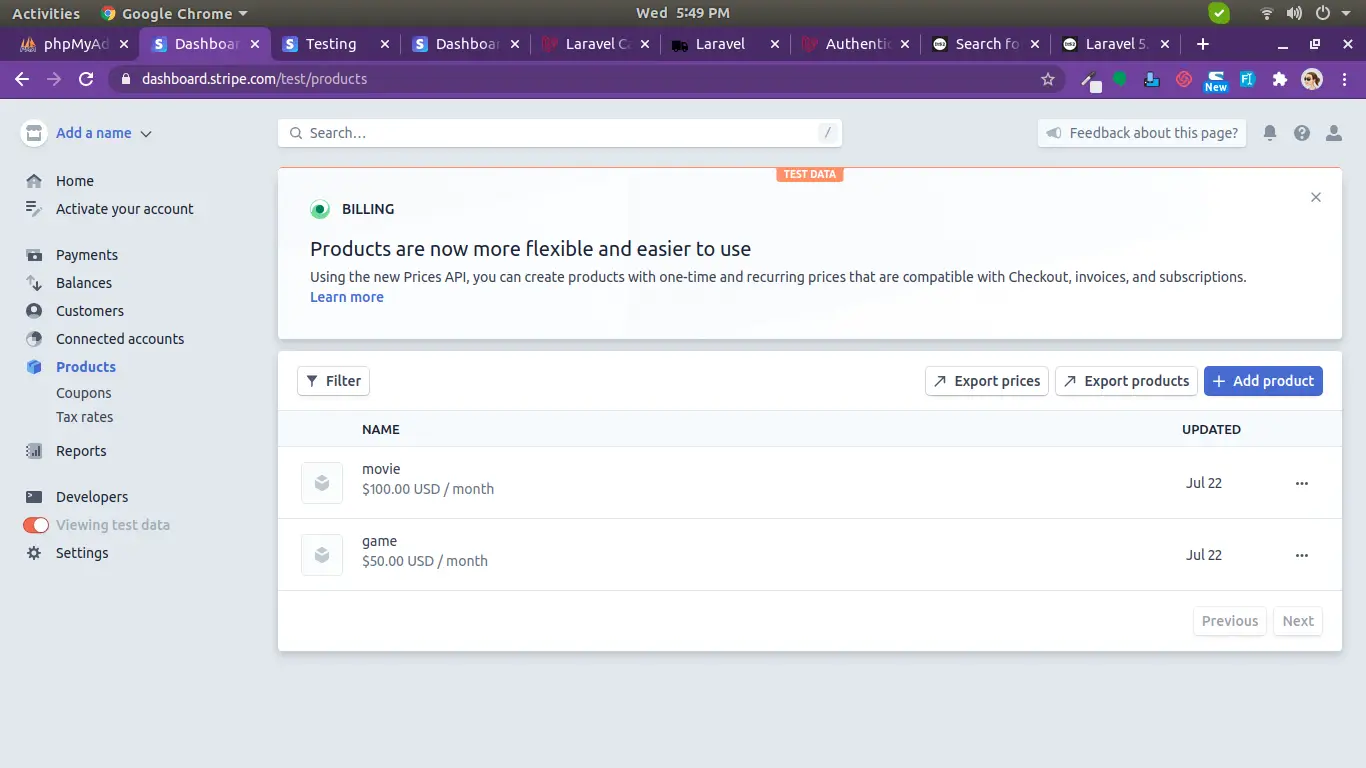
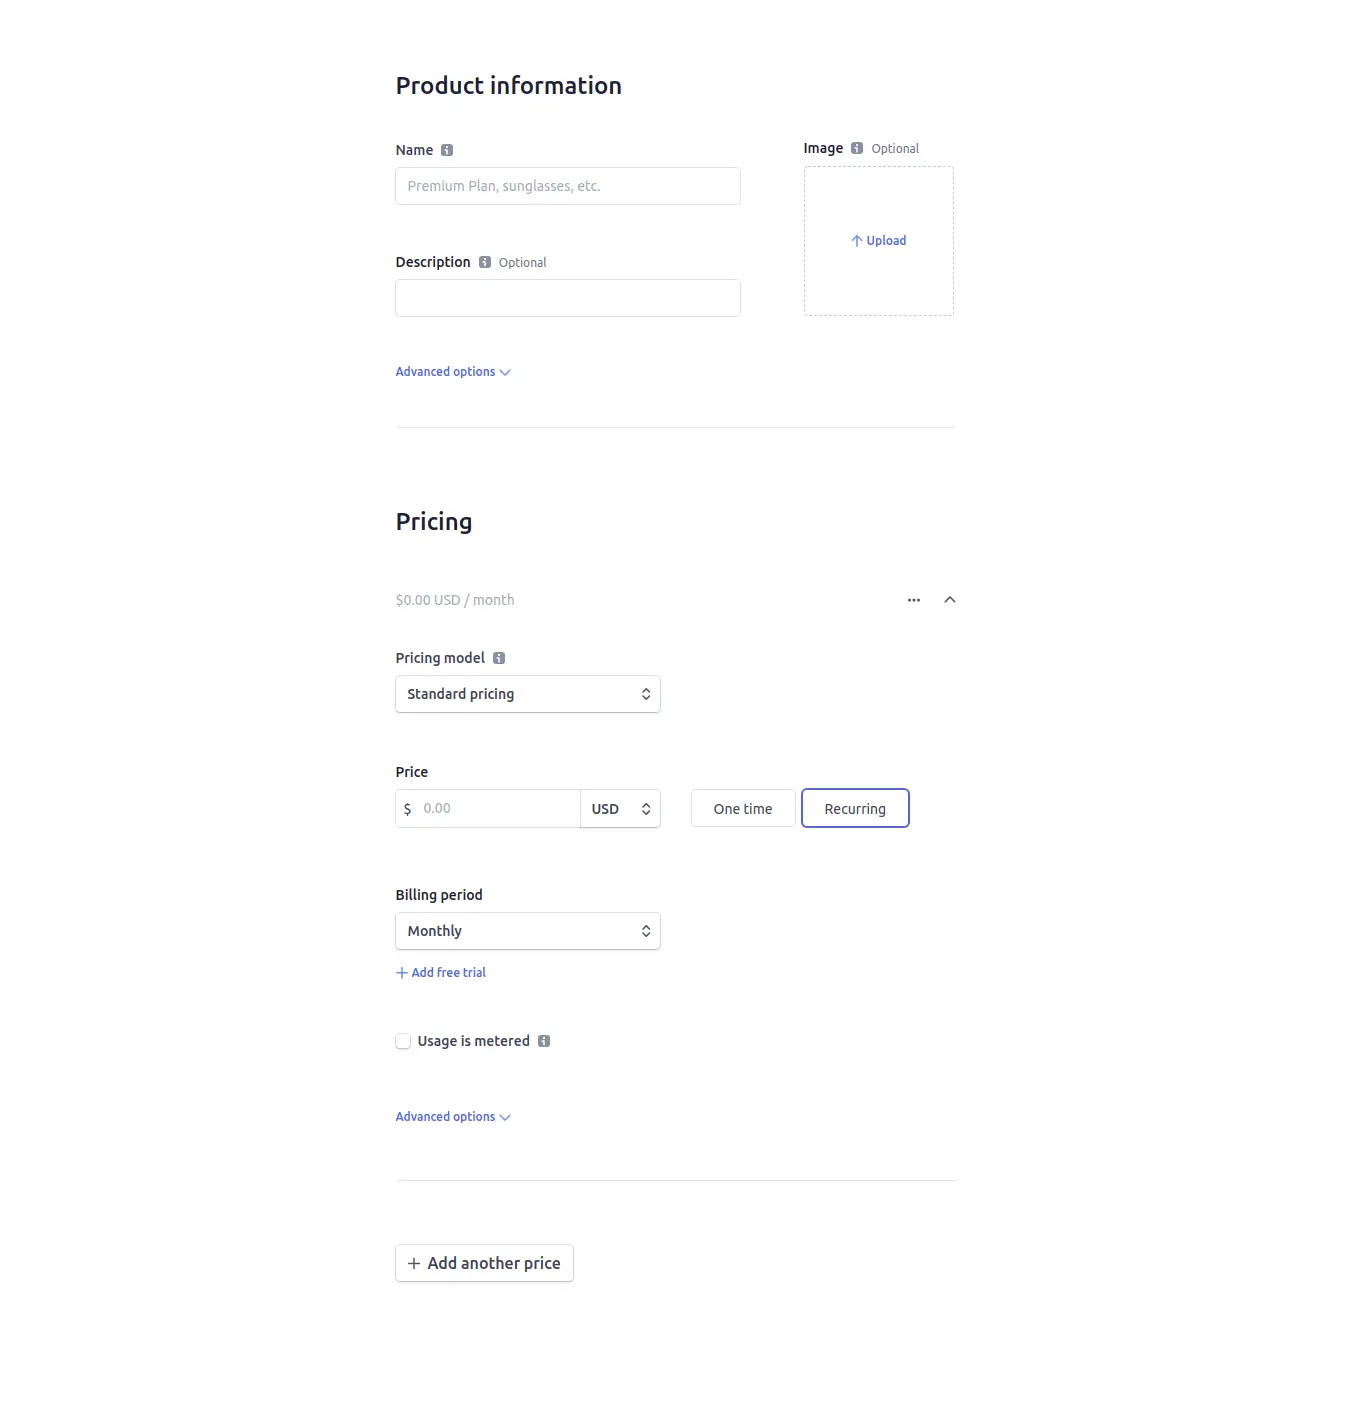
Step 7 : Create Product as plan
In this step, You can create product in your stripe account. So lets see bellow image to create product:
Step 7 : Add Route
In this step, We will add route in route file so lets open web.php file and add two route first route is form and second route is store stripe subscription.
routes/web.php
Route::get('/subscription/create', ['as'=>'home','uses'=>'SubscriptionController@index'])->name('subscription.create');
Route::post('order-post', ['as'=>'order-post','uses'=>'SubscriptionController@orderPost']);
Step 8 : Create Controller
In this step, you have to create controller as SubscriptionController using bellow artisan command:
php artisan make:controller SubscriptionController
app/Http/SubscriptionController.php
<?php
namespace App\Http\Controllers;
use Illuminate\Http\Request;
Use App\User;
use Stripe;
use Session;
use Exception;
class SubscriptionController extends Controller
{
public function index()
{
return view('subscription.create');
}
public function orderPost(Request $request)
{
$user = auth()->user();
$input = $request->all();
$token = $request->stripeToken;
$paymentMethod = $request->paymentMethod;
try {
Stripe\Stripe::setApiKey(env('STRIPE_SECRET'));
if (is_null($user->stripe_id)) {
$stripeCustomer = $user->createAsStripeCustomer();
}
\Stripe\Customer::createSource(
$user->stripe_id,
['source' => $token]
);
$user->newSubscription('test',$input['plane'])
->create($paymentMethod, [
'email' => $user->email,
]);
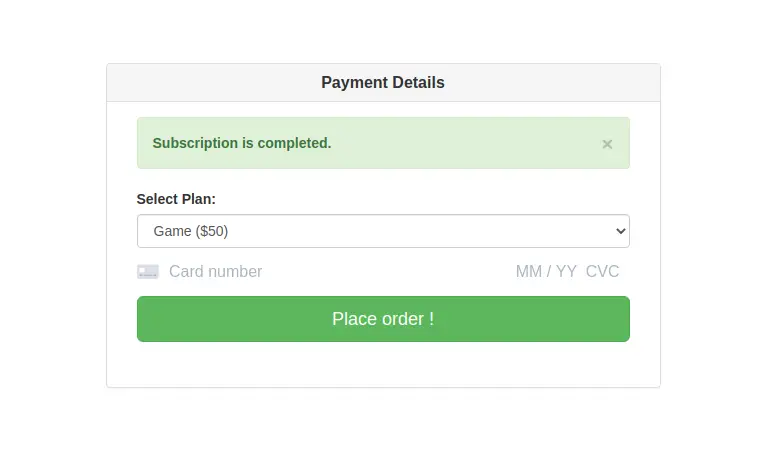
return back()->with('success','Subscription is completed.');
} catch (Exception $e) {
return back()->with('success',$e->getMessage());
}
}
}
Step 9 : Create View File
In last step, You can create view blade file first you can create subscription directory then after create blade file in subscription directory.
resources/view/subscription/create.blade.php
<html lang="en">
<head>
    <meta charset="utf-8">
    <meta http-equiv="X-UA-Compatible" content="IE=edge">
    <meta name="viewport" content="width=device-width, initial-scale=1">
    <title>Laravel</title>
    <!-- Styles -->
    <link href="https://maxcdn.bootstrapcdn.com/bootstrap/3.3.6/css/bootstrap.min.css" rel="stylesheet">
     <style>
        .alert.parsley {
            margin-top: 5px;
            margin-bottom: 0px;
            padding: 10px 15px 10px 15px;
        }
        .check .alert {
            margin-top: 20px;
        }
        .credit-card-box .panel-title {
            display: inline;
            font-weight: bold;
        }
        .credit-card-box .display-td {
            display: table-cell;
            vertical-align: middle;
            width: 100%;
            text-align: center;
        }
        .credit-card-box .display-tr {
            display: table-row;
        }
    </style>
    <!-- JavaScripts -->
    <script src="https://cdnjs.cloudflare.com/ajax/libs/jquery/2.1.4/jquery.min.js"></script>
    <script src="https://maxcdn.bootstrapcdn.com/bootstrap/3.3.6/js/bootstrap.min.js"></script>

</head>
<body id="app-layout">
<div class="container">
    <div class="row" style="margin-top: 100px;">
      <div class="col-md-6 col-md-offset-3">
        <div class="panel panel-default credit-card-box">
            <div class="panel-heading display-table" >
                <div class="row display-tr" >
                    <h3 class="panel-title display-td" >Payment Details</h3>
                    <div class="display-td" >
                        <img class="img-responsive pull-right" src="http://i76.imgup.net/accepted_c22e0.png">
                    </div>
                </div>
            </div>
            <div class="panel-body">
                <div class="col-md-12">
                {!! Form::open(['url' => route('order-post'), 'data-parsley-validate', 'id' => 'payment-form']) !!}
                    @if ($message = Session::get('success'))
                    <div class="alert alert-success alert-block">
                      <button type="button" class="close" data-dismiss="alert">×</button>
                            <strong>{{ $message }}</strong>
                    </div>
                    @endif
                    <div class="form-group" id="product-group">
                        {!! Form::label('plane', 'Select Plan:') !!}
                        {!! Form::select('plane', ['price_***' => 'Game ($50)','price_***' => 'Movie ($100)'], null, [
                            'class'                       => 'form-control',
                            'required'                    => 'required',
                            'data-parsley-class-handler'  => '#product-group'
                            ]) !!}
                    </div>
                    <div class="row">
                        <div class="col-md-12">
                            <div class="form-group">
                                <div id="card-element"></div>
                            </div>
                        </div>

                    </div>
                      <div class="form-group">
                          <button id="card-button" class="btn btn-lg btn-block btn-success btn-order">Place order !</button>
                      </div>
                      <div class="row">
                        <div class="col-md-12">
                            <span class="payment-errors" id="card-errors" style="color: red;margin-top:10px;"></span>
                        </div>
                      </div>
                    {!! Form::close() !!}
                </div>
            </div>
        </div>

        </div>
    </div>

</div>

    <!-- PARSLEY -->
    <script>
        window.ParsleyConfig = {
            errorsWrapper: '<div></div>',
            errorTemplate: '<div class="alert alert-danger parsley" role="alert"></div>',
            errorClass: 'has-error',
            successClass: 'has-success'
        };
    </script>

    <script src="http://parsleyjs.org/dist/parsley.js"></script>

    <script type="text/javascript" src="https://js.stripe.com/v2/"></script>
    <script src="https://js.stripe.com/v3/"></script>
    <script>
        var style = {
            base: {
                color: '#32325d',
                lineHeight: '18px',
                fontFamily: '"Helvetica Neue", Helvetica, sans-serif',
                fontSmoothing: 'antialiased',
                fontSize: '16px',
                '::placeholder': {
                    color: '#aab7c4'
                }
            },
            invalid: {
                color: '#fa755a',
                iconColor: '#fa755a'
            }
        };

        const stripe = Stripe('{{ env("STRIPE_KEY") }}', { locale: 'en' }); // Create a Stripe client.
        const elements = stripe.elements(); // Create an instance of Elements.
        const card = elements.create('card', { style: style }); // Create an instance of the card Element.

        card.mount('#card-element'); // Add an instance of the card Element into the `card-element` <div>.

        card.on('change', function(event) {
            var displayError = document.getElementById('card-errors');
            if (event.error) {
                displayError.textContent = event.error.message;
            } else {
                displayError.textContent = '';
            }
        });

        // Handle form submission.
        var form = document.getElementById('payment-form');


        var form = document.getElementById('payment-form');
        form.addEventListener('submit', function(event) {
            event.preventDefault();

            stripe.createToken(card).then(function(result) {
                if (result.error) {
                    // Inform the user if there was an error.
                    var errorElement = document.getElementById('card-errors');
                    errorElement.textContent = result.error.message;
                } else {
                    // Send the token to your server.
                    stripeTokenHandler(result.token);
                }
            });
        });

        // Submit the form with the token ID.
        function stripeTokenHandler(token) {
            // Insert the token ID into the form so it gets submitted to the server
            var form = document.getElementById('payment-form');
            var hiddenInput = document.createElement('input');
            hiddenInput.setAttribute('type', 'hidden');
            hiddenInput.setAttribute('name', 'stripeToken');
            hiddenInput.setAttribute('value', token.id);
            form.appendChild(hiddenInput);

            // Submit the form
            form.submit();
        }
    </script>
</body>
</html>
Now we are ready to run our example so run bellow command for quick run:
php artisan serve
Now you can open bellow URL on your browser:
http://localhost:8000/subscription/create
It will help you...
#Laravel 7
#Laravel
#Laravel 6
