10-Apr-2023
.
Admin

Hi Guys
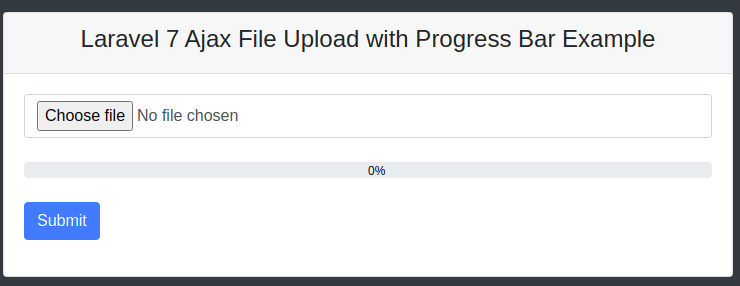
In this example,I will example you how to create ajax file upload with progress bar in laravel 7.laravel 7 file upload with progress bar tutorial. here you will learn how to implement progress bar in laravel ajax file uploading app.A progress bar displays how much time is remaining to upload a file. So this tutorial will guide you on how to upload file with progress bar using ajax in laravel
Here, I will give you full example for simply ajax file upload with progress bar using laravel 7 as bellow.
Step 1: Install Laravel App For Progress Bar
First of all, open your terminal and run the following command to install or download laravel app for laravel ajax file upload with progress bar app:
composer create-project --prefer-dist laravel/laravel Blog
Step 2: Add Database Details
In this step, Navigate to your downloaded laravel file upload progress bar using ajax app root directory and open .env file. Then add your database details in .env file, as follow:
DB_CONNECTION=mysql
DB_HOST=127.0.0.1
DB_PORT=3306
DB_DATABASE=here your database name here
DB_USERNAME=here database username here
DB_PASSWORD=here database password here
Step 3: Create Migration & Model
In this step, open a command prompt and run the following command:
php artisan make:model Post -m
This command will create one model name Post.php and as well as one migration file for the Posts table.
Then Navigate to database/migrations folder and open create_posts_table.php. Then update the following code into create_posts_table.php:
<?php

use Illuminate\Support\Facades\Schema;
use Illuminate\Database\Schema\Blueprint;
use Illuminate\Database\Migrations\Migration;

class CreatePostsTable extends Migration
{
    /**
     * Run the migrations.
     *
     * @return void
     */
    public function up()
    {
        Schema::create('posts', function (Blueprint $table) {
            $table->increments('id');
            $table->string('title');
            $table->timestamps();
        });
    }

    /**
     * Reverse the migrations.
     *
     * @return void
     */
    public function down()
    {
        Schema::dropIfExists('posts');
    }
}
After that, run the following command to migrate the table into your select database:
php artisan migrate
Step 4: Create Route For File
here this step, Navigate to the app/routes folder and open web.php file. Then update the following routes into your web.php file:
Route::get('ajax-file-upload-progress-bar', 'ProgressBarUploadFileController@index');
Route::post('store', 'ProgressBarUploadFileController@store');
Step 5: Generate Controller
In this step, open your terminal and run the following command to create ajax file upload controller file:
php artisan make:controller ProgressBarUploadFileController
This command will create a controller named ProgressBarUploadFileController.php file.
Next, Navigate to app/http/controllers/ folder and open ProgressBarUploadFileController.php. Then add the following file uploading methods into your ProgressBarUploadFileController.php file:
<?php

namespace App\Http\Controllers;

use Illuminate\Http\Request;
use App\Post;

class ProgressBarUploadFileController extends Controller
{
    public function index()
    {
        return view('progress-bar-file-upload');
    }

    public function store(Request $request)
    {
        $request->validate([
            'file' => 'required',
        ]);

       $title = time().'.'.request()->file->getClientOriginalExtension();

       $request->file->move(public_path('posts'), $title);

       $storeFile = new Post;
       $storeFile->title = $title;
       $storeFile->save();

        return response()->json(['success'=>'File Uploaded Successfully']);
    }
}
Step 6: Create Blade View
In this step, create one blade view file named progress-bar-file-upload.blade.php.
Now, navigate /resources/views and create one file name progress-bar-file-upload.blade.php. Then update the following code into your progress-bar-file-upload.blade.php file:
<!DOCTYPE html>
<html>
<head>
    <title>Laravel 7 Ajax File Upload with Progress Bar Example</title>
    <link rel="stylesheet" href="https://maxcdn.bootstrapcdn.com/bootstrap/4.1.0/css/bootstrap.min.css">
    <script src="https://ajax.googleapis.com/ajax/libs/jquery/3.3.1/jquery.min.js"></script>
    <script src="https://cdnjs.cloudflare.com/ajax/libs/jquery.form/4.2.2/jquery.form.js"></script>
    <style>
        .progress { position:relative; width:100%; }
        .bar { background-color: #00ff00; width:0%; height:20px; }
        .percent { position:absolute; display:inline-block; left:50%; color: #040608;}
   </style>
</head>
<body class="bg-dark">
<div class="container mt-5">
    <div class="row">
        <div class="col-md-8 offset-md-2">
            <div class="card">
              <div class="card-header text-center">
                <h4>Laravel 7 Ajax File Upload with Progress Bar Example</h4>
              </div>
              <div class="card-body">
                <form method="POST" action="{{ url('ajax-file-upload-progress-bar') }}" enctype="multipart/form-data">
                    @csrf
                    <div class="form-group">
                        <input name="file" type="file" class="form-control"><br/>
                        <div class="progress">
                            <div class="bar"></div >
                            <div class="percent">0%</div >
                        </div>
                        <br>
                        <input type="submit"  value="Submit" class="btn btn-primary">
                    </div>
                </form>
              </div>
            </div>
        </div>
    </div>
</div>
<script type="text/javascript">
var SITEURL = "{{URL('/')}}";
$(function() {
    $(document).ready(function()
    {
        var bar = $('.bar');
        var percent = $('.percent');
          $('form').ajaxForm({
            beforeSend: function() {
                var percentVal = '0%';
                bar.width(percentVal)
                percent.html(percentVal);
            },
            uploadProgress: function(event, position, total, percentComplete) {
                var percentVal = percentComplete + '%';
                bar.width(percentVal)
                percent.html(percentVal);
            },
            complete: function(xhr) {
                alert('File Has Been Uploaded Successfully');
                window.location.href = SITEURL +"/"+"ajax-file-upload-progress-bar";
            }
          });
    });
 });
</script>
</body>
</html>
Step 7: Run Server
Now, run the following command to start the development server for your laravel ajax file with a progress bar app:
php artisan serve
After, open your browser and hit the following URLs into it:
http://localhost:8000/ajax-file-upload-progress-bar
It will help you...
#Bootstrap 4
#Laravel 7
#Bootstrap
#Laravel
#Laravel 6