22-Mar-2021
.
Admin
Hi Guys,
Today, I will learn how to express login with mysql in node.js We will show example of Node.js Express Login with MySQL As well as learn how to handle Session in node express js, body-parser to handle form data, and how to contact DB to node express js app.
you step by step to creating a login system in node js using express js framework with MySQL database.
Here, I will give you full example for simply express login with mysql in Node.js bellow.
Step 1: Install Node Express JS Setup
In this step, I will Install express js setup.The following command install express js setup.
express --view=ejs loginSystem
Next open loginSystem setup with any text editor. And use the following command to enter your loginSystem app directories, So open your cmd and run the following command.
cd loginSystem
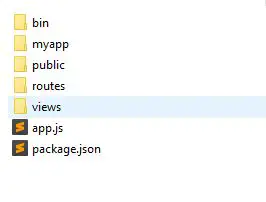
Your node express js app structure looks like:
After, you need to install some required pacakges, so open again your cmd and run the following commands.
 npm install
 npm install express-flash --save
 npm install express-session --save
 npm install express-validator --save
 npm install method-override --save
 npm install mysql --save
express-flash
Flash is an extension of connect-flash with the ability to define a flash message and render it without redirecting the request.
In this node js mysql crud tutorial express flash is used to display a warning, error and information message
express-session
Express-session is used to made a session as like in PHP. In this node js mysql crud tutorial, session is needed as the express requirement of express-flash.
express-validator
Express validator is used to validate form data it is easy to use. express-validator highly effective and efficient way to accelerate the creation of applications.
method-override
NPM is used to run a DELETE and PUT method from an HTML form. In several web browsers only support GET and POST methods.
MySQL
Driver to connect node.js with MySQL
Step 2: Connect App with DB
Before connecting DB to your application, create table into your database by using the following SQL query:
CREATE DATABASE IF NOT EXISTS `nodelogin` DEFAULT CHARACTER SET utf8 COLLATE utf8_general_ci;
USE `nodelogin`;

CREATE TABLE IF NOT EXISTS `users` (
  `id` int(11) NOT NULL,
  `name` varchar(50) NOT NULL,
  `password` varchar(255) NOT NULL,
  `email` varchar(100) NOT NULL
) ENGINE=InnoDB AUTO_INCREMENT=2 DEFAULT CHARSET=utf8;

INSERT INTO `users` (`id`, `name`, `password`, `email`) VALUES (1, 'test', 'test', 'test@test.com');

ALTER TABLE `users` ADD PRIMARY KEY (`id`);
ALTER TABLE `users` MODIFY `id` int(11) NOT NULL AUTO_INCREMENT,AUTO_INCREMENT=2;
After, you need to create one folder named lib and create a new file name db.js inside lib folder.
Note that, This file is used to connect your node express js app to MySQL db.
lib/db.js
Update the MySQL connection code into your db.js file:
var mysql=require('mysql');
 var connection=mysql.createConnection({
   host:'localhost',
   user:'root',
   password:'your password',
   database:'nodelogin'
 });
connection.connect(function(error){
   if(!!error){
     console.log(error);
   }else{
     console.log('Connected!:)');
   }
 });
module.exports = connection;
Step 3: Include Packages and routes in app.js
Now this step, you need to include all packages in app.js file whose installed above and also initialize the session in this file.
So go to app.js file and update the following code:
var createError = require('http-errors');
var express = require('express');
var path = require('path');
var cookieParser = require('cookie-parser');
var logger = require('morgan');
var expressValidator = require('express-validator');
var flash = require('express-flash');
var session = require('express-session');
var bodyParser = require('body-parser');


var mysql = require('mysql');
var connection  = require('./lib/db');


var indexRouter = require('./routes/index');
var authRouter = require('./routes/auth');

var app = express();

// view engine setup
app.set('views', path.join(__dirname, 'views'));
app.set('view engine', 'ejs');

app.use(logger('dev'));
app.use(bodyParser.json());
app.use(bodyParser.urlencoded({ extended: true }));
app.use(cookieParser());
app.use(express.static(path.join(__dirname, 'public')));

app.use(session({
    secret: '123456cat',
    resave: false,
    saveUninitialized: true,
    cookie: { maxAge: 60000 }
}))

app.use(flash());
app.use(expressValidator());

app.use('/', indexRouter);
app.use('/auth', authRouter);

// catch 404 and forward to error handler
app.use(function(req, res, next) {
  next(createError(404));
});

// error handler
app.use(function(err, req, res, next) {
  // set locals, only providing error in development
  res.locals.message = err.message;
  res.locals.error = req.app.get('env') === 'development' ? err : {};

  // render the error page
  res.status(err.status || 500);
  res.render('error');
});

module.exports = app;
Step 4: Create Route
In this step, you need to create one route file name auth.js inside the routes folder.
Then update the following routes into your routes/auth.js file:
var express = require('express');
var router = express.Router();
var connection  = require('../lib/db');


//display login page
router.get('/', function(req, res, next){
    // render to views/user/add.ejs
    res.render('auth/login', {
        title: 'Login',
        email: '',
        password: ''
    })
})

//display login page
router.get('/login', function(req, res, next){
    // render to views/user/add.ejs
    res.render('auth/login', {
        title: 'Login',
        email: '',
        password: ''
    })
})


//authenticate user
router.post('/authentication', function(req, res, next) {

    var email = req.body.email;
    var password = req.body.password;

        connection.query('SELECT * FROM accounts WHERE email = ? AND password = ?', [email, password], function(err, rows, fields) {
            if(err) throw err

            // if user not found
            if (rows.length <= 0) {
                req.flash('error', 'Please correct enter email and Password!')
                res.redirect('/login')
            }
            else { // if user found
                // render to views/user/edit.ejs template file
                req.session.loggedin = true;
                req.session.name = name;
                res.redirect('/home');

            }
        })

})


//display home page
router.get('/home', function(req, res, next) {
    if (req.session.loggedin) {

        res.render('auth/home', {
            title:"Dashboard",
            name: req.session.name,
        });

    } else {

        req.flash('success', 'Please login first!');
        res.redirect('/login');
    }
});

// Logout user
router.get('/logout', function (req, res) {
  req.session.destroy();
  req.flash('success', 'Login Again Here');
  res.redirect('/login');
});

module.exports = router;
Step 5: Create views
In this step, you need to create one folder name Auth. So go to the views folder in your app and create the Auth folder.
Inside the Auth folder, you need to create two views file. The views file is the following:
->login.ejs
->home.ejs
Application-folder/viwes/auth/home.js
Now, open your login.ejs file and update the following code into your file:
<html>
<head>
  <title><%= title %></title>
  <script src="https://code.jquery.com/jquery-3.4.1.min.js"></script>

  <script src="https://cdnjs.cloudflare.com/ajax/libs/popper.js/1.14.3/umd/popper.min.js"></script>

  <script src="https://stackpath.bootstrapcdn.com/bootstrap/4.1.3/js/bootstrap.min.js"></script>

  <link rel="stylesheet" href="https://stackpath.bootstrapcdn.com/bootstrap/4.1.3/css/bootstrap.min.css">
</head>
<body>
  <% if (messages.error) { %>
  <p style="color:red"><%- messages.error %></p>
  <% } %>

  <% if (messages.success) { %>
      <p style="color:green"><%- messages.success %></p>
  <% } %>
  <form action="/auth/authentication" method="post" name="form1">

    <div class="form-group">
      <label for="exampleInputEmail1">Email</label>
      <input type="email" name="email" class="form-control" id="email" aria-describedby="emailHelp" placeholder="Enter email" value="">
    </div>

    <div class="form-group">
      <label for="exampleInputEmail1">Password</label>
      <input type="password" name="password" class="form-control" id="password" aria-describedby="emailHelp" placeholder="*********" value="">
    </div>

    <input type="submit" class="btn btn-primary" value="Add">
  </form>
</body>
</html>
This login.ejs file contains login form.
Next, open your home.ejs file and update the following code into your file.
<!DOCTYPE html>
<html>
<head>
  <title><%= title %></title>

  <script src="https://code.jquery.com/jquery-3.4.1.min.js"></script>

  <script src="https://cdnjs.cloudflare.com/ajax/libs/popper.js/1.14.3/umd/popper.min.js"></script>

  <script src="https://stackpath.bootstrapcdn.com/bootstrap/4.1.3/js/bootstrap.min.js"></script>

  <link rel="stylesheet" href="https://stackpath.bootstrapcdn.com/bootstrap/4.1.3/css/bootstrap.min.css">
</head>
<body>
  <div class="container">

  <% if (messages.error) { %>
  <p style="color:red"><%- messages.error %></p>
  <% } %>

  <% if (messages.success) { %>
      <p style="color:green"><%- messages.success %></p>
  <% } %>

  <div class="card">
    <div class="card-header">
     Dashboard <b><%= name %></b>
    </div>
    <div class="card-body">
      <h5 class="card-title">Welcome</h5>
      <p class="card-text">You have successfully login</p>
      <a href="auth/logout" class="btn btn-primary">Logout</a>
    </div>
  </div>

  </div>
</body>
</html>
Step 6: Run Development Server
You can use the following command to run development server:
//run the below command

npm start

after run this command open your browser and hit

http://127.0.0.1:3000/auth
OR
http://127.0.0.1:3000/auth/login
It Will help you...
#Node JS