10-Apr-2023
.
Admin
.png)
Hi Artisan,
Today,In this article I will learn you how to integrate laravel Ajax request using X-editable bootstrap Plugin Example in laravel application. laravel x-editable example in our laravel application.
Here,i will give you a simple and easy example how to use X-editable in laravel simply follow my all steps.
Step 1 : Install Laravel App
In this step, You can install laravel fresh app. So open terminal and put the bellow command.
composer create-project --prefer-dist laravel/laravel blog
Step 2 : Setup Database Configuration
After successfully install laravel app next we configure databse setup. We will open ".env" file and change the database name, username and password in the env file.
.env
DB_CONNECTION=mysql
DB_HOST=127.0.0.1
DB_PORT=3306
DB_DATABASE=Enter_Your_Database_Name
DB_USERNAME=Enter_Your_Database_Username
DB_PASSWORD=Enter_Your_Database_Password
Step 3 : Create Route
now, we require to create route for XeditableController in laravel application. so open your "routes/web.php" file and add following route.
routes/web.php
<?php
use Illuminate\Support\Facades\Route;
use App\Http\Controllers\XeditableController;

Route::get('home',[XeditableController::class ,'index'])->name('home');
Route::post('editable/update',[XeditableController::class ,'update'])->name('editable.update');
Step 4 : Create Controler
Here this fourth step now we should create new controller as XeditableController. So run bellow command and create new controller.
php artisan make:controller XeditableController
After successfully run above command . So, let's copy bellow code and put on XeditableController.php file.
app/http/controller/XeditableController.php
<?php

namespace App\Http\Controllers;

use Illuminate\Http\Request;
use App\Models\User;

class XeditableController extends Controller
{
    /**
     * Write Your Code..
     *
     * @return string
    */
    public function index()
    {
        $data = User::take(5)->get();
        return view('index',compact('data'));
    }

    /**
     * Write Your Code..
     *
     * @return string
    */
    public function update(Request $request)
    {
        if($request->ajax()){
            User::find($request->input('pk'))->update([$request->input('name') => $request->input('value')]);
            return response()->json(['success' => true]);
        }
    }
}
Step 5 : Create Blade File
In last step. In this step we have to engender blade file.So finally you have to create following index.blde.php file and put bellow code:
resources/views/index.blade.php
<!DOCTYPE html>
<html>
<head>
    <meta charset="utf-8">
    <meta http-equiv="X-UA-Compatible" content="IE=edge">
    <meta name="csrf-token" content="{{ csrf_token() }}">
    <title>Laravel X-editable Example Tutorial - NiceSnippets.com</title>
    <link rel="stylesheet" href="https://maxcdn.bootstrapcdn.com/bootstrap/3.3.7/css/bootstrap.min.css">
    <script src="https://cdnjs.cloudflare.com/ajax/libs/jquery/3.2.1/jquery.min.js"></script>
    <script src="https://cdnjs.cloudflare.com/ajax/libs/twitter-bootstrap/3.3.7/js/bootstrap.min.js"></script>
    <link href="https://cdnjs.cloudflare.com/ajax/libs/x-editable/1.5.0/bootstrap3-editable/css/bootstrap-editable.css" rel="stylesheet"/>
    <script src="https://cdnjs.cloudflare.com/ajax/libs/x-editable/1.5.0/bootstrap3-editable/js/bootstrap-editable.min.js"></script>
    <style type="text/css" media="screen">
        body{
            background: #000;
        }
        .wrapper{
            background: #fff;
            margin-top: 70px;
            width: 700px;
        }
    </style>
</head>
<body>
    <div class="container wrapper">
        <div class="row">
            <div class="col-md-12">
                <div class="card">
                    <div class="card-header">
                        <h4>Laravel X-editable Example Tutorial - NiceSnippets.com</h4>
                    </div>
                    <div class="card-body">
                        <table class="table table-bordered table-striped table-condensed">
                            <tr>
                                <td>Name</td>
                                <td>Email</td>
                            </tr>
                            @foreach($data as $row)
                            <tr>
                                <td>
                                    <a href="#" class="xedit" data-pk="{{$row->id}}" data-type="text" data-title="Enter name" data-name="name"> {{$row->name}}</a>
                                </td>
                                <td>
                                    <a href="#" class="xedit" data-pk="{{$row->id}}" data-type="email" data-title="Enter Email" data-name="email"> {{$row->email}}</a>
                                </td>
                            </tr>
                            @endforeach
                        </table>
                    </div>
                </div>
            </div>
        </div>
    </div>
<script>
    $(document).ready(function () {
        $.ajaxSetup({
            headers: {
                'X-CSRF-TOKEN': $('meta[name="csrf-token"]').attr('content')
            }
        });
        $('.xedit').editable({
            url: '{{route('editable.update')}}',
            title: 'Update',
            type: 'text',
            pk: 1,
            name: 'name',
            success: function (response, newValue) {
                console.log('Updated', response)
            }
        });
    });
</script>
</body>
</html>
Now we are ready to run our example so run bellow command for quick run:
php artisan serve
Now you can open bellow URL on your browser:
http://localhost:8000/home
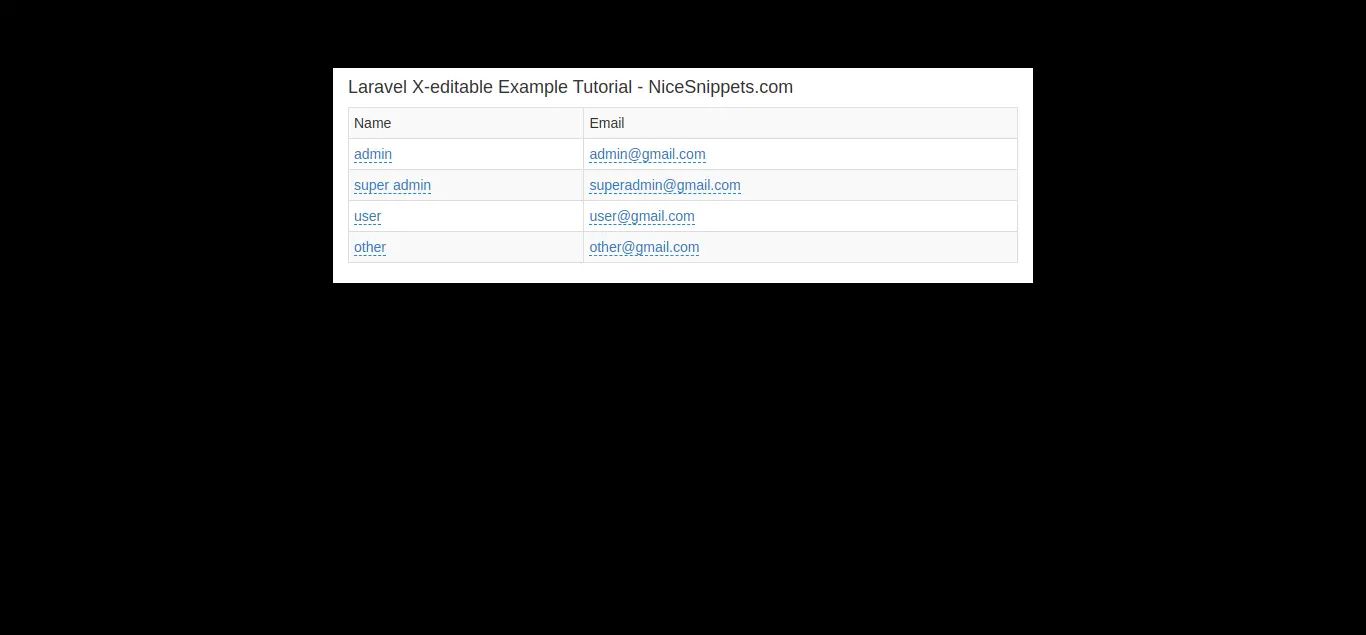
Output:
I hope it help you...
#Laravel 8
#Laravel 7
#Laravel
#Laravel 6