10-Apr-2023
.
Admin

Hi Dev,
In this article I will share with you how to create a multilingual website in laravel 9 application, I will show an example of laravel 9 in multiple languages.
Here, I will give you a full example of how to laravel 9 multilanguage with language dropdown or laravel 9 multiple language websites as below so follow my all steps.
So, let's follow a few step to create multi language support in your laravel 9 application.
Step 1: Download Laravel
Let us begin the tutorial by installing a new laravel application. if you have already created the project, then skip following step.
composer create-project laravel/laravel example-app
Step 2: Database Configuration
In second step, we will make database Configuration for example database name, username, password etc. So lets open .env file and fill all deatils like as bellow:
.env
DB_CONNECTION=mysql
DB_HOST=127.0.0.1
DB_PORT=3306
DB_DATABASE=laravel_9
DB_USERNAME=root
DB_PASSWORD=
Step 3: Add Lang File
In this third step, I will create three files in the following folder for english, french, and russian in the lang folder.
resources/lang/en/messages.php
<?php

return [
    'title' => 'This is English Language Title.'
];
resources/lang/en/messages.php
<?php

return [
    'title' => 'Ceci est le titre fr langue anglaise.'
];
resources/lang/ru/messages.php
<?php

return [
    'title' => '??? ???????? ?? ?????????? ?????.'
];
Step 4: Add Route
In this step, I will create two route one for the display dashboard and the second one is change language.
routes/web.php
<?php

use Illuminate\Support\Facades\Route;
use App\Http\Controllers\LanguageController;

/*
|--------------------------------------------------------------------------
| Web Routes
|--------------------------------------------------------------------------
|
| Here is where you can register web routes for your application. These
| routes are loaded by the RouteServiceProvider within a group which
| contains the "web" middleware group. Now create something great!
|
*/

Route::get('/', [LanguageController::class, 'index'])->name('home');
Route::get('lan-change', [LanguageController::class, 'langChange'])->name('lan.change');
Step 5: Add Controller
In this step, we will create a controller. Use the below command to generate a controller
php artisan make:controller LanguageController
app/Http/Controllers/LanguageController.php
<?php

namespace App\Http\Controllers;

use Illuminate\Http\Request;
use Illuminate\Support\Facades\App;

class LanguageController extends Controller
{
    /**
     * Write Your Code.
     *
     * @return string
    */
    public function index()
    {
        return view('lang');
    }

    /**
     * Write Your Code...
     *
     * @return string
    */
    public function langChange(Request $request)
    {
        App::setLocale($request->lang);
        session()->put('locale',$request->lang);
        return redirect()->back();
    }
}
Step 6: Add Blade File
In this step, we will create a blade file name lang.blade.php bellow the following path.
resources/views/lang.blade.php
<!DOCTYPE html>
<html>
<head>
    <title>How to Create Multilingual Website in Laravel 9?</title>
    <meta charset="utf-8">
    <meta http-equiv="X-UA-Compatible" content="IE=edge">
    <link rel="stylesheet" href="https://maxcdn.bootstrapcdn.com/bootstrap/4.5.2/css/bootstrap.min.css">
    <!-- jQuery library -->
    <script src="https://ajax.googleapis.com/ajax/libs/jquery/3.5.1/jquery.min.js"></script>
    <!-- Popper JS -->
    <script src="https://cdnjs.cloudflare.com/ajax/libs/popper.js/1.16.0/umd/popper.min.js"></script>
    <!-- Latest compiled JavaScript -->
    <script src="https://maxcdn.bootstrapcdn.com/bootstrap/4.5.2/js/bootstrap.min.js"></script>
</head>
<body class="bg-dark">
    <div class="container mt-5">
        <div class="row">
            <div class="col-md-8 offset-2">
                <div class="card">
                    <div class="card-header">
                        <h5>How to Create Multilingual Website in Laravel 9 - <span class="text-primary">NiceSnippets.com</span></h5>
                    </div>
                    <div class="card-body">
                        <div class="row">
                            <div class="col-md-3 col-md-offset-6 text-right">
                                <strong>Select Language: </strong>
                            </div>
                            <div class="col-md-9">
                                <select class="form-control changeLang">
                                    <option value="en" {{ session()->get('locale') == 'en' ? 'selected' : '' }}>English</option>
                                    <option value="fr" {{ session()->get('locale') == 'fr' ? 'selected' : '' }}>French</option>
                                    <option value="ru" {{ session()->get('locale') == 'ru' ? 'selected' : '' }}>Russian</option>
                                </select>
                            </div>
                        </div>
                        <h2 class="mt-4 text-center">{{ __('messages.title') }}</h2>
                    </div>
                </div>
            </div>
        </div>
    </div>
</body>
<script>
    var url = "{{ route('lan.change') }}";

    $('.changeLang').change(function(){
        window.location.href = url + "?lang=" + $(this).val();
    });
</script>
</html>
Step 7: Add Middleware
In this step, I will create one middleware for dynamically changing language let's create below artisan command.
php artisan make:middleware LanguageManager
app/Http/Middleware/LanguageManager.php
<?php

namespace App\Http\Middleware;

use Closure;
use Illuminate\Http\Request;
use Illuminate\Support\Facades\App;

class LanguageManager
{
    /**
     * Handle an incoming request.
     *
     * @param  \Illuminate\Http\Request  $request
     * @param  \Closure  $next
     * @return mixed
     */
    public function handle(Request $request, Closure $next)
    {
        if (session()->has('locale')) {
            App::setLocale(session()->get('locale'));
        }
        return $next($request);
    }
}
So,now we need to register in kernel.php file so let's define.
App/Http/kernel.php
<?php

namespace App\Http;

use Illuminate\Foundation\Http\Kernel as HttpKernel;

class Kernel extends HttpKernel
{
    /**
     * The application's route middleware groups.
     *
     * @var array
     */
    protected $middlewareGroups = [
        'web' => [
            \App\Http\Middleware\EncryptCookies::class,
            \Illuminate\Cookie\Middleware\AddQueuedCookiesToResponse::class,
            \Illuminate\Session\Middleware\StartSession::class,
            \Illuminate\View\Middleware\ShareErrorsFromSession::class,
            \App\Http\Middleware\VerifyCsrfToken::class,
            \Illuminate\Routing\Middleware\SubstituteBindings::class,
            \App\Http\Middleware\LanguageManager::class,
        ],

        'api' => [
            'throttle:60,1',
            \Illuminate\Routing\Middleware\SubstituteBindings::class,
        ],
    ];
Run Laravel App:
All steps have been done, now you have to type the given command and hit enter to run the laravel app:
php artisan serve
Now, you have to open web browser, type the given URL and view the app output:
http://localhost:8000/
Output :
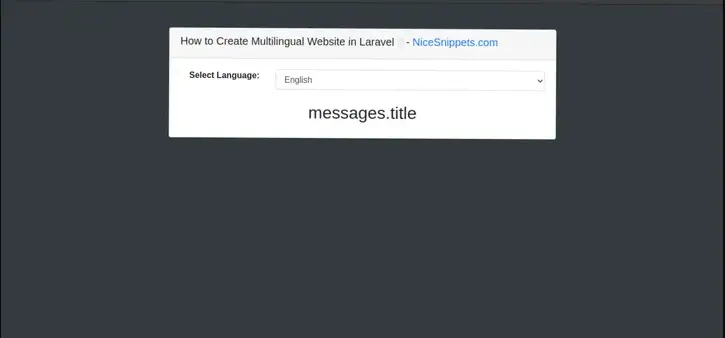
It will help you...
#Laravel 9